Laser Cutting Paper on a Diode Laser

Laser cutting paper can be a mix of a science and art-form. The paper manufacturer, glossiness, color, and weight all come into play to make a successful cut. I’ve done some experimenting with a few different types of paper, basic printer paper to card stock.

Finding a good paper is key, I went through a number of different manufacturers/types till I found one that worked well. I found the darker colored papers were best (and in this case, color didn’t matter), so I used those. The dark color hides soot marks and makes the paper absorb more laser light, getting a better cut. AstroBright Grocer Kraft is a good paper and color. These have been seen to work better than generic white card stock. The white card stock had too much of a sheen to it, the laser could cut it, but it took slower passes or multiple passes to do so, while sooting far more than the AstroBright paper.

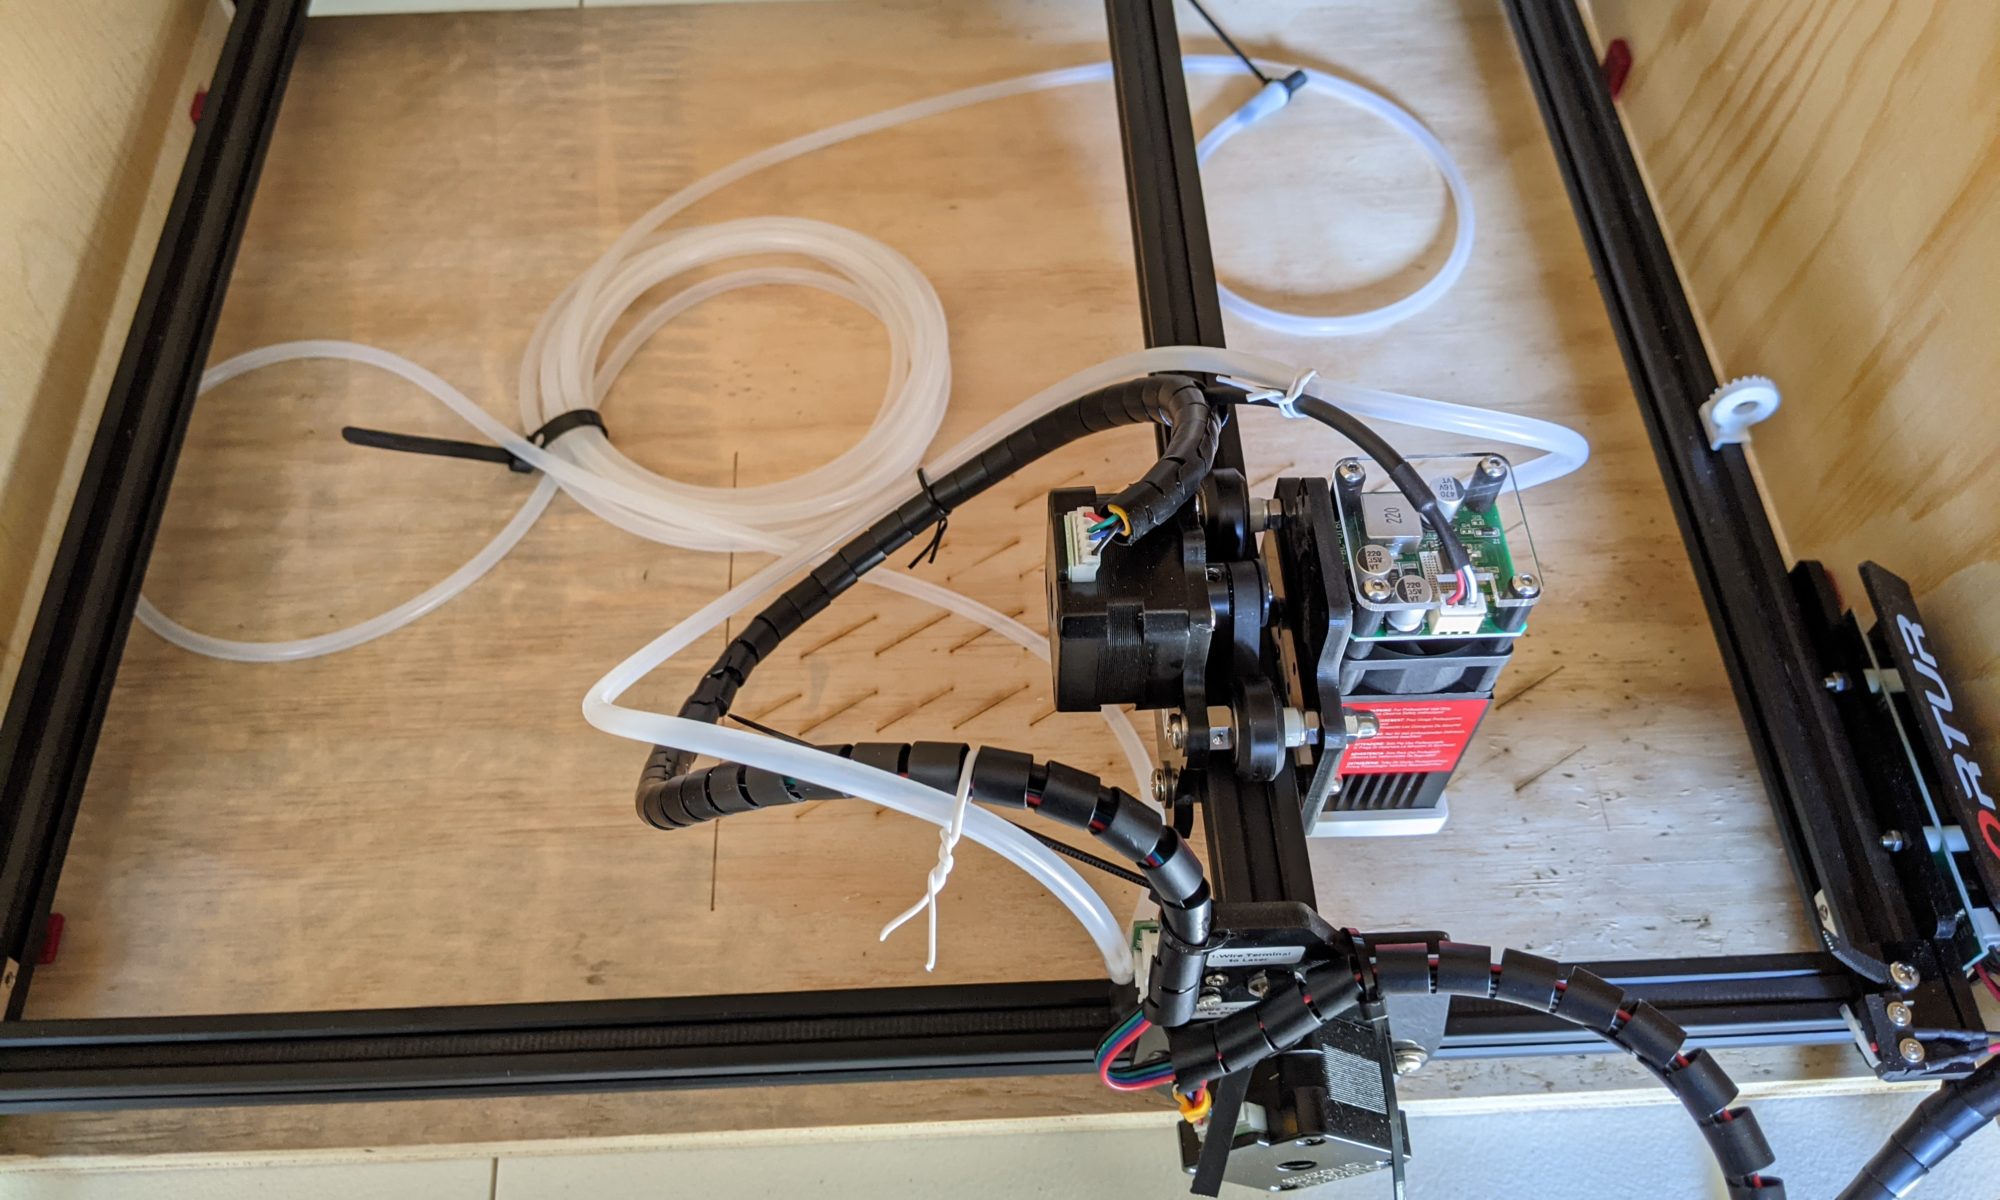
Next up is a good lens, I found that the G8 lens is better than the stock ortur laser master 2 lens for paper cutting. Using the G8, I’m able to cut paper in fewer passes with less scorching and a smaller focus size. Using this lens may even work quickly through the bright whites that the stock lens couldn’t handle (more experimentation is needed).
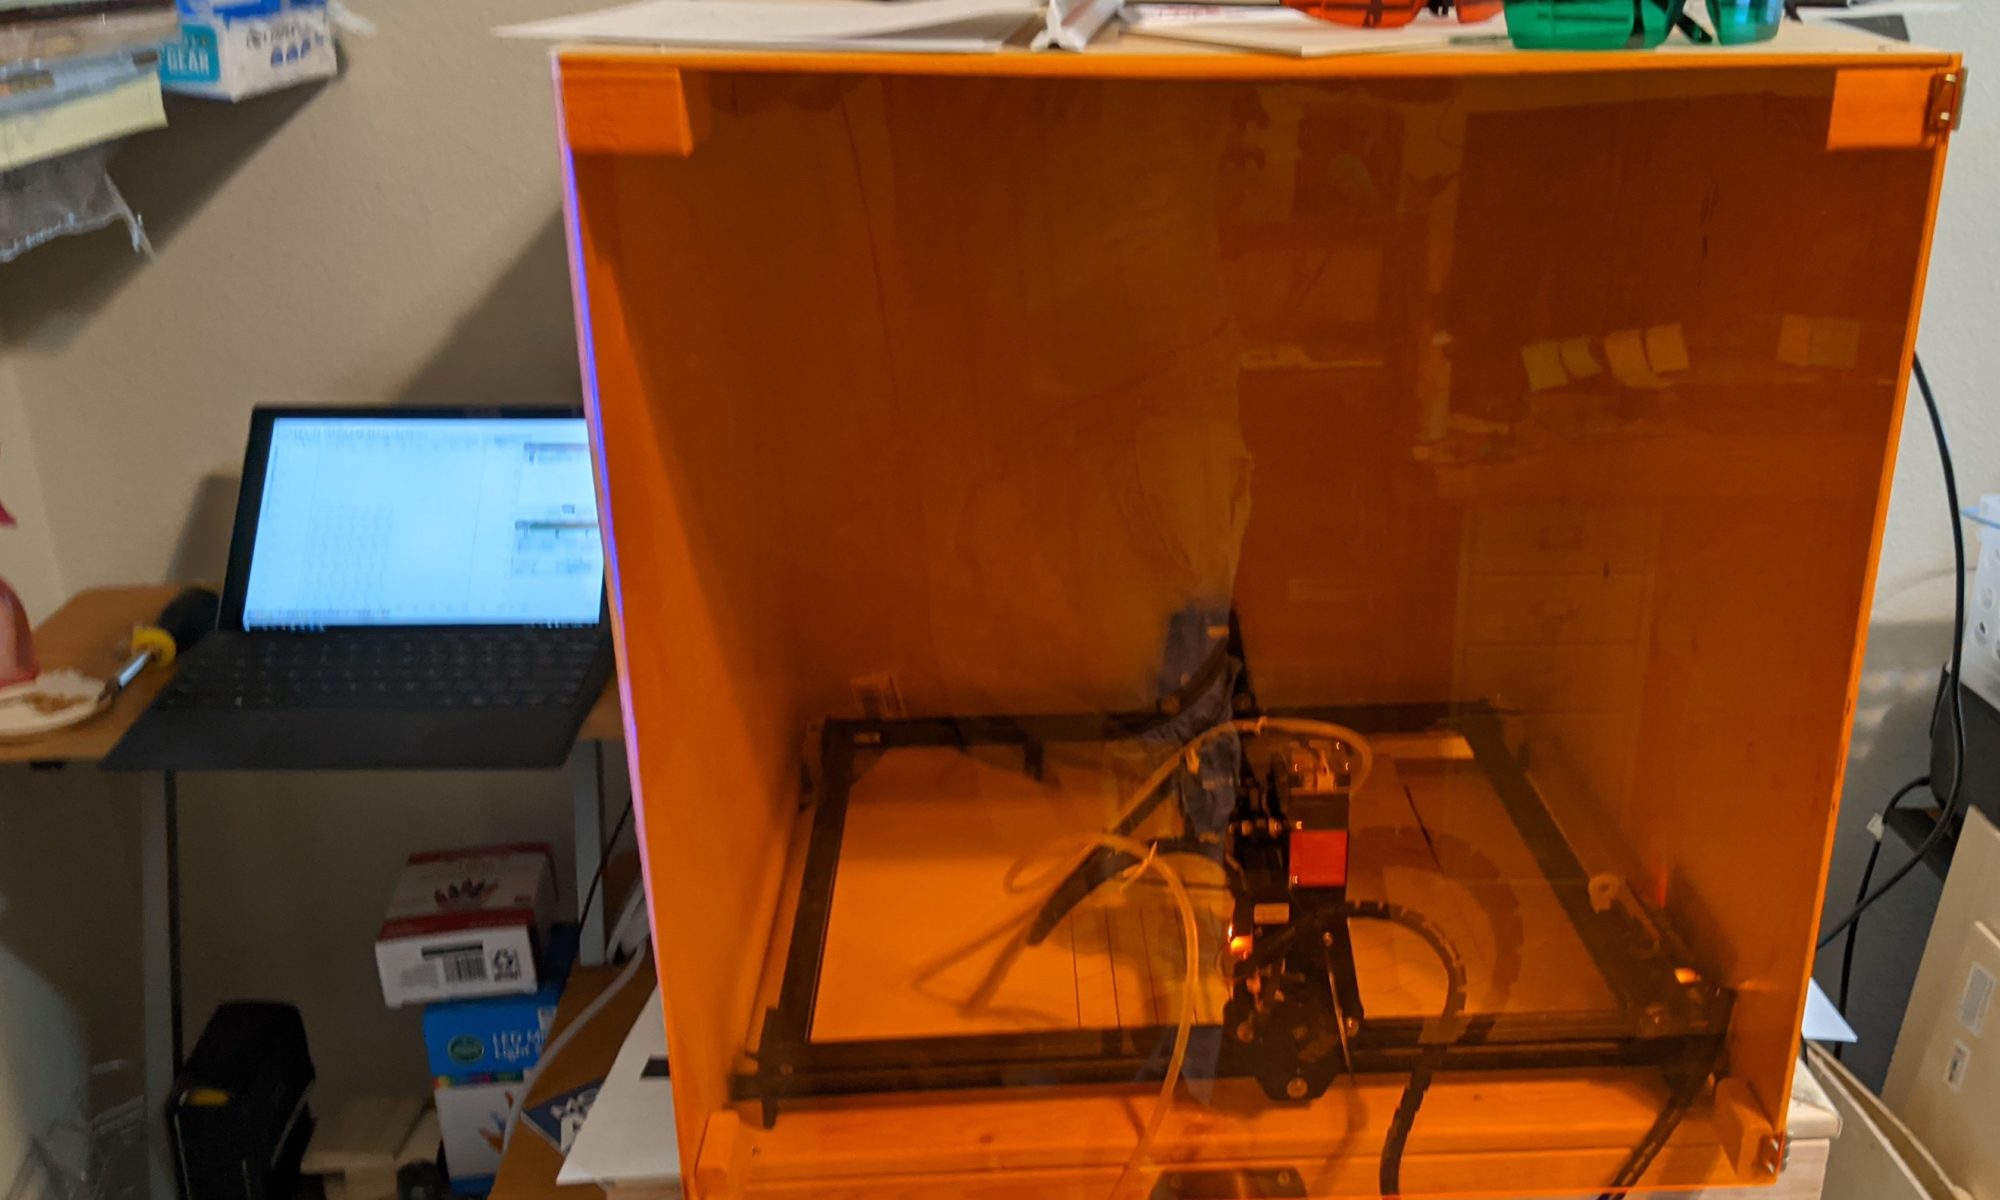
Holding It Down

I’ve used a few different hold down methods, none, blue tape, and a vacuum table. While using nothing to hold down the paper, the paper would curl up during the cutting, causing the cuts to lose accuracy, it could also shift around from other forces in the environment (air conditioning) which caused issues.

Blue tape worked okay but using it meant the edges of the paper weren’t cut completely through and everything had to be gently removed to prevent damage to the paper. I could cut through the edges completely with slower speeds or more passes, but this meant more scorching of the rest of the paper that didn’t need the extra power and this was undesirable.

The final stop was using a vacuum table to control the fumes and hold the paper down, this works the best as it holds the paper so it doesn’t bend upwards during cutting while also pulling the fumes to prevent as much sooting. This can also prevent scorching by reducing flareups during cutting.

Conclusion

Paper cutting on the laser master isn’t bad once you have everything tuned, running the G8 lens, darker card stock, and a vacuum table if possible. This all comes together to provide the quickest and cleanest cuts.

Testing the G8 Lens on the Ortur Laser Master 2

I’ve been using the ortur laser master 2 for a while now, and while I had seen plenty of chatter about the G8 lens, I didn’t think it would be that major of an upgrade for me, but I was Very wrong. I recently picked up the G8 to try it out and once it was focused, the beam was tighter than it ever could be with the stock lens. This gave me high hopes for the test cuts.

I ran one cut job on some brown AstroBright paper that I was using a few days ago. With the stock ortur lens, I found that 900 mm/min at 100% power for 2 passes would give a clean cut through and require minimal to no hand work to split the papers apart. For my test with the G8, I started with one pass, and that’s all I needed, everything was perfectly cut apart, no tabs between the pieces, nothing. I did run into one snag with that first test run, some of my cuts were inaccurate, lines not lining up and some corners shifted. I noticed while focusing the lens that it was really loose in the mount. I pulled it out, put 2 wraps of teflon tape around the threads, and put it back in the laser. Second test cut went 100% perfectly, all pieces fell apart, no shifting of lines/corners.

The G8 lens is absolutely worth getting and installing on the ortur laser master 2. The tighter focus will help with both cutting and engraving and let you run the machine faster.

Ortur Laser Master 2 Vacuum Table

The Ortur laser is completely open air, providing no assistance or infrastructure to vent the fumes away. I decided to work on a vacuum table for the laser as the second component to fume management alongside the enclosure. The vacuum table also has some other added benefits when working with thinner materials like paper that may warp up while being cut.

Goals

  • Hold pieces down and prevent them from moving under the pressure of the air assist
  • Pull away smoke and soot from the machine and exhaust it elsewhere
Continue reading “Ortur Laser Master 2 Vacuum Table”

Ortur Laser Master 2 Air Assist

While the Ortur Laser Master 2 that I picked up is advertised as a laser engraver and not a laser cutter, it can do lightweight cutting and I was intent and optimizing that capability. After performing some research, I found that air assist would be a great modification to aid in this endeavor.

The air assist system was built with 1 main goal in mind, to make cutting with the laser more efficient. This will also reduce sooting and scorching by putting out fires while cutting.

Continue reading “Ortur Laser Master 2 Air Assist”

Ortur Laser Master 2 Enclosure

The Ortur laser is completely open air, providing no assistance or infrastructure to vent the fumes away. I decided to work on an enclosure for these reasons. The enclosure has 2 main goals, to contain excess laser light from the room and to contain fumes from the laser so they can be exhausted. The exhaust could be a fan in the back of the box or using a vacuum table underneath the laser. In my case, I’ll be building a vacuum table to hold materials and exhaust fumes.

admin

Ortur Laser Master 2 Software – LightBurn

One thing needed with every CNC driven machine is good software to control it and generate the gcode. There are two main options for the Ortur Laser Master 2. These are LaserGRBL and LightBurn. The Ortur uses LaserGRBL as the main control software out of the box while LightBurn is a commercial offering that costs $40. This article will be going through the LightBurn setup while I went through LaserGRBL in the past.

Continue reading “Ortur Laser Master 2 Software – LightBurn”

Ortur Laser Master 2 Software – LaserGRBL

One thing needed with every CNC driven machine is good software to control it and generate the gcode. There are two main options for the Ortur Laser Master 2. These are LaserGRBL and LightBurn. The Ortur uses LaserGRBL as the main control software out of the box while LightBurn is a commercial offering that costs $40. This article will be going through the LaserGRBL setup while I’ll be doing one in the future going through the LightBurn setup.

Continue reading “Ortur Laser Master 2 Software – LaserGRBL”

Focusing the Diode Laser on an Ortur Laser Master 2

Focusing the laser is just as important if not more important than leveling the bed of a 3d printer. A well focused laser will have tighter cuts, will engrave and cut faster and will have higher quality engravings. Getting the laser to a good focus point however can be difficult, and there are a few tricks to getting things to work smoothly.

admin

Laser Safety Glasses

Various Laser Safety Glasses

I recently picked up an Ortur Laser Master 2 engraver and cutter. With the new hardware to join my 3d printer in making things, comes new safety gear to use things with minimal risk (and prevent myself from going blind). I ended up going on an adventure to get the right safety equipment. My wife and I both wanted to work with the laser, so we both needed safety glasses.

Continue reading “Laser Safety Glasses”