
One thing needed with every CNC driven machine is good software to control it and generate the gcode. There are two main options for the Ortur Laser Master 2. These are LaserGRBL and LightBurn. The Ortur uses LaserGRBL as the main control software out of the box while LightBurn is a commercial offering that costs $40. This article will be going through the LightBurn setup while I went through LaserGRBL in the past.
Install
There is a 30 day free trial for LightBurn. Its certainly worth trying out if you’re not a fan of using LaserGRBL. This gives enough time to check out the capabilities before having to put down any money on it. Whether you buy it or go to use the free trial, download and install using the default options. The Ortur Laser Master 2 only needs the GCode license key if you do end up going for a license of LightBurn.
Setup
The Ortur laser can be added as a device, Use the “Devices” -> “Find My Laser” option from the main screen. This will then auto configure the laser in LightBurn.
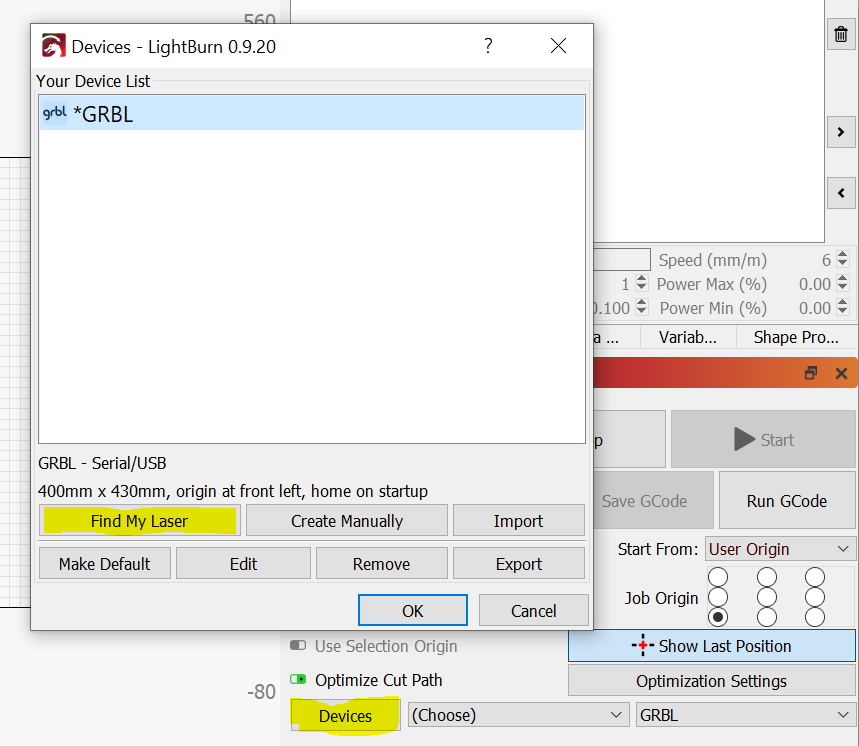
While going through the configuration and adding the laser to set origin and allow auto-home on startup. This will home the laser on connecting to LightBurn, providing more accurate cutting with regards to the home position.

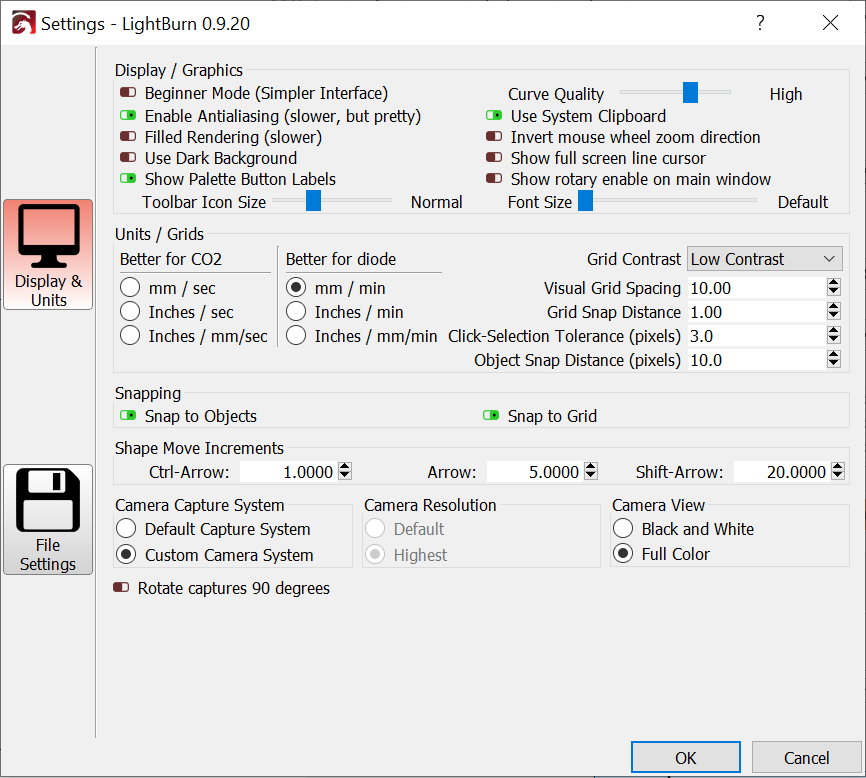
The LightBurn settings can be reached from the Edit menu.
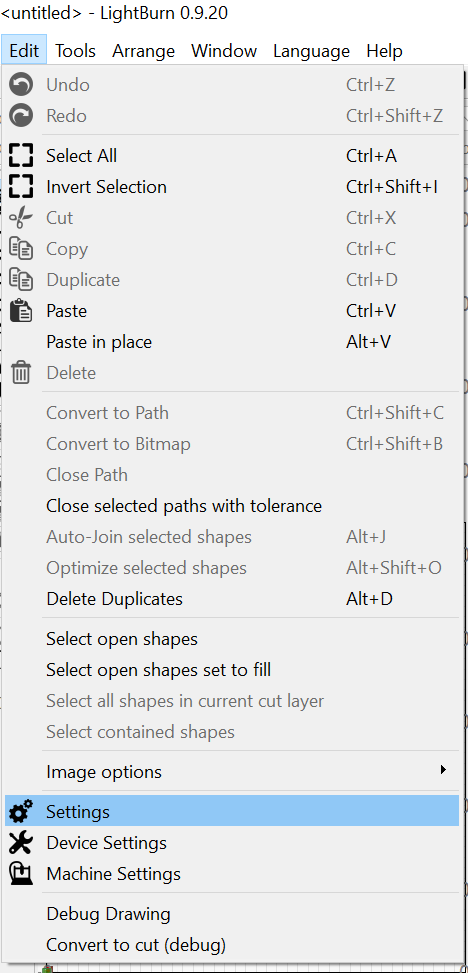
Once in the settings, the jog distances can be set for the slow, medium, and long jogs. I also use mm/min as my unit of choice for speed.
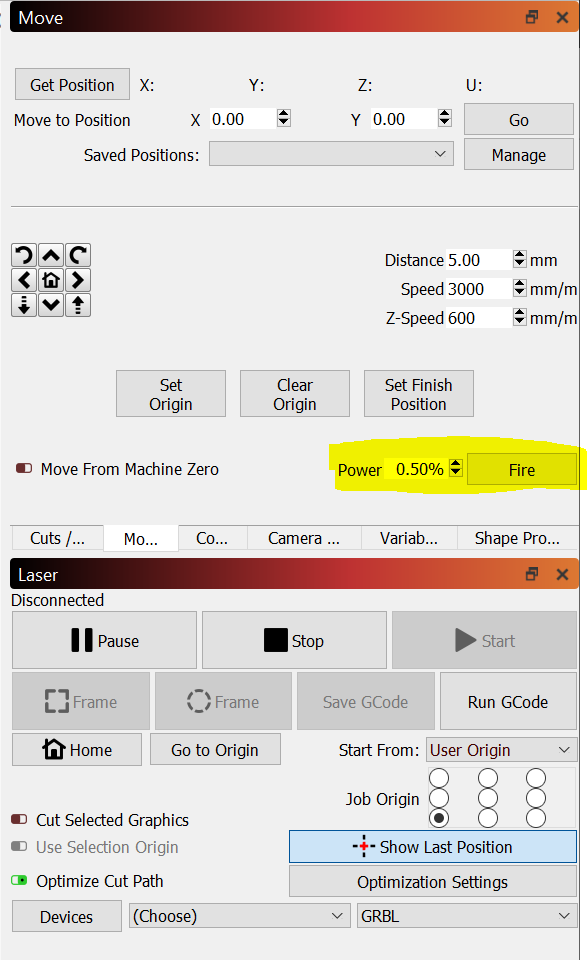
To add the laser fire button to the GUI, we need to go to the device settings. These can be found under the “Edit” -> “Device Settings” menu. The fire button can be used to enable the laser with a low power percentage for focusing it. Another option to enable is the laser on when framing option. This turns on the laser with a low power setting when running the frame to make it obvious where you will be cutting/engraving. This replaces holding shift when hitting the frame button from older releases.
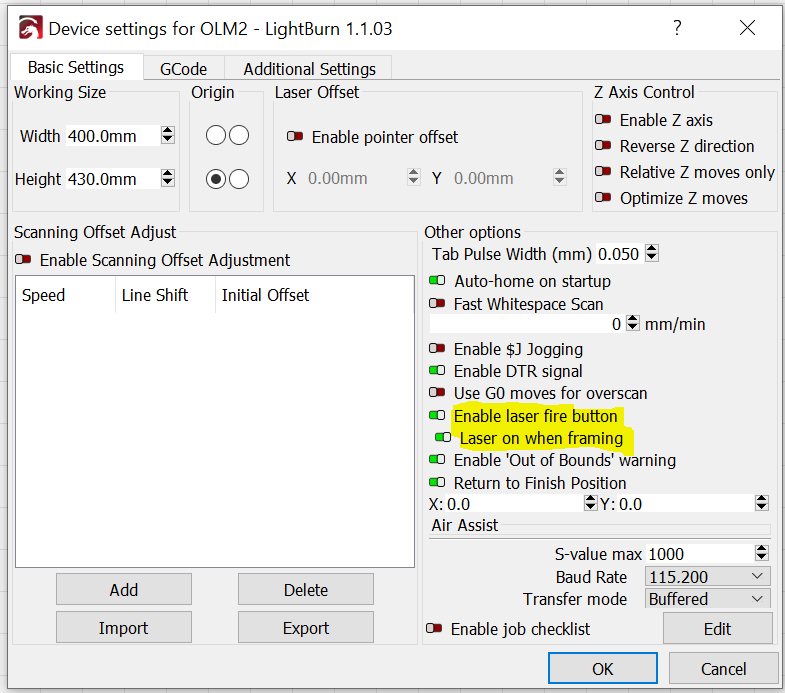
The button will appear in the move tab after restarting LightBurn. I use a 0.5% power setting with my fire button for focusing.
The laser can then be connected to by selecting the correct COM port in next to the Devices button in the laser settings area.
Basic Usage
I’ll also go through some of the basic usage of LightBurn. This won’t be comprehensive but should get you going. The multi-direction pad will jog the laser head in the direction selected.
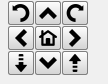
- Hold CTRL while clicking on one of the arrows, you’ll get a small step
- Hold Shift while clicking for a large step
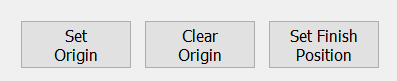
“Set Origin” can be used to set the origin that the home button uses as well as the zero point for engravings/cuts.
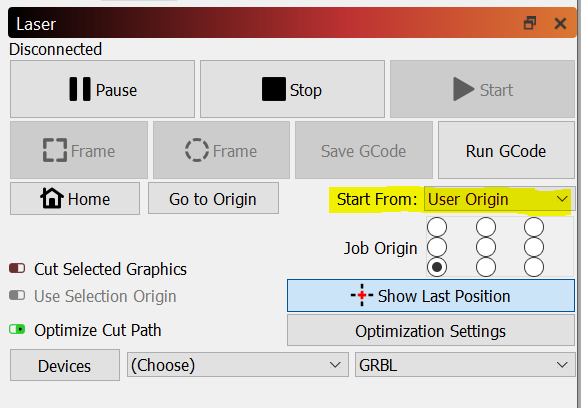
Changing the “Start From” setting to “User Origin” will allow you to set the origin position for the laser to use when cutting and engraving. This is an extremely useful setting to use for repositioning where cuts are being done on the laser bed.
LightBurn supports having different settings for different layers, allowing multiple different engraves and cuts to be done at one time (and in a specific order). Each layer has different settings for power, speed, mode, etc.
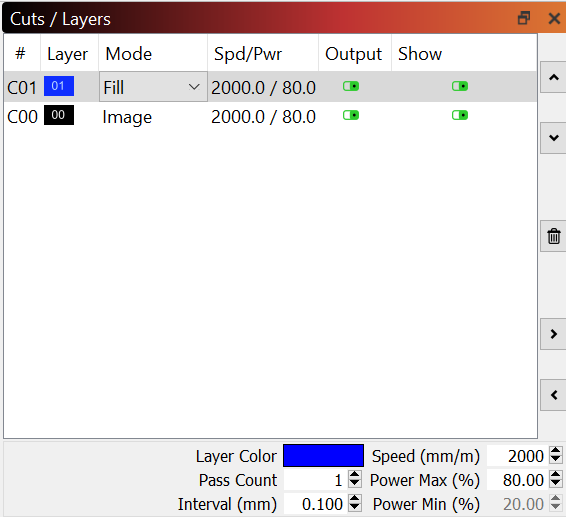
Selecting the layer number at the bottom of the GUI will put any new engrave/cuts into that layer, allowing the user to choose what layers each new addition is put in.

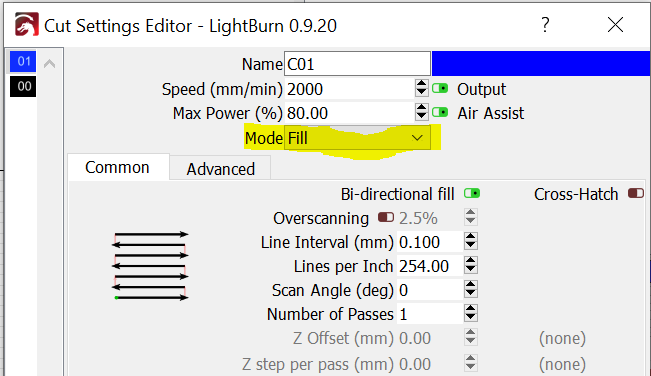
The supported cut/engrave layer modes can be:
- Line (best used with cutting)
- Fill (used to engrave when using SVG files)
- Fill + Line
- Offset Fill
The modes are found in the cut settings editor which can be accessed by double clicking on a layer. They’re also available from the main GUI as a dropdown when viewing the layers.
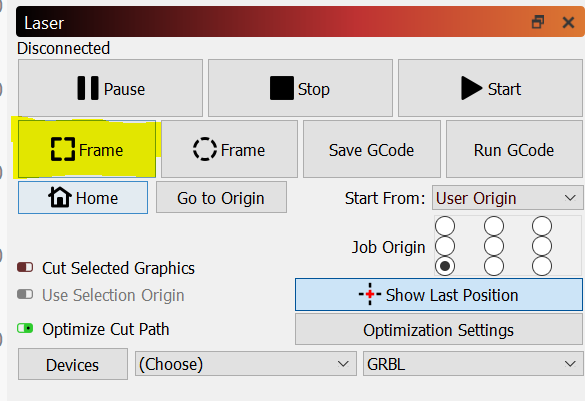
The frame button runs the laser around the outline of what is going to be cut or engraved. The “Laser on when framing” option automatically turns on the laser with a low power setting when running the frame, essentially ‘drawing’ the frame on whatever material is on the bed.
LightBurn can handle vector files and image files for engraving or cutting. It can also add simple shapes and text without requiring an external piece of software like InkScape. It can also lock/unlock the aspect ratio for imported images, allowing more granular control within the software for control.
In general, LightBurn is my preferred piece of software to control the Ortur Laser Master 2. The layer capability is powerful and I’ve used the basic shape/text inputs more than I would have thought since starting using the laser.