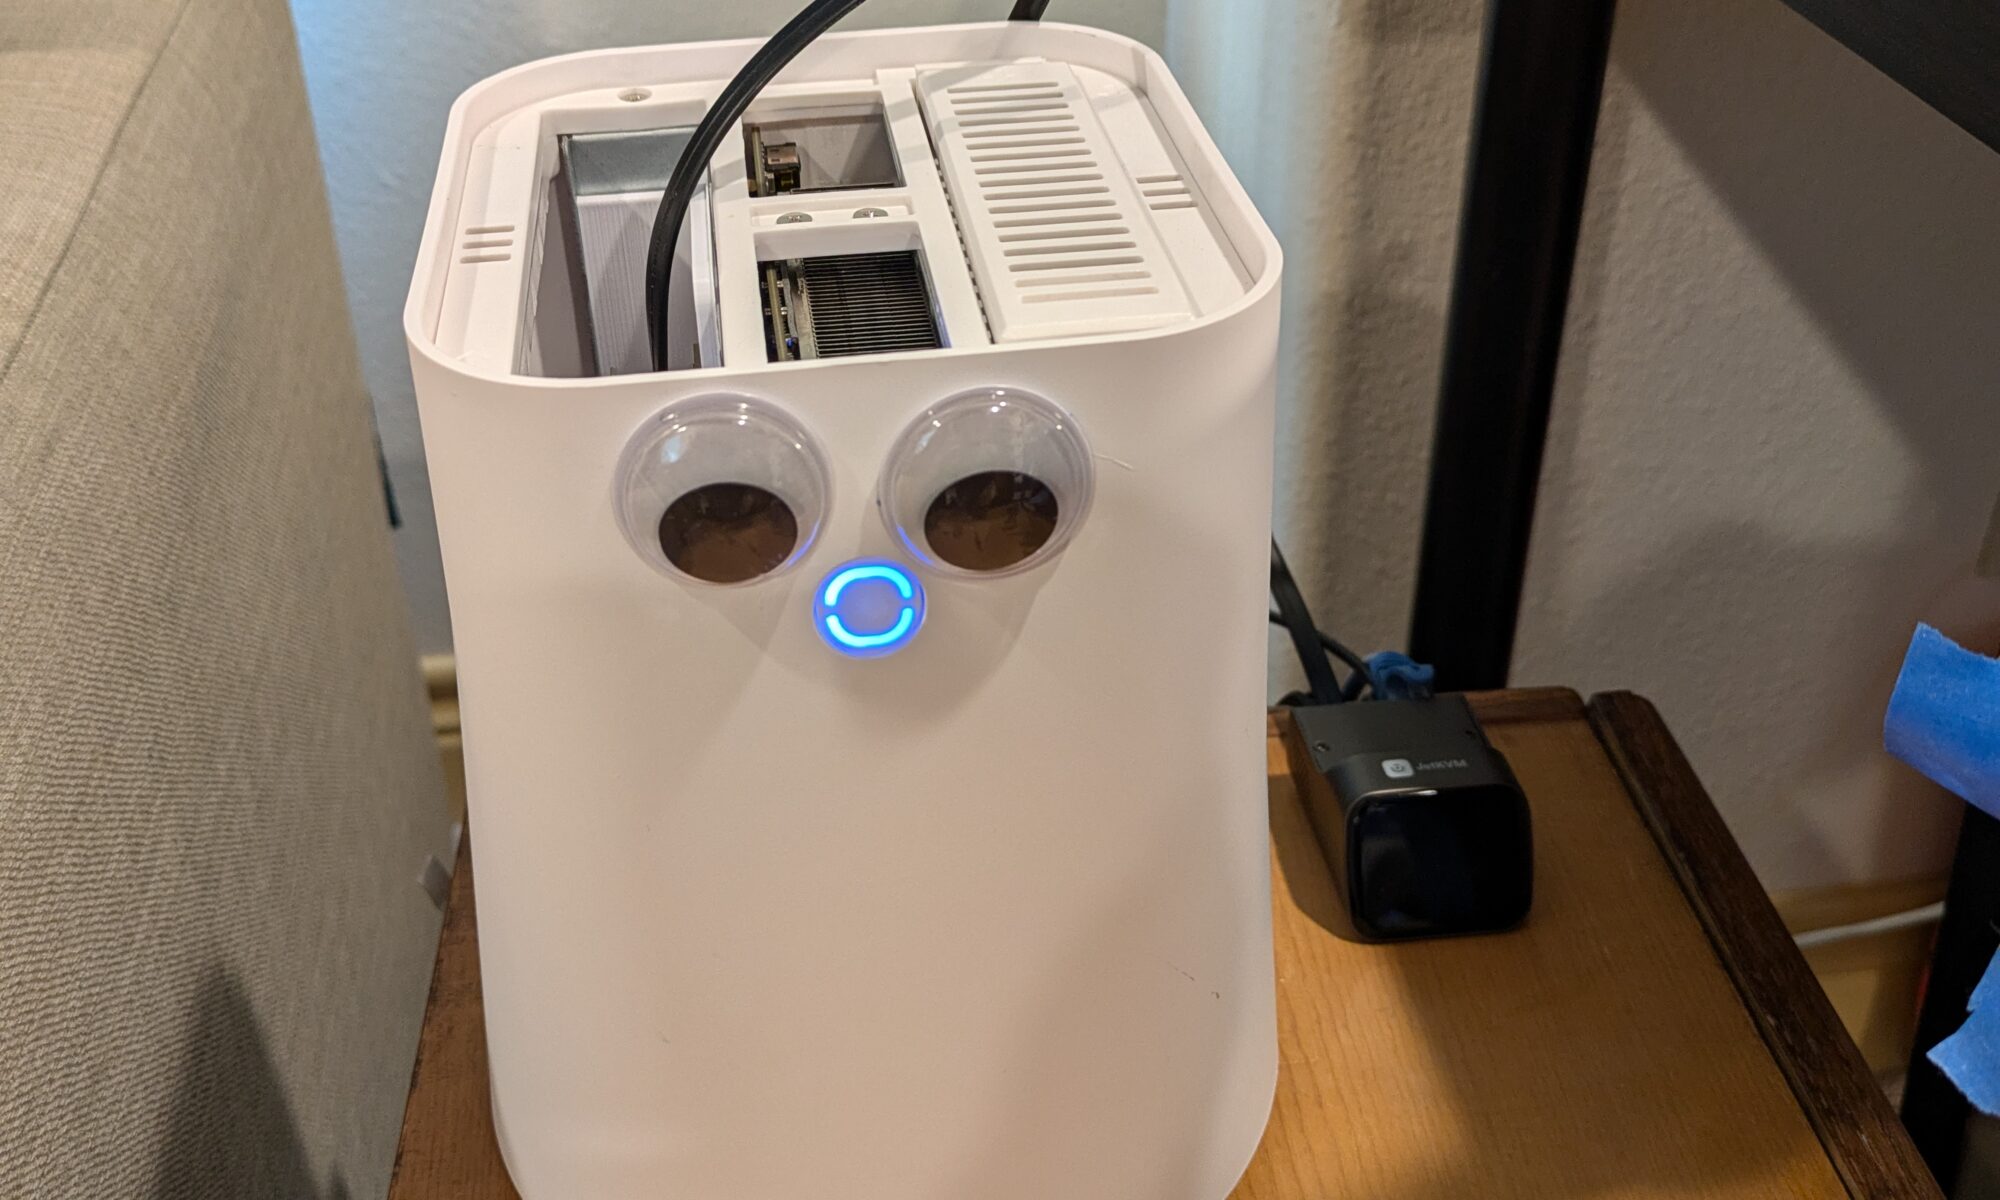
Working on my docker swarm recently I noticed that my storage was running low. After investigation, I found I had 17GB of usage by my docker registry. I have no need to have that many versions of my custom built containers on hand, so I went through the process of cleaning it up.
Continue reading “Cleaning up the docker registry”Setting up Giscus Comments on WordPress
This blog was setup originally in 2016 and has never had a really useful comments section. There was a time when the only thing showing up were trackbacks to malicious websites. This wasn’t exactly a positive addition, so I disabled trackbacks and commenting to prevent any misleading comments. I decided to try and get a comments section back and operational as a part of my overhaul of my webserver (and having recently learned of Giscus for using GitHub accounts and backend for commenting). So here we have a guide for setting up Giscus comments on WordPress.
Continue reading “Setting up Giscus Comments on WordPress”Upgrading Ubuntu Host for Unifi Controller
My unifi controller was installed on an Ubuntu server back on 16.04 LTS. This server finally reached end of life and I needed to run an upgrade to Ubuntu 20.04 LTS. I decided to first try to just release upgrade it two steps. I’d tried this in the past and failed which is why it stayed out of date for so long, but maybe the upgrade process was fixed for things to work automagically. I was a bit wrong on that, however I also found out that rebuilding from scratch is pretty easy.
Continue reading “Upgrading Ubuntu Host for Unifi Controller”Stepping up Telegraf to Influx V2
Telegraf was the second service I stepped up to influxdb v2. With this service running on unraid, I’ll be able to start monitoring the system and get my dashboards back up and running. I have some other instances of telegraf that will need to be stepped up that are configured differently, but in this case, I’ll be working on my unraid instance first.
Continue reading “Stepping up Telegraf to Influx V2”Stepping up Grafana to InfluxDB V2
With my InfluxDB V2 container setup, some tokens created, and buckets in place, its time to start stepping up services. The first service to be stepped up will of course be Grafana itself, so that once the other tools are stepped up, I can start using the dashboards again.
Continue reading “Stepping up Grafana to InfluxDB V2”Intro to InfluxDB V2
I have watchtower setup on my Unraid server to handle automatically updating all my docker containers. This is quite convenient, however it does come with some dangers. For instance, my InfluxDB instance recently updated to version 2. This version of influx has a brand new query language, authentication system, and much more. This also breaks all compatibility with my Telegraf, Unifi-Poller, Grafana, and other services. Instead of trying to revert to an older version and refuse the slow change of technology, I decided to just start stepping up services to work with the new version. So I know get to introduce myself to InfluxDB V2 and then to move on to stepping up services to use it.
Continue reading “Intro to InfluxDB V2”Virtualized Docker Swarm
Why
Why not? In reality, I always wanted to play with clustering, originally with proxmox and ceph, but I never had enough hardware to do so. I do however have a proxmox node with enough ram that I can host multiple lightweight nodes.
Docker swarm is lightweight enough that I can virtualize the entire cluster on my single proxmox host. While this isn’t fault tolerant like a cluster across multiple nodes, it does mean I can reboot cluster nodes for kernel updates and maintain my uptime. I also am able to add additional docker swarm nodes on separate hardware if I get additional hardware, and there is the benefit of having the cluster load balance itself for which software is running on which node.
Benefits
Each node in the cluster is identical, each can be replaced by following the exact same process and while I don’t have automated deployment of new nodes, they are still closer to cattle than many of my other virtual machines. Due to the goal of replicated storage between the nodes, I should also be able to take a single node and rebuild the entire cluster if needed, since it would have the entire clusters configuration.
Continue reading “Virtualized Docker Swarm”DNS Structure
The goal of the DNS structure of my lab was primarily to create a very stable foundation. Second to that, was the addition of two services, the first a local DNS server to avoid loopback issues with my ISP, and the second was pihole ad blocking.
To set this up, UCS was chosen as a domain controller/DNS server over FreeIPA. Linux was chosen as the platform of choice as that is what a majority of my systems are, and I don’t have any windows server licenses. UCS was installed to a VM, and a second ubuntu VM was configured with PiHole. These were configured to handle local queries first, then everything else. If one of my local DNS servers is down, the clients won’t notice a change as everything uses Google DNS as backup.
Installing OctoPi on an RPi
3D printers have come a long ways in the past few years. The prices have plummeted for basic units, allowing anyone to buy them. The raspberry pi can be setup alongside a basic 3D printer to enable some amazing functionality. They can allow remote control, management, and monitoring of the printers. When combined with a pi cam, you can even create time lapses of the prints. To do this, we will be running OctoPi on the raspberry pi.
OctoPi is a Raspberry Pi distribution for 3d printers. Out of the box it includes:
- theOctoPrint host software including all its dependencies and preconfigured with webcam and slicing support,
- mjpg-streamer for live viewing of prints and timelapse video creation with support for USB webcams and the Raspberry Pi camera,
- CuraEngine 15.04 for direct slicing on your Raspberry Pi and
- the LCD app OctoPiPanel plus various scripts to configure supported displays
Installing MotionEyeOS on an RPi
Raspberry Pis are neat little computers that can be placed just about anywhere assuming there is power and network connectivity nearby. These were made even more convenient with the addition of built in Wi-Fi on the Raspberry Pi 3. One application of these small devices is for home security, as a small motion sensing webcam that can record 24/7, or only when there is motion detected.
There are ways to build up your own system using the basic raspbian distribution and various software packages, or you can use a custom built operating system for this purpose, MotionEyeOS.
MotionEyeOS has everything needed to run a security camera system, or simply a remote webcam monitoring system. This will cover setting up a camera in this tutorial for basic recording and monitoring. This will let us spy on our dog while away at work. Continue reading “Installing MotionEyeOS on an RPi”