
While trying to cut some fabric with the Ortur Laser Master 2, we ran into a strange curiosity in light burn. We found that different SVG types generated different GCode for the same shape. After this we managed to put together a table of cutting settings for various fabric colors.
Continue reading “Cutting Fabric with the Ortur Laser Master 2 & SVG Types”Enabling the Home Assistant API
The home assistant API can be used to build external tools to manipulate information in home assistant and control elements in it. This can be useful for triggering automations with custom code. It can even be triggered using curl on linux, allowing for simple scripts executing home assistant actions.
Continue reading “Enabling the Home Assistant API”Home Assistant Automated Christmas Lights
I have a number of windows with Christmas lights in them. I would like to use smart plugs and home assistant to automate them turning on and off during the winter season since I’m pretty lazy when it comes to decorating. This should be pretty straight forward to do once we have the current month sensor setup in home assistant to use as a condition.
Continue reading “Home Assistant Automated Christmas Lights”Improve CATIA STL Output Accuracy

CATIA is pretty good at times at hiding options, so here we’ll find out how to increase the export accuracy of STL files from CATIA. The defaults used give some pretty rough models especially around curves, so we’ll be increasing the accuracy to get smoother models to use on our 3d printer.
Continue reading “Improve CATIA STL Output Accuracy”Amazon Fire Tablet Rant
I wouldn’t normally go into this, but boy does this product tell me that I’m the product being sold here, not the tablet. Starting with purchasing the tablet, Amazon asked if I wanted my account preloaded and I am glad I said no, or else they would’ve probably subscribed me to every fee possible.
When going through the initial setup, there were multiple pages of “do you want to sign up for this monthly service for $xx/month”, each of which moved the accept and deny buttons, often swapping them from the previous page, so don’t just click quickly through or you’ll have a new monthly bill.
On top of that there was the same situation with permissions, do you want maps to be able to use your permission (oh and allow Amazon to track your permission too, can’t do one and not the other). This really liked like they saw the windows 10 and Google privacy settings and said “we can do worse, much worse”.
One final insult Amazon gave us through this tablet is how it handles its lock screen ads, when the tablet is asleep. It will wake up the screen to play ads, this is just…. one great big slap to the face. Pros: cheap, Cons: Software, now to work on rooting and installing lineage OS, if its possible.
Motion Sensing Lights with Home Assistant
I’ve already setup some fairy lights on the stairs which come on just before sundown and stay on until bedtime, but I started wondering, can I use them as night lights on the stairs for when I don’t want to turn on the main overheads, and can I do that all with motion sensors. For this project, I’d like to take my lights from here and add motion sensors so they turn on for some time period after being triggered and act as automated stairway night lights.
Continue reading “Motion Sensing Lights with Home Assistant”New LightBurn Features (aka I probably didn’t read the release notes months ago)
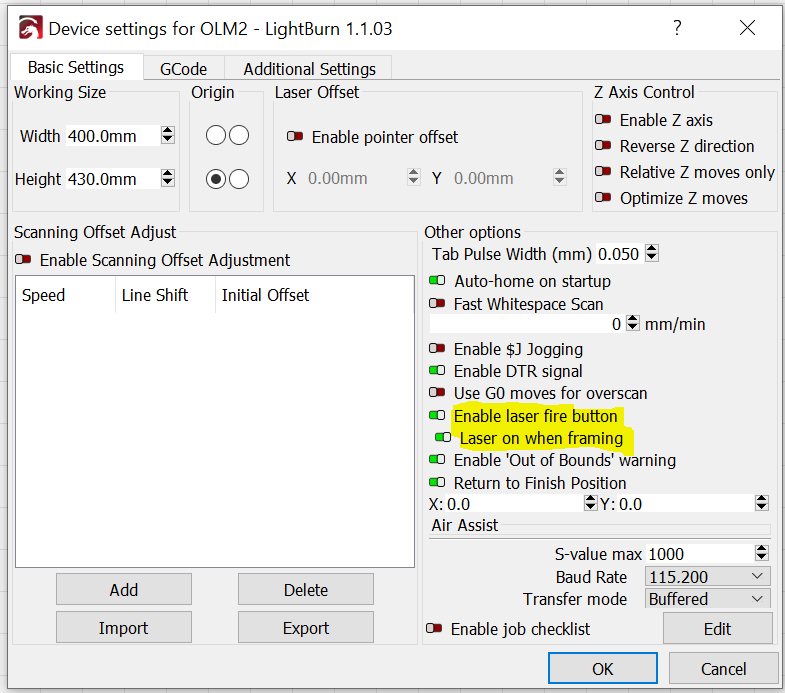
I can’t believe I missed this option being added to LightBurn. In the device settings, there is now an option to enable is the laser on when framing option. This turns on the laser with a low power setting when running the frame to make it obvious where you will be cutting/engraving. This replaces holding shift when hitting the frame button from older releases. This small quality of life improvement is much appreciated here.
Novelkeys Novelty Big Switch Macro Pad
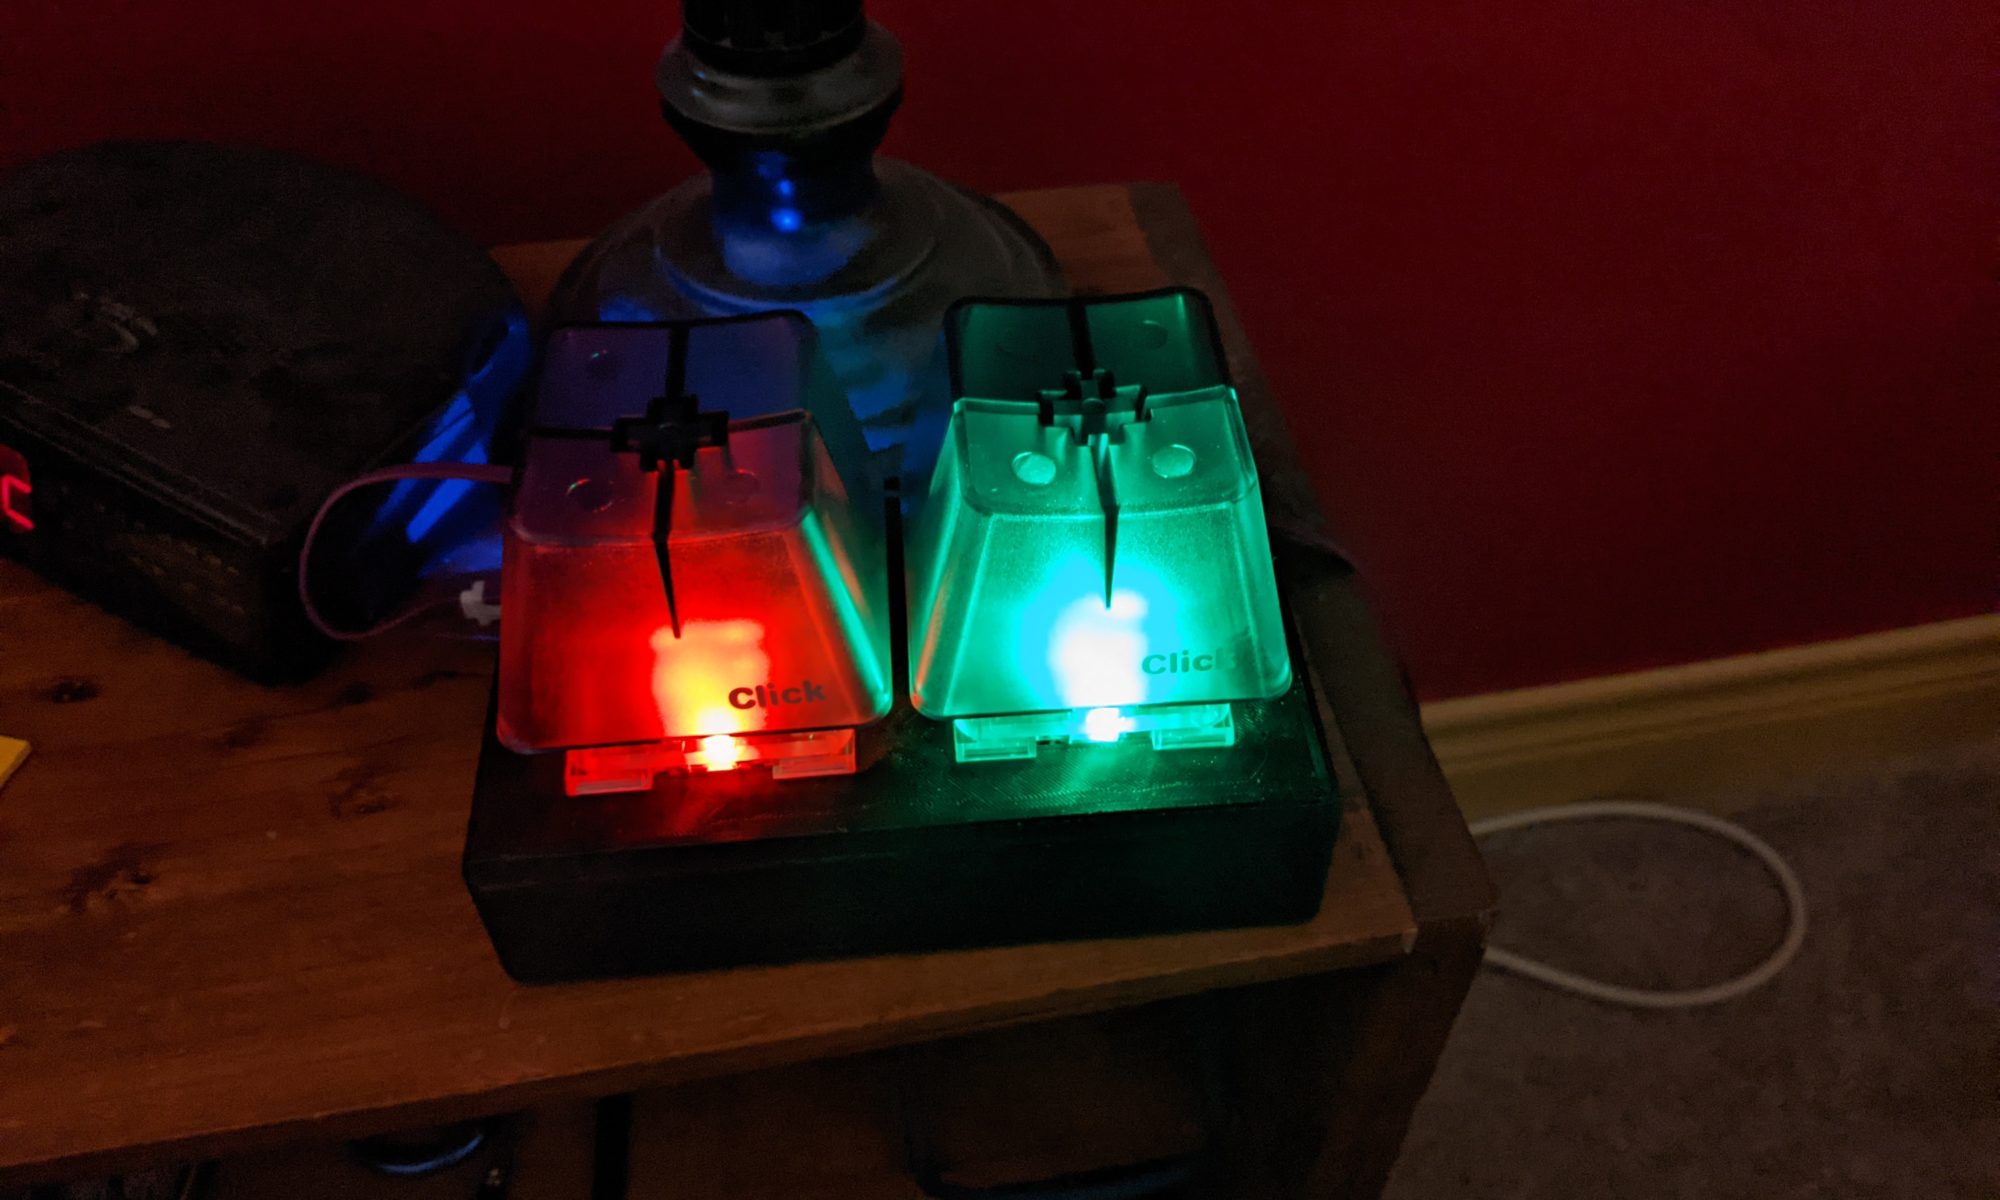
After putting together the EspDeck 9 key pad, and talking to the wife of other places we could make things better, the bedroom fan and lights came up. I mentioned that we could use smart switches for them and make a small 2 key control for our night stands, which she was super excited about, and then I showed her the NovelKeys big switches and it was sold, we were going to have some hilarious macro pads to control our bedroom lights.
Continue reading “Novelkeys Novelty Big Switch Macro Pad”Automated Pantry Light
I have a light in my pantry that isn’t super obvious when its on if the door is closed, and I may leave the light on from time to time by accident. The light switch is also partially buried in things hanging from the wall, so why not automate it to make things a bit easier, that is what smart homes are for. My idea is to use a smart door sensor and light switch to automate it and keep things from being left on.
Goal
- Turn on the pantry lights while the door is open
- Close the pantry lights when the door is closed
- Allow lights to be turned on with the door closed
WLED Notice of Laser Cutter Use
I have a laser cutter in my office that I use from time to time. I close the door when its running because you need safety glasses on while its running, but since I use my office for other things, the door closed doesn’t necessarily mean safety glasses are needed. To make this simpler, I decided to try and make some automations to notify when the laser is running. I want to use a WLED strip around the door and light it different colors based on laser operating status (and other statuses in the future).
Goals
- Set the WLED strip to red when the laser starts cutting
- Set the WLED strip to the previous settings (or turn it off) when the laser stops cutting