
I saw this model while looking for some type of laser toy for a cat. It looked neat, integrated with home assistant, and it didn’t require many parts, so I figured why not try and see if my cat would be interested with it.
Parts
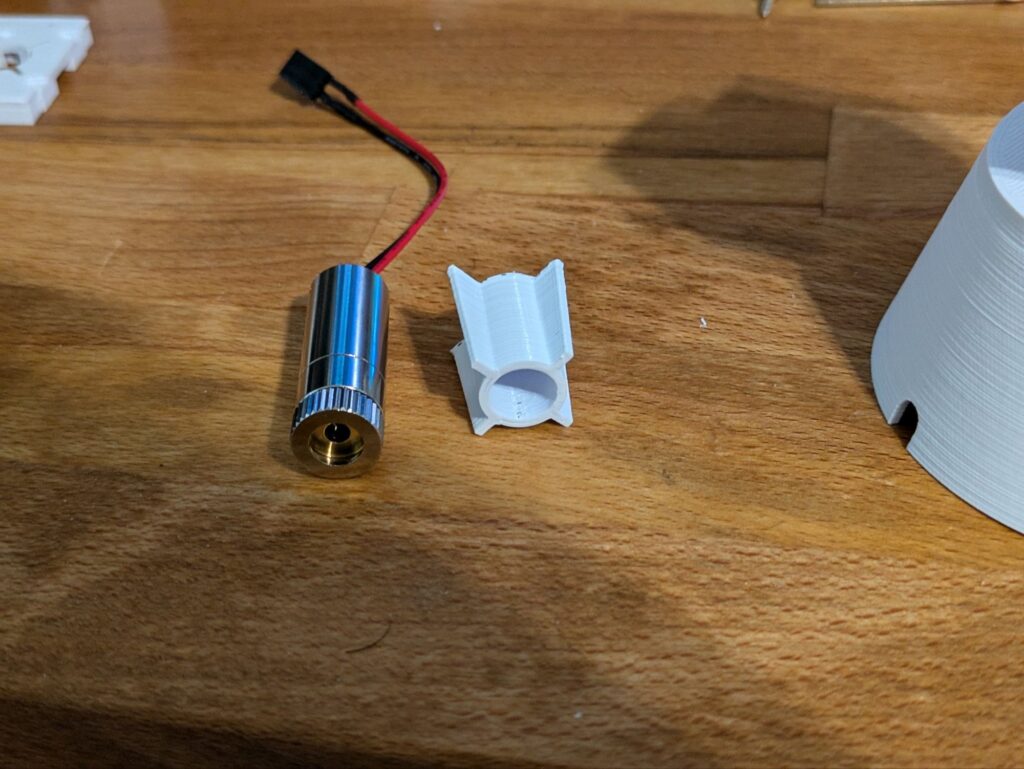
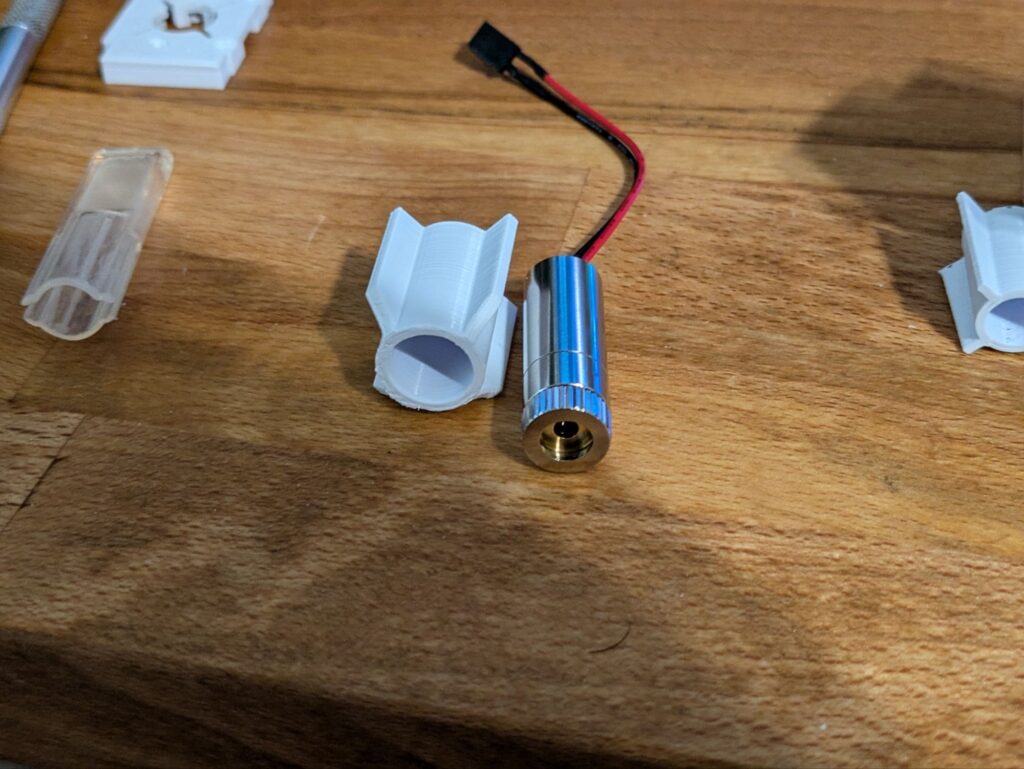
Theres basically 3 parts outside the 3d printed parts. The one I found hard to find was a 5v laser online that wasn’t a line laser / laser level and was reasonable quality. I ended up on the listing below, though one of the two lasers is missing a lens to focus it, so your mileage may vary.
- 2 9g servos
- 1 5v laser pointer
- Esp32
- 3 M2 x 12 screws
- 3 M2 Nuts
Assembly
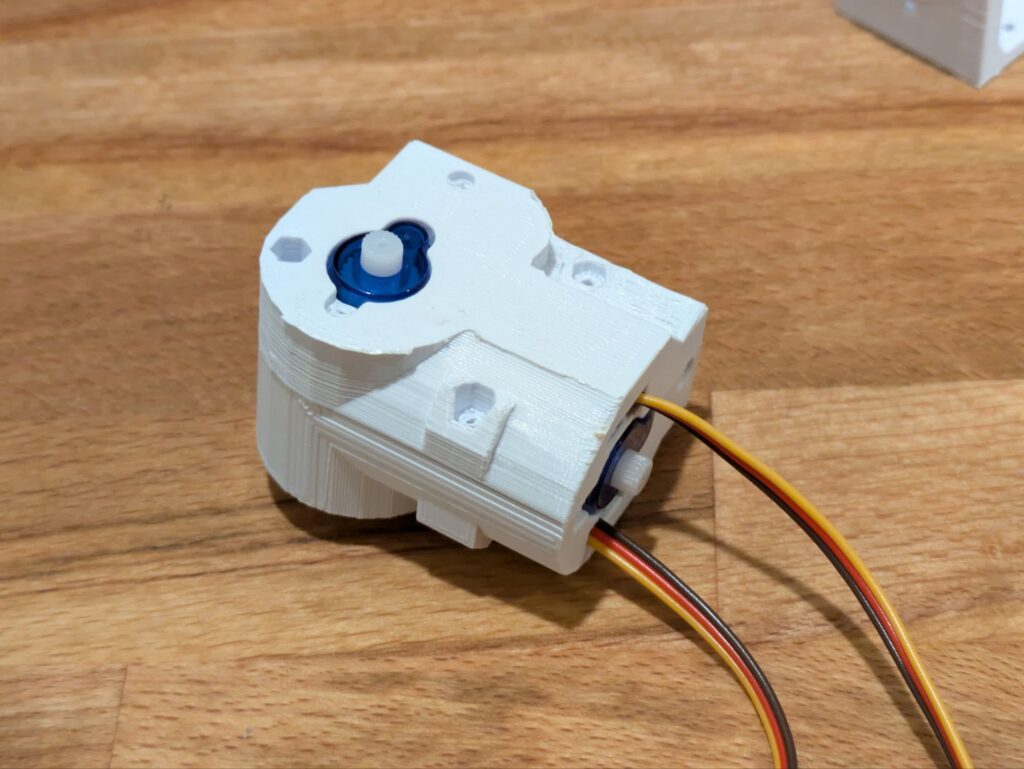
The assembly starts with the head of the unit that houses the two servos that handle movement. These are built entirely into the printed parts, and the wiring takes a bit of finesse to get into place. The first servo is mounted in a standing position with the wire wrapping around the outside of the servo and then down the side of the housing.
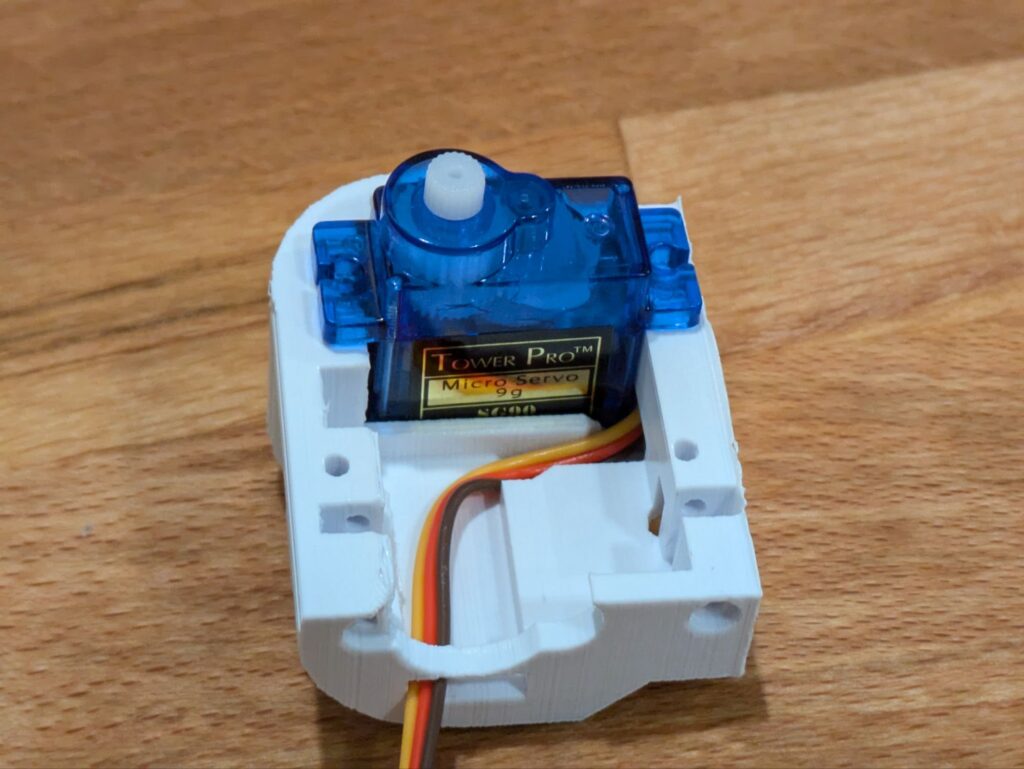
The second servo is mounted laying down with the wire passing underneath the servo once it’s in place.
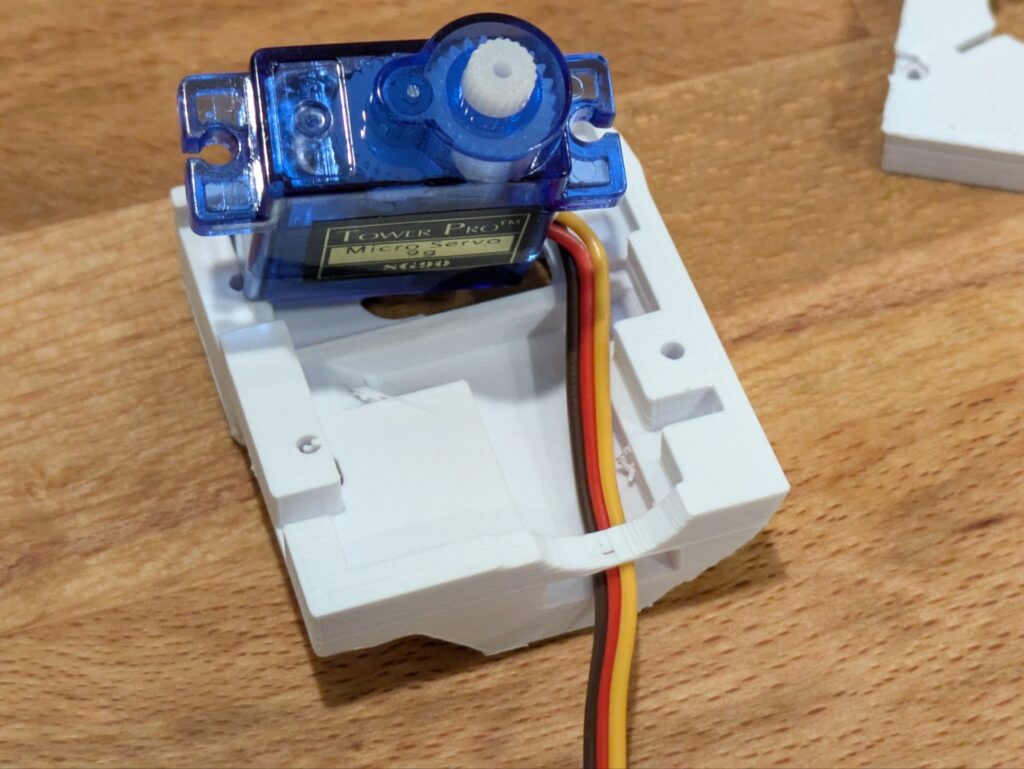
This servo should be held in place while putting the other side together with it to ensure it doesn’t wiggle, letting the wire get in the way.
Smash the two sides together, each with it’s respective servo and both wires coming out the same side and then it’s off to the races.
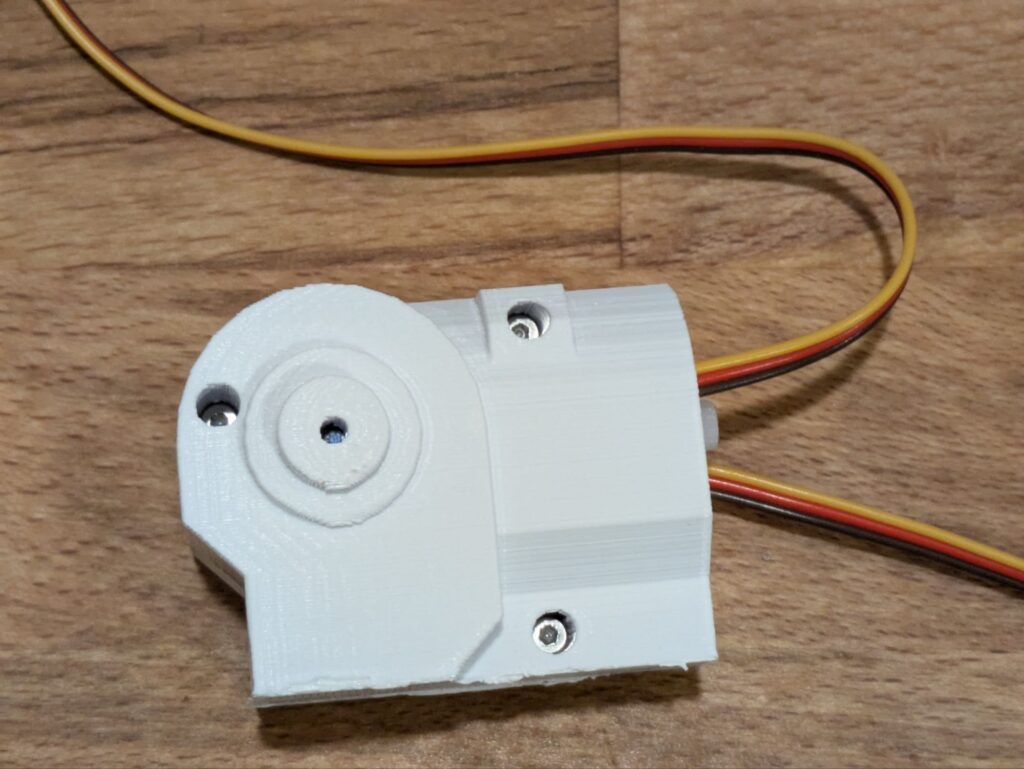
I used 3 M2 x 12 screws with nuts to assemble the two halves together. These had enough length to make it through but not too much overlap (and also were a length of screw I had around).
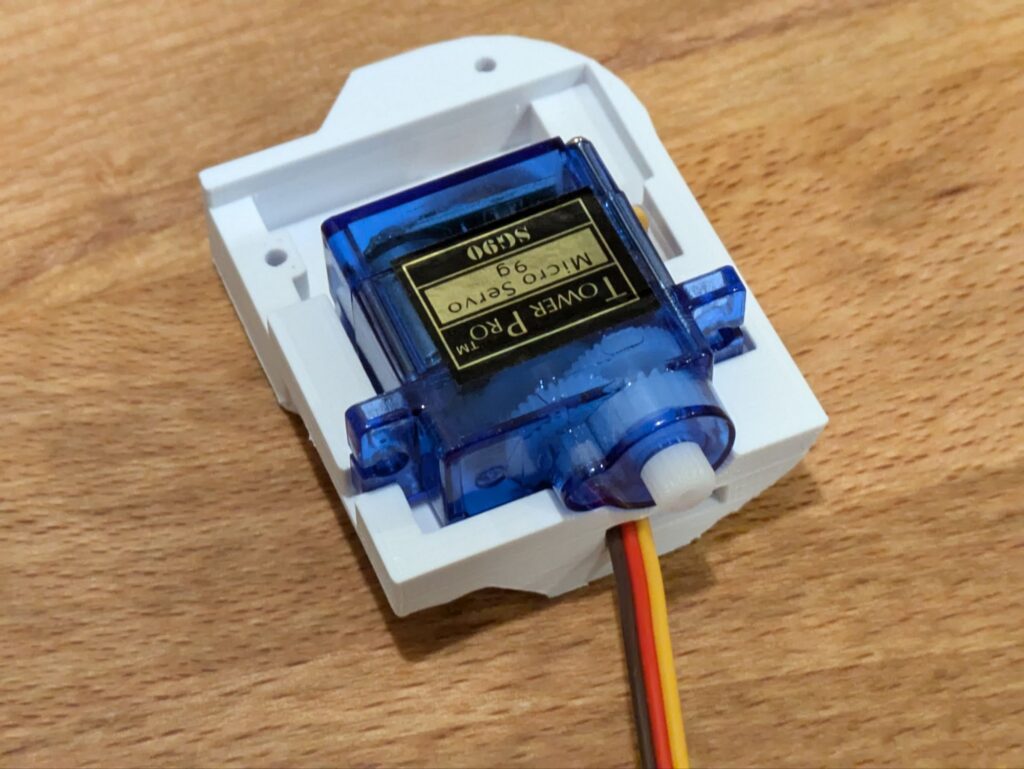
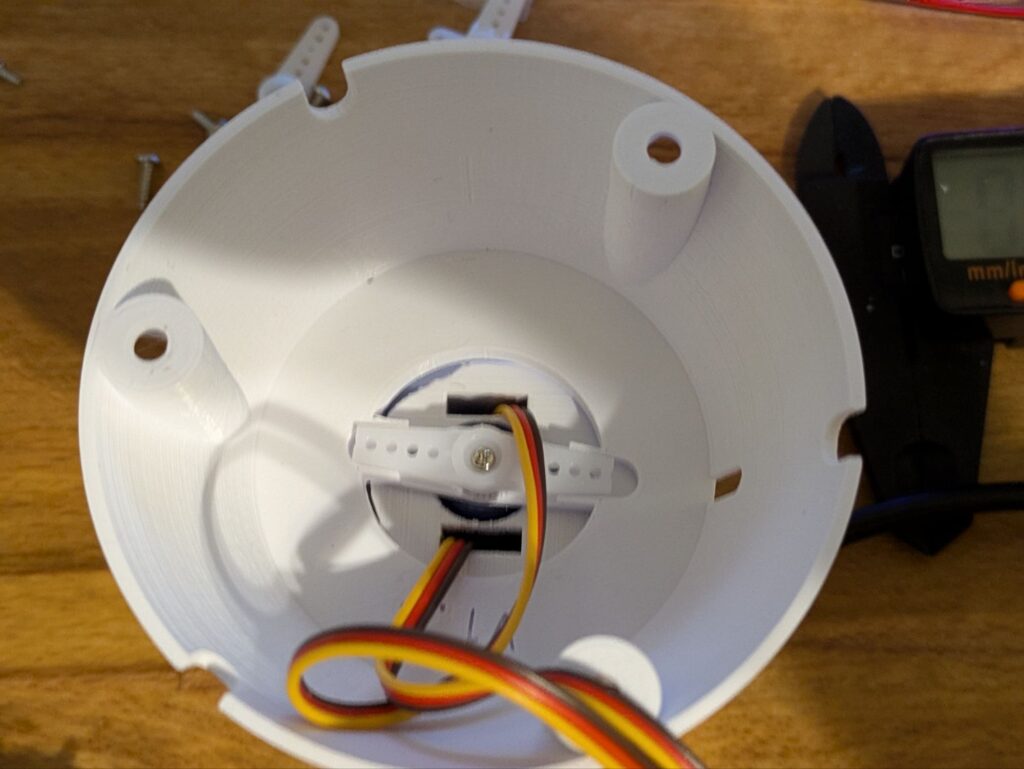
For the bottom servo, I had to trim the servo horn a bit, and widen the hole in order for it to fit in its housing. Once it was in place, I could just screw it in place to the servo for a solid fit.
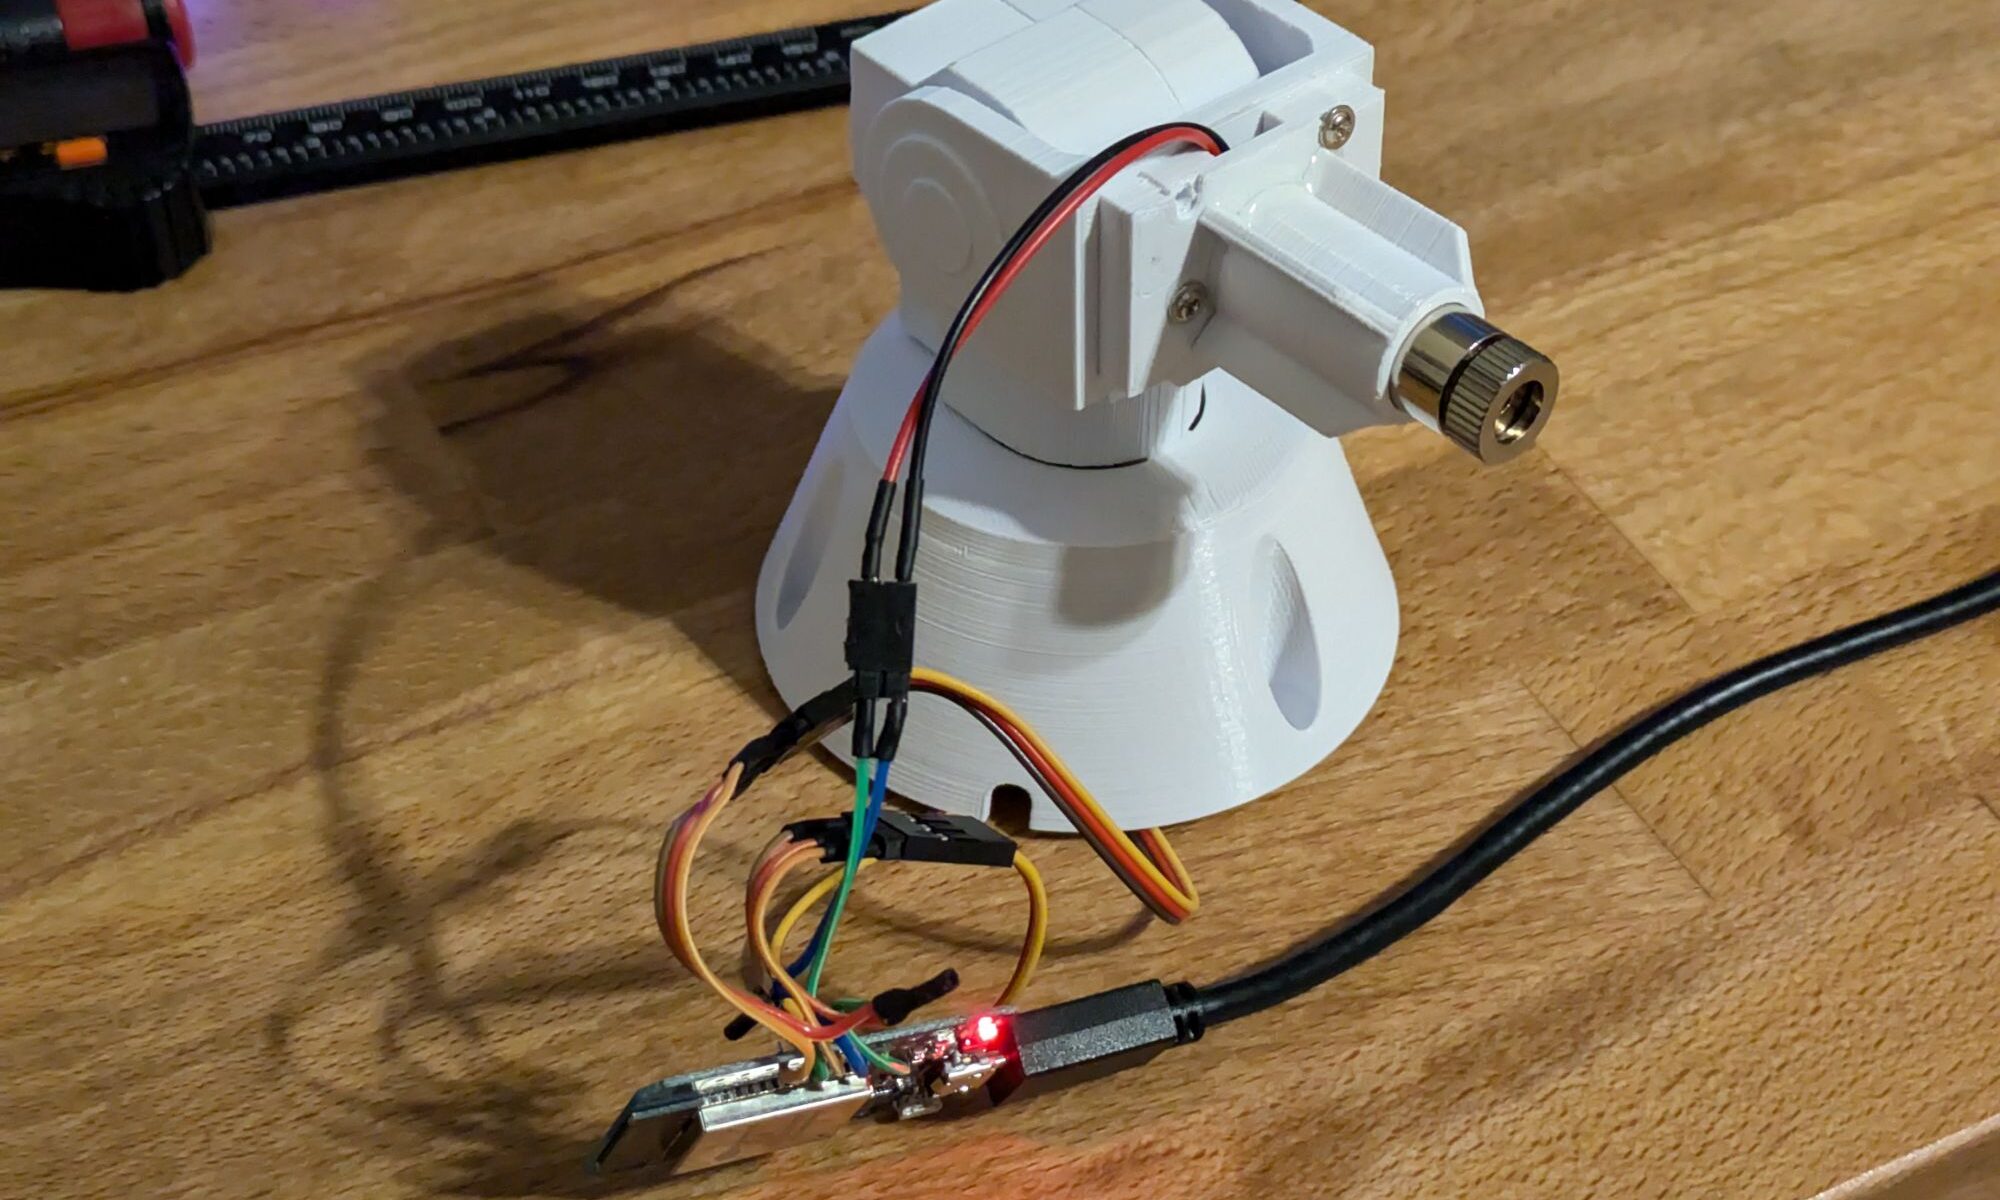
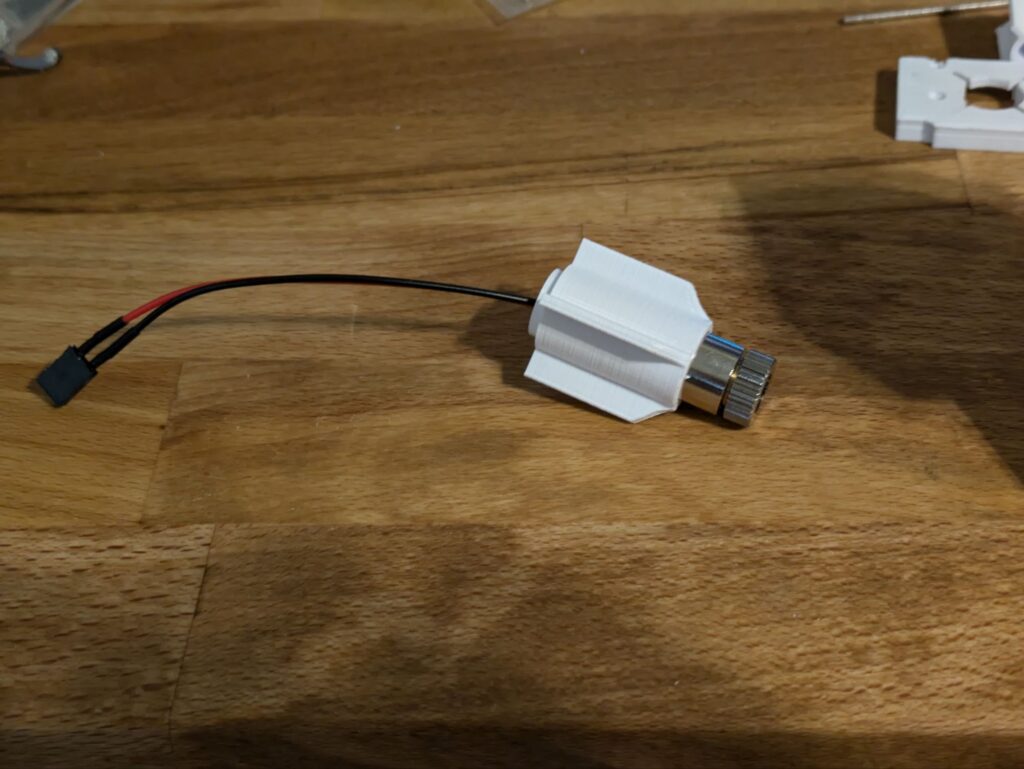
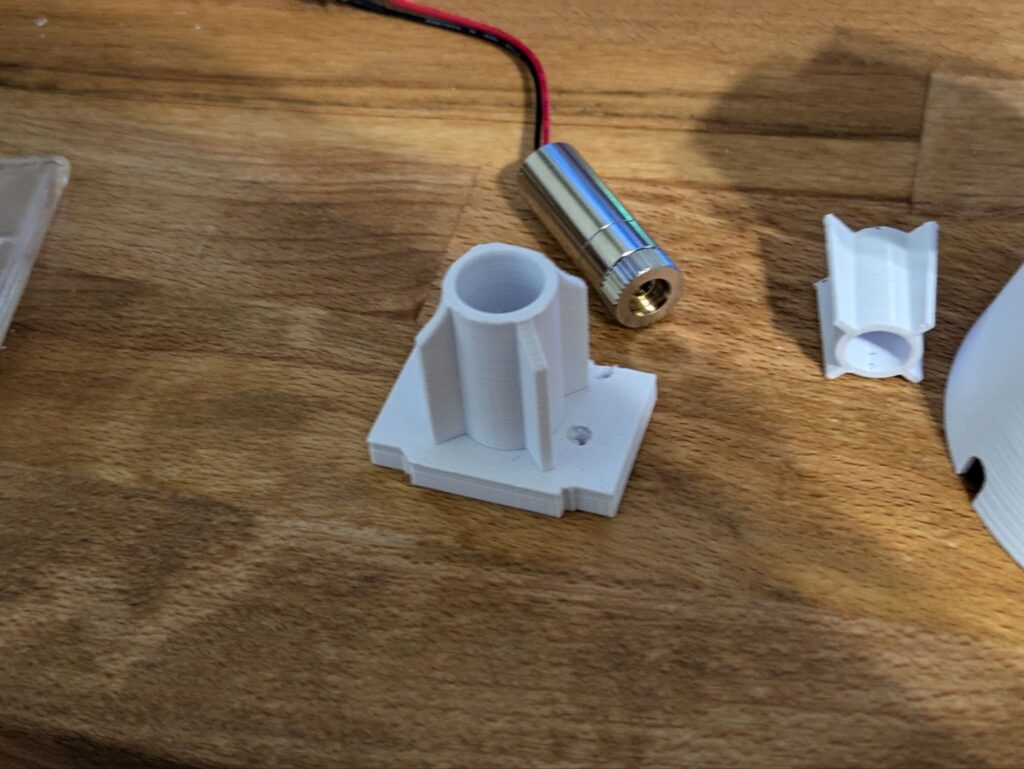
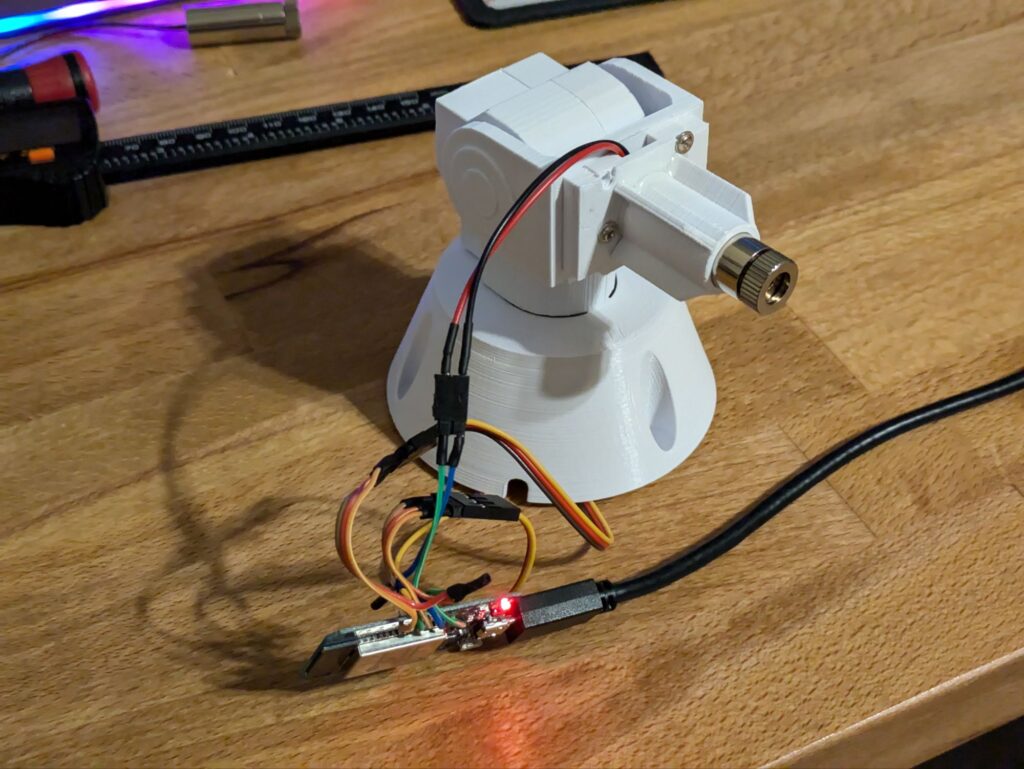
After that, I had to install the laser. The original mount was for a smaller diameter laser than I had, so I modeled a new mount for it. After printing out the mount, it worked on the first try, so I glued it to the base plate and screw that onto the head of the unit.
The head mounts onto the other servo arm and basically clips into place. You can also adjust the position relative to the servo’s position in order to skew the distance available one way or another (to have maximum range).
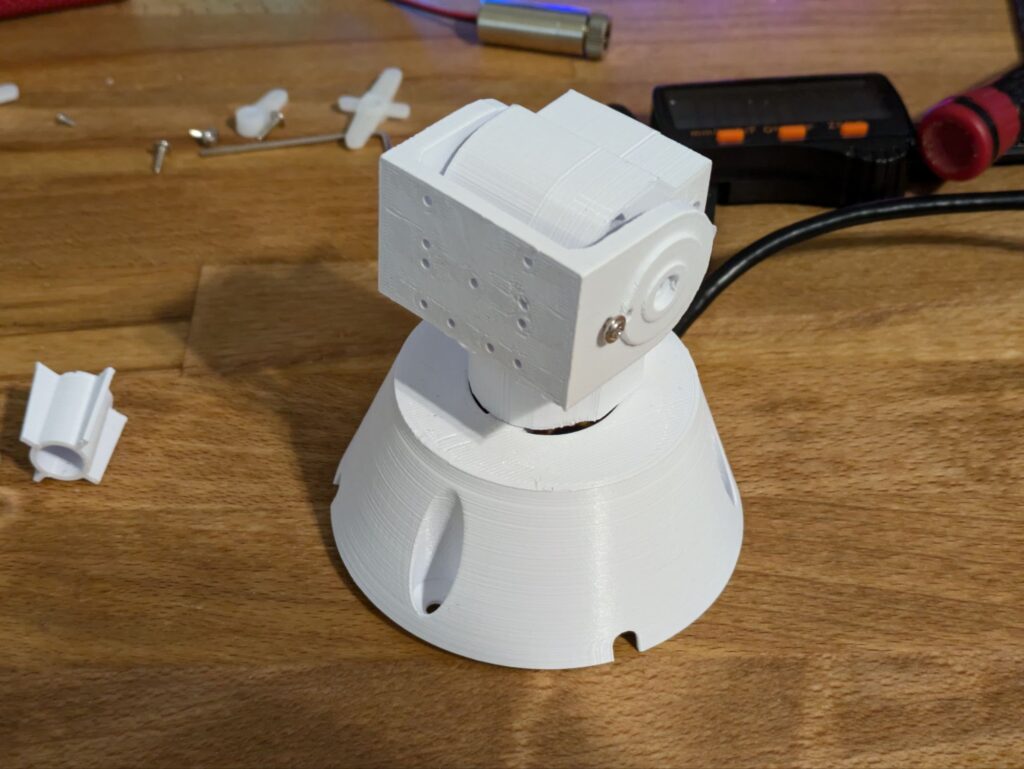
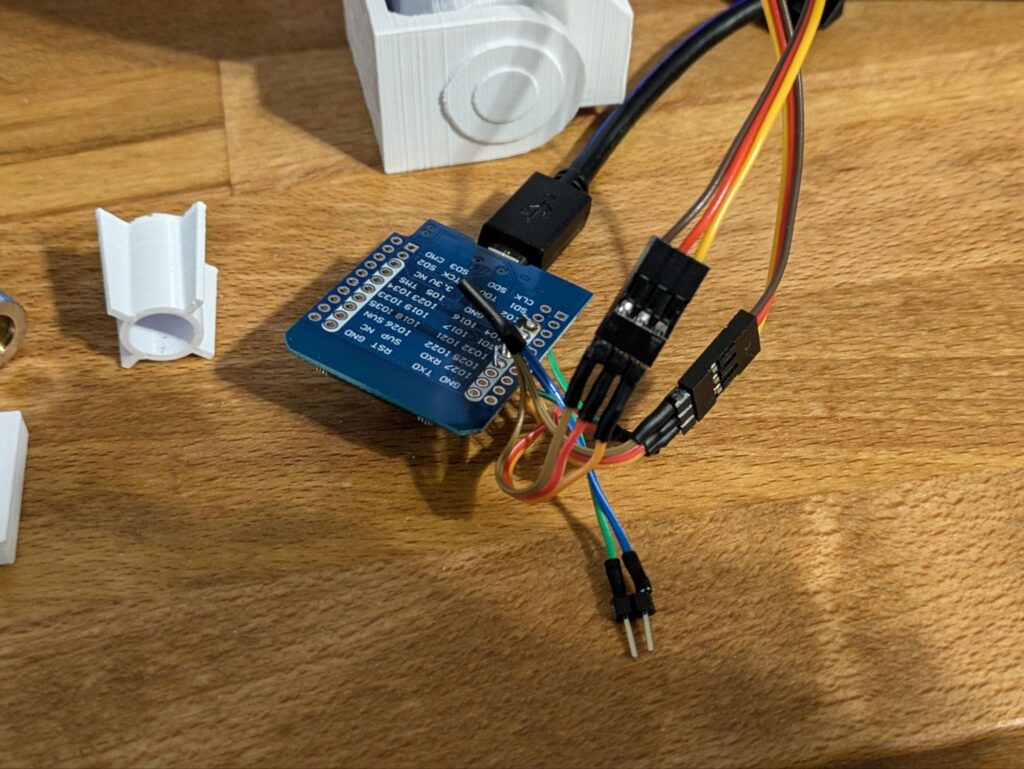
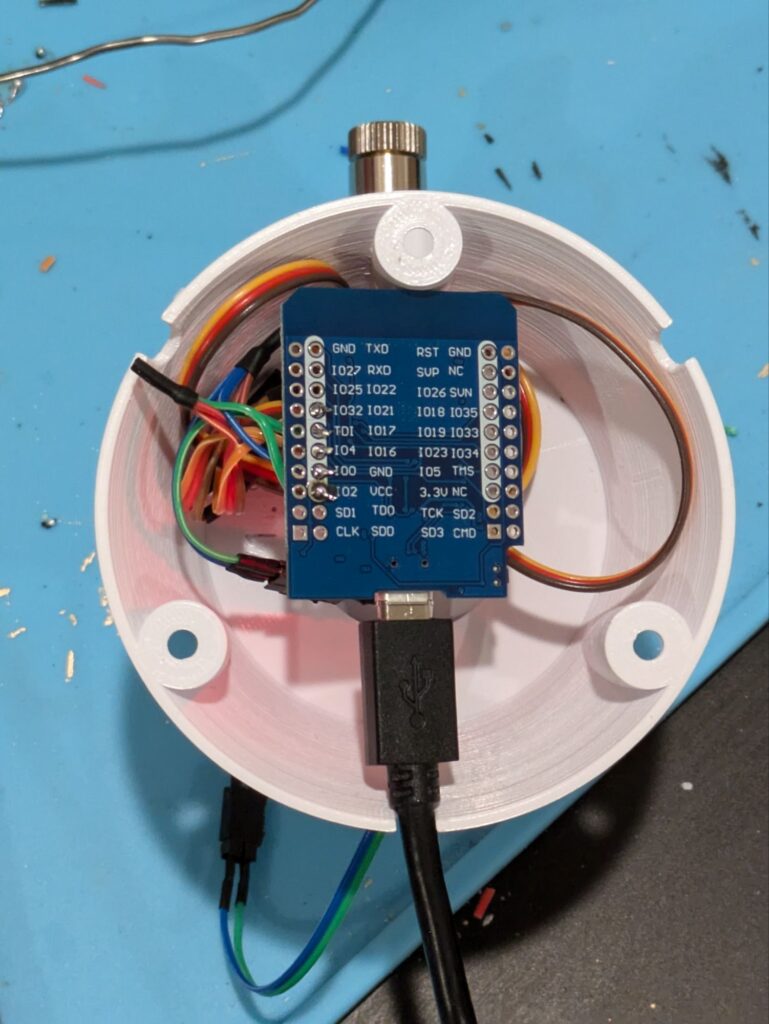
I soldered in connectors to the ESP32 for the servos and laser. The cables were then routed to the base of the unit where the ESP32 just barely fits. Its not the prettiest wiring, but its also not the worst that I’ve done.
ESPHome Configuration
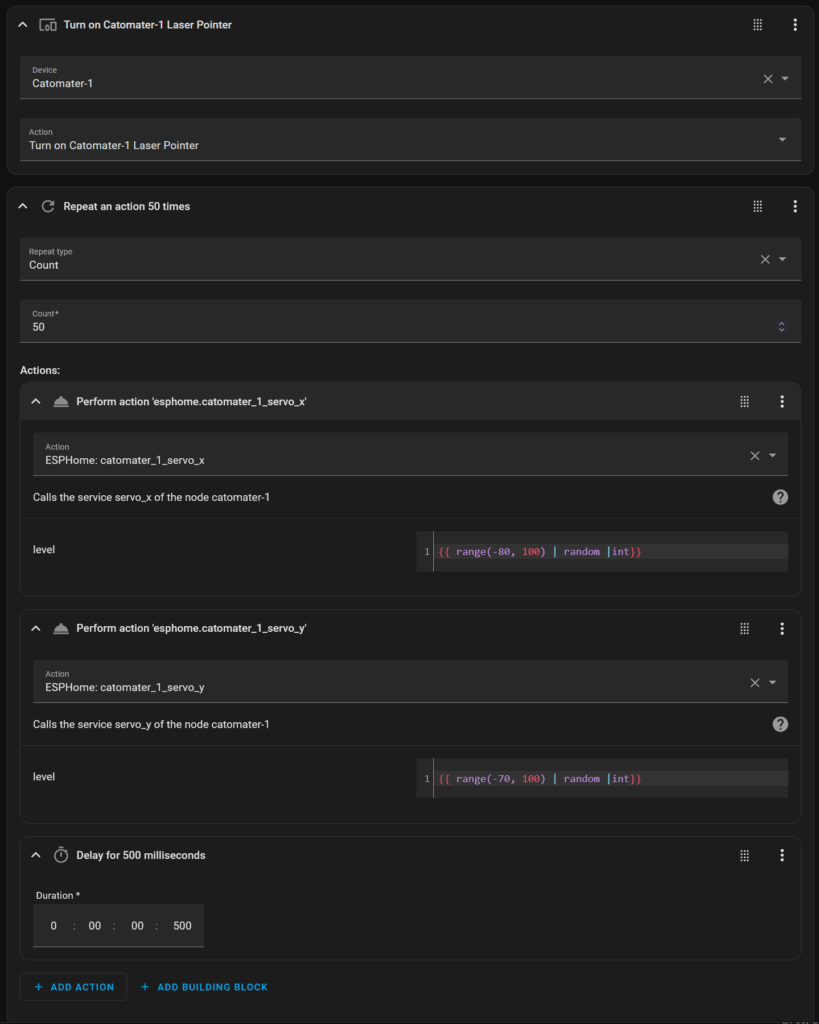
My ESPHome configuration is below. The ranges on the servos will have to be adjusted depending on how the unit is built and where the zero positions are in the build. I’ve added comments otherwise around for various aspects of it. I’ve also uploaded my configuration and scripts to Github here.
esphome:
  name: "catomater-1"
  #name: catomater-1
  friendly_name: Catomater-1
  min_version: 2024.11.0
  name_add_mac_suffix: false

esp32:
  board: esp32dev
  framework:
    type: esp-idf

# Enable logging
logger:

# Enable Home Assistant API
api:
  services:
    # goes from about -70 to 100
    # 70 is facing forward
  - service: servo_y
    variables:
      level: float
    then:
      - servo.write:
          id: servo_y
          level: !lambda 'return level / 100.0;'
    # goes from about -80 to 100
    # 0 is centered
  - service: servo_x
    variables:
      level: float
    then:
      - servo.write:
          id: servo_x
          level: !lambda 'return level / 100.0;'

# Allow Over-The-Air updates
ota:
- platform: esphome

wifi:
  ssid: !secret wifi_ssid
  password: !secret wifi_password

output:
  - platform: ledc
    id: pwm_1
    pin: GPIO21
    frequency: 100 Hz
  - platform: ledc
    id: pwm_2
    pin: GPIO16
    frequency: 100 Hz

servo:
  - id: servo_y
    output: pwm_1
    # transition_length: "10s"
    auto_detach_time: 1s
  - id: servo_x
    output: pwm_2
    # transition_length: "10s"
    auto_detach_time: 1s

# input_number:
  # x_servo_control:
    # initial: 0
    # min: -100
    # max: 100
    # step: 1
    # mode: slider
  # y_servo_control:
    # initial: 0
    # min: -100
    # max: 100
    # step: 1
    # mode: slider

# Example configuration entry
switch:
  - platform: gpio
    id: laser
    pin:
      number: GPIO17
      mode:
        output: true
    name: "Laser Pointer"
    internal: true

    restore_mode: ALWAYS_OFF
  - platform: template
    name: "Laser Pointer"
    lambda: |-
      if (id(laser).state) {
        return true;
      } else {
        return false;
      }
    turn_on_action:
      - switch.turn_on: laser
    turn_off_action:
      - switch.turn_off: laser
    assumed_state: false

binary_sensor:
  - platform: status
    name: "Catomater Status"
  # - platform: homeassistant
  #   id: switch1
  #   entity_id: input_boolean.switch1
  #   internal: true
# alias: Cat Laser - Park position
# sequence:
#  - service: switch.turn_off
#    data: {}
#    target:
#      entity_id: switch.cat_laser_laser_pointer
#  - variables:
#      park_x: -25
#      park_y: 75
#  - service: esphome.cat_laser_servo_x
#    data:
#       level: "{{ park_x }}"
#  - service: esphome.cat_laser_servo_y
#    data:
#       level: "{{ park_y }}"
# mode: single
# icon: mdi:cat
Home Assistant
The scripts to run it are fairly simple. There is a run script and a park script. The park script sets the servos to pre-determined zero locations and turns off the laser. The run script moves the servos to random locations in a loop until the counter runs out and it turns everything off.
Running it

Parking it

Conclusion
Even though my cat seems more interested in the noise the catomater makes and the unit itself moving around, rather than the laser. Its still a success, the unit works well, integrates well in home assistant, and was pretty fun to build.