
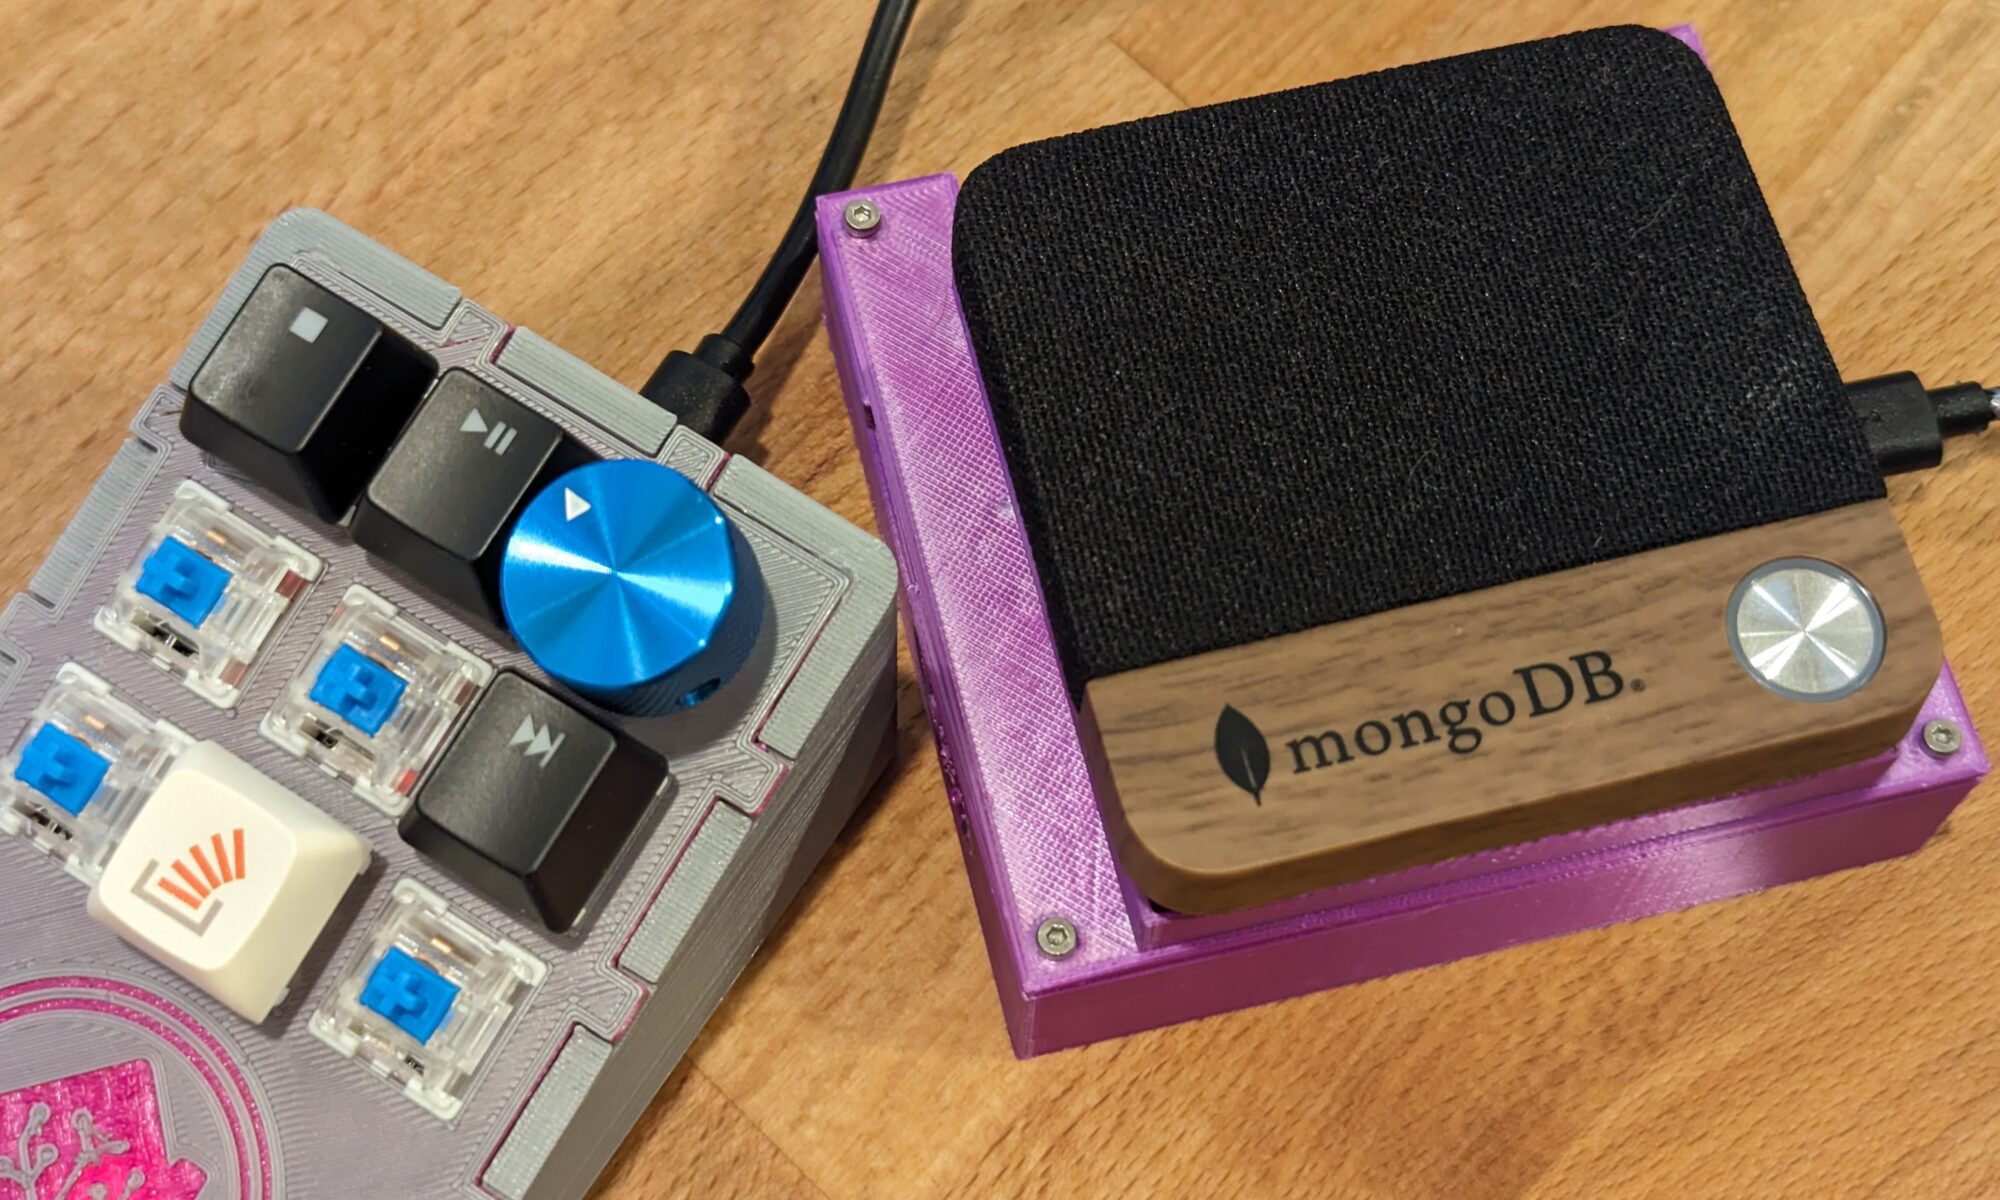
The NFC Decks that I design and build have rotary encoders onboard. I added them to eventually use in a whole home audio setup, and now that I have some squeezelite speakers to control, I finally have something to use that part of my design on. Let’s take a look at how to control media volume with the rotary encoders.
There are 3 general components to setup for this automation, the ESPHome rotary encoder, template sensor, and the automation itself. I’ll be using the NFC Deck for my examples but any device with a rotary encoder will work.
NFC Deck Related Posts
ESPHome Rotary Encoder Settings
Prior to getting into the template sensor and automation, we want to make sure our ESPHome rotary sensor has the right settings. In this case, we want to make sure it’s limited to the values 0-100, so that the interactions with the volume set action are all valid. To do this we can add the max and min values to our configuration like below.
sensor:
  - platform: rotary_encoder
    name: "Rotary Encoder"
    pin_a:
      number: $rotary_pin_a
      mode:
        input: true
        pullup: true
    pin_b:
      number: $rotary_pin_b
      mode:
        pullup: true
        input: true
    publish_initial_value: true
    max_value: 100
    min_value: 0
Template
The home assistant set volume action takes the requested volume in the form of a floating point value from 0-1, while my rotary encoder outputs values in the form of an integer from 0-100. To convert between these ranges, we need to create a template sensor.

The template sensor converts the value to a floating point number, divides it by 100, and rounds it to two decimal places. For every rotary encoder you want to use in this fashion, you’ll need a new template sensor.
sensor:
  - platform: template
      studio_rotary:
        value_template: "{% set state = states('sensor.esphome_web_757c70_rotary_encoder') %}{{ (state | float / 100) | round(2) if is_number(state)}}"
        friendly_name: "Studio Rotary Encoder %"
After adding the template sensor to the configuration.yaml file, home assistant will need to be reloaded for it to be picked up and usable. After that we can add it to the automation as the input volume to the set volume action.
Automation
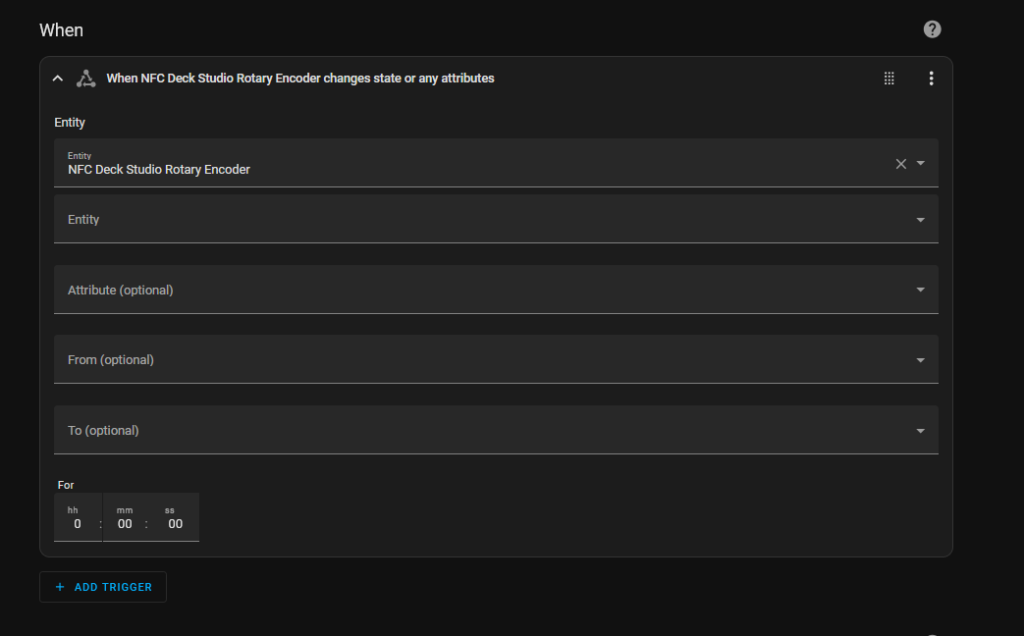
Now that we have the template sensor, the automation is relatively straight forward to create. We want it to trigger on a state change of the rotary encoder, we don’t care what values it’s changing between, just that it’s changing at all.
We then want it to perform the set volume action using our template sensor as the value. The key to all of it is the template value being retrieved. The device being modified can be any media player entity in home assistant.
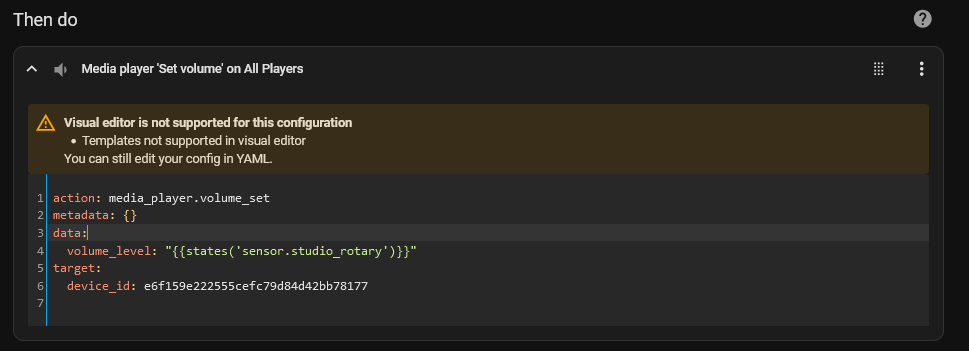
action: media_player.volume_set
metadata: {}
data:
  volume_level: "{{states('sensor.studio_rotary')}}"
target:
  device_id: e6f159e222555cefc79d84d42bb78177
With the automation, template, and esphome settings all in place, we have a volume knob system actively controlling our audio system. The system works well in this basic setting, though for my final multi room audio system, I’ll need to make it more flexible.
The volume control is pretty slick running off the NFC Decks that I’ve built so far. I’m pretty happy with it and am excited to keep working towards a fully functioning, fully open source whole home audio system.