
I picked up some extra sensors for my AirGradient DIY kits and didn’t realize at the time that they’re not officially supported in EspHome. So with that I went on the journey of adding my own custom sensor code to EspHome to run them.
The AirGradient Saga
- Making the AirGradient DIY
- Adding an LPS22 to AirGradient and Building a Custom Sensor in EspHome
- Adding TVOC to the AirGradient
- The Indoor Air Quality (UK) HACS Integration and Sensor
Parts
- AirGradient DIY
- LPS22 sensor
- Ribbon cable
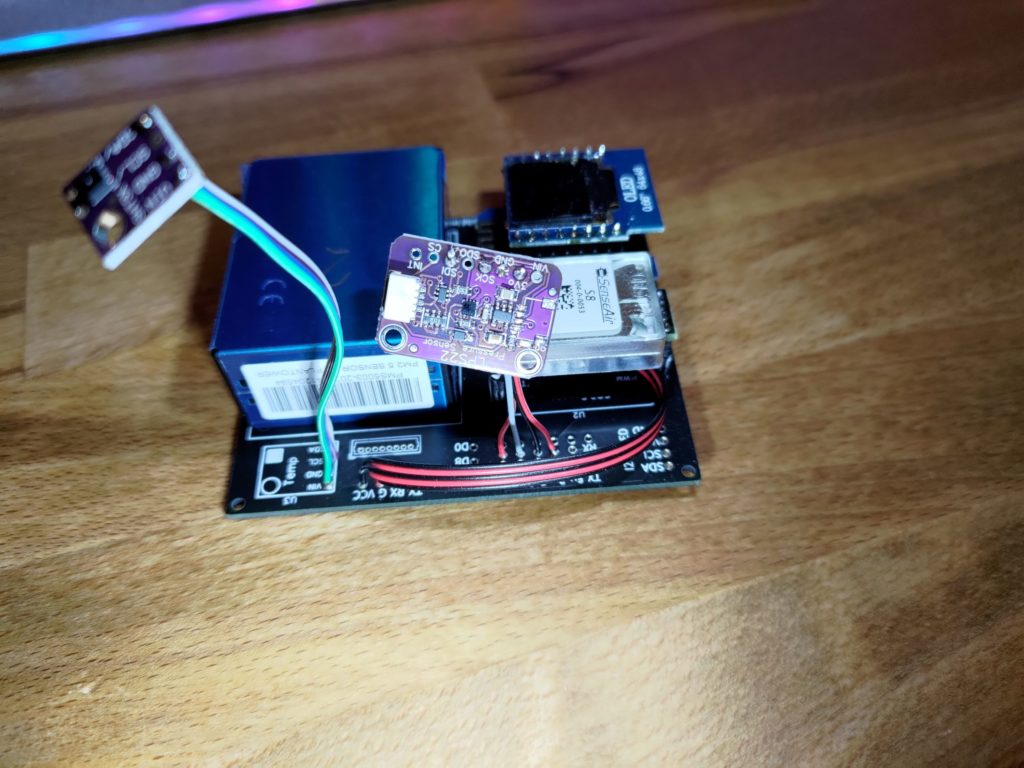
Soldering
Soldering the sensor is straight forward once you know what the pins are all used for on it. In this case, we’ll be soldering it as follows.
- LPS22 SDI to AirGradient SDA
- LPS22 SCK to AirGradient SDC
- LPS22 3v to AirGradient 3v
- LPS22 GND to AirGradient GND
Once that is done, the sensor should just work with the right firmware. There’s no need to remove the pull-up resistors from the temperature sensor (a step needed to add TVOC to the AirGradient).

The only other soldering you might want is to change the i2c address, but none of the sensors in my AirGradient builds had overlapping addresses. By default, the i2c address is 0x5D. If you add a jumper from SDO to GND the address will change to 0x5C.
Flashing with Esphome
I started with googling for the sensor and found Adafruits libraries for running it. While I didn’t buy the sensor from them, Adafruit is an amazing source for guides on electronics and making everything work together. I used that library and it’s example codes as my baseline. I also used some of the esphome example documentation to fill in the gaps and get everything working.
Starting in esphome, let’s add our library calls so that they’re all built into the final firmware. The order does matter here, so we include our baseline Arduino libraries first, followed by the Adafruit libraries using those, and finally the sensor specific library.
esphome:
name: "air-gradient-02"
includes:
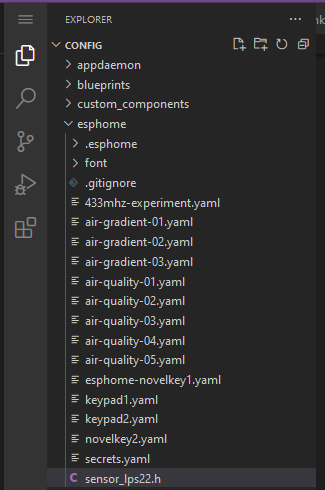
- sensor_lps22.h
libraries:
- SPI
- Wire
- Adafruit_Sensor=https://github.com/adafruit/Adafruit_Sensor.git
- Adafruit_BusIO=https://github.com/adafruit/Adafruit_BusIO.git
- Adafruit_LPS2x=https://github.com/adafruit/Adafruit_LPS2X.git
Next up in the esphome yaml, we have our sensor creation and initialization.
sensor:
  - platform: custom
    lambda: |-
      auto my_sensor = new SensorLps22();
      App.register_component(my_sensor);
      return {my_sensor->temperature_sensor, my_sensor->pressure_sensor};
    sensors:
      - name: "LPS22 Temperature"
        unit_of_measurement: °C
        accuracy_decimals: 1
      - name: "Pressure"
        unit_of_measurement: hPa
        accuracy_decimals: 2
        id: pres
Since this is an atmospheric pressure sensor, we can also add a bit of extra measurements. In this case, I’m adding a delta above sea level pressure sensor for home assistant to read. Since I live near sea level, this gives me a good idea on how the weather is shifting the pressure from the norm.
  - platform: template
    name: "Pressure Above Sea Level"
    unit_of_measurement: hPa
    accuracy_decimals: 2
    lambda: !lambda |-
      return(id(pres).state - 1013.25);
Now let’s take a look at our custom component source code (sensor_lps22.h). This is c/c++ code that is run by the esp to read and interpret the sensors.
I used the example custom sensor code from Esphome and the example code for the LPS22 sensor from Adafruit as the basis for my code. These combined worked out well to give me a good basis for my sensors.
#include "esphome.h"
// ...
// Basic demo for pressure readings from Adafruit LPS2X
#include <Wire.h>
#include <Adafruit_LPS2X.h>
#include <Adafruit_Sensor.h>

// For SPI mode, we need a CS pin
#define LPS_CS 10
// For software-SPI mode we need SCK/MOSI/MISO pins
#define LPS_SCK 13
#define LPS_MISO 12
#define LPS_MOSI 11


class SensorLps22 : public PollingComponent, public Sensor {
 public:
  Adafruit_LPS22 lps;
  Sensor *temperature_sensor = new Sensor();
  Sensor *pressure_sensor = new Sensor();

  SensorLps22() : PollingComponent(15000) { }

  void setup() override {
        Serial.begin(115200);
        while (!Serial) delay(10);     // will pause Zero, Leonardo, etc until serial console opens

        Serial.println("Adafruit LPS22 test!");

        // Try to initialize!
        if (!lps.begin_I2C()) {
        //if (!lps.begin_SPI(LPS_CS)) {
        //if (!lps.begin_SPI(LPS_CS, LPS_SCK, LPS_MISO, LPS_MOSI)) {
            Serial.println("Failed to find LPS22 chip");
            while (1) { delay(10); }
        }
        Serial.println("LPS22 Found!");

        lps.setDataRate(LPS22_RATE_10_HZ);
        Serial.print("Data rate set to: ");
        switch (lps.getDataRate()) {
            case LPS22_RATE_ONE_SHOT: Serial.println("One Shot / Power Down"); break;
            case LPS22_RATE_1_HZ: Serial.println("1 Hz"); break;
            case LPS22_RATE_10_HZ: Serial.println("10 Hz"); break;
            case LPS22_RATE_25_HZ: Serial.println("25 Hz"); break;
            case LPS22_RATE_50_HZ: Serial.println("50 Hz"); break;
            case LPS22_RATE_75_HZ: Serial.println("75 Hz"); break;
        }
  }

  void update() override {
        sensors_event_t temp;
        sensors_event_t pressure;
        lps.getEvent(&pressure, &temp);// get pressure
        Serial.print("Temperature: ");Serial.print(temp.temperature);Serial.println(" degrees C");
        Serial.print("Pressure: ");Serial.print(pressure.pressure);Serial.println(" hPa");
        Serial.println("");

        float temperature = temp.temperature;
        temperature_sensor->publish_state(temperature);

        int pres = pressure.pressure;
        pressure_sensor->publish_state(pres);
        delay(100);
  }
};

// ...
The sensor_lps22.h file needs to be in the right location in your configuration. Once there, it’ll be compiled into your esp firmware when you call it out as a library in the yaml. My full code can be found here.
Now that we have the yaml and sensor code all ready, we’ll build and install it to the AirGradient esp and get some data into home assistant to check out.
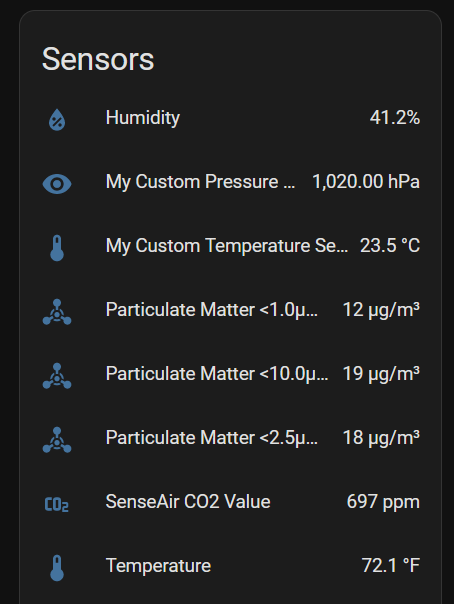
Conclusion
I’m happy with the way it all turned out. The pressure sensor works well, while the above sea level pressure template sensor does take a little bit to update compared to the actual pressure, its still close enough in time to give me the results that I’m looking for. Next time I pick up sensors, I’ll double check the built in capabilities from EspHome, however it won’t stop me from picking up an interesting sensor as long as there are some libraries available to work with as a starting point.