I’ve wanted to mess about with the whole home automation craze that seems to be going on, but on a fully self-hosted installation (no alexa, no google assistant, my data staying all on my network). After the SelfHosted Podcast mentioned the CloudFree smart plugs, I knew they were the right gear to try out. The smart plugs come from CloudFree which has the plugs pre-flashed with Tasmota.
The quick start guide worked perfectly for the initial setup and getting the smart plugs on my WiFi network. I’ll have that guide below (in case its lost) and continue on with my own instructions for connecting to Home Assistant via MQTT afterwards.
Configuring Tasmota
This device has been flashed with Tasmota. To get started,
- Connect to the tasmota_xxxxxx-xxxx wifi network
- Tap to sign in or visit 192.168.4.1 in a web browser
- Enter your home Wi-Fi credentials and save (can scan for wifi networks to get the SSID)
- Either log into your router’s dashboard or use an app like Fing to find the IP address of your plug. Visit the IP address in your browser (HTTP)
- Now you are ready to configure the smart plug to work for you! You can use MQTT, one of the included emulation modes, or flash alternative firmware like ESPHome on the plug.
Configuring MQTT
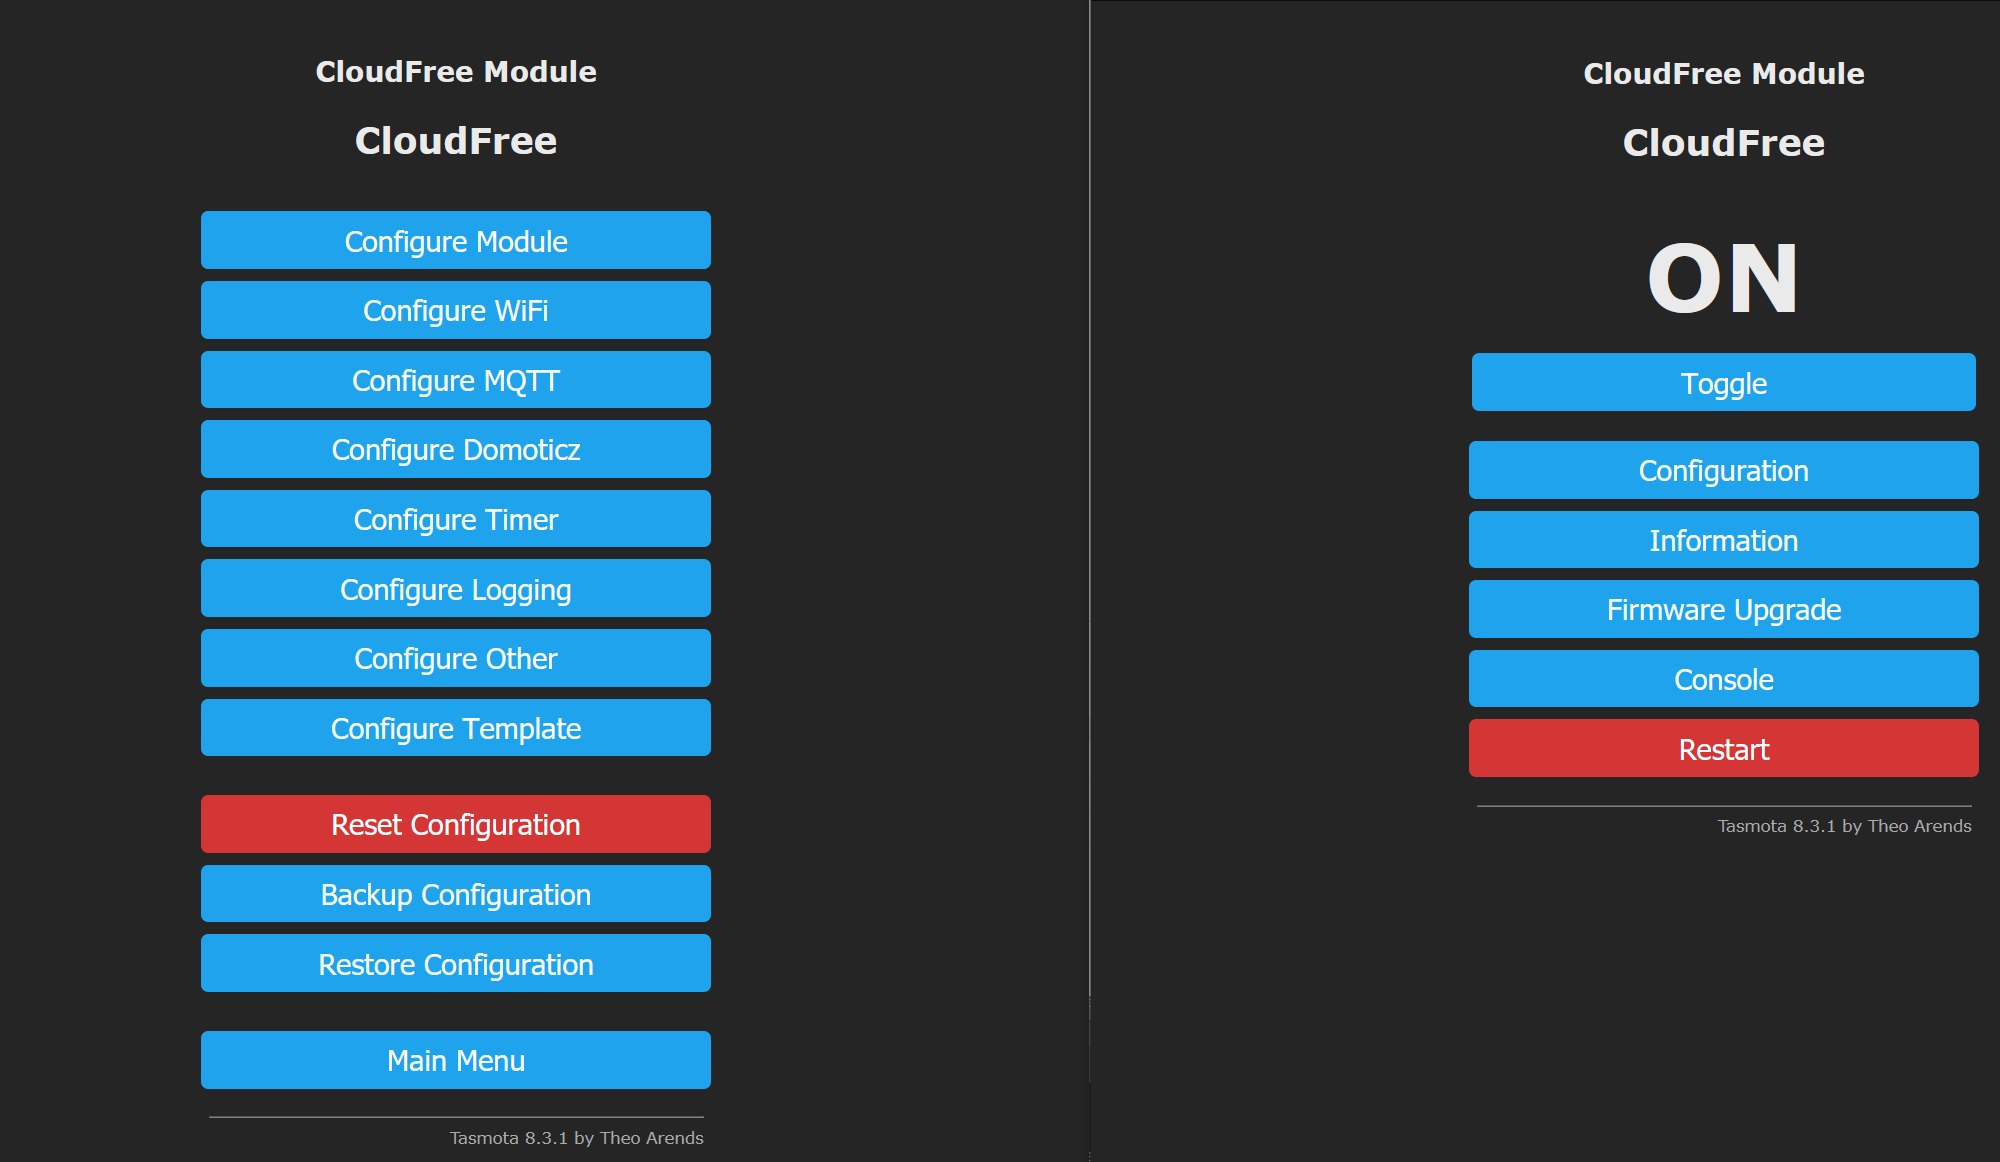
Now that we have our device configured, we can set up MQTT. Click on “Configuration” on the home page, and then “Configure MQTT” to bring up the configuration options for MQTT.
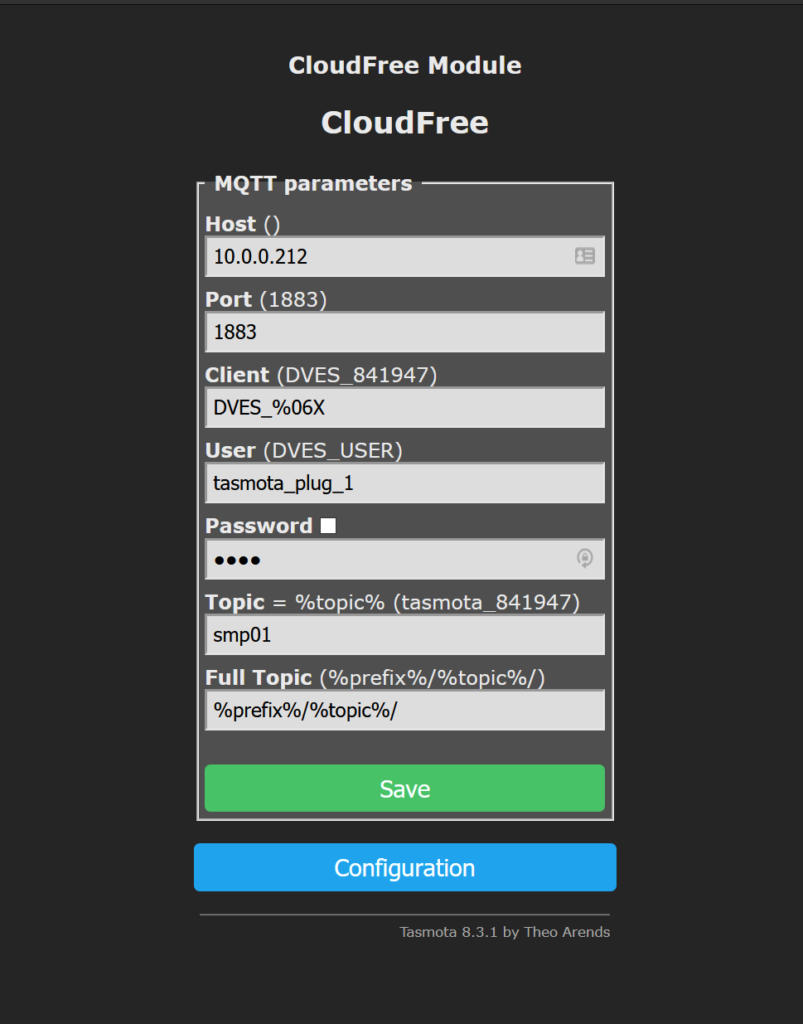
Enter your Home Assistant server IP address (or IP address of your MQTT broker if you are using one external to Home Assistant) under host. Enter the port under port, although it is likely the default port 1883 is already correct. If in doubt just leave it set to default.
Enter the user name and password for your MQTT broker. If you are using MQTT in Home Assistant, the username and password can be set in the broker configuration and then used in the Tasmota smart plug.
logins:
  - username: smart_plug_user
    password: smart_plug_password
anonymous: false
customize:
  active: false
  folder: mosquitto
certfile: fullchain.pem
keyfile: privkey.pem
require_certificate: false
Enter your device name with no spaces under topic. This is the name that MQTT will use when communicating with the broker. Now click save and allow Tasmota to reboot. Below shows an example MQTT setup.
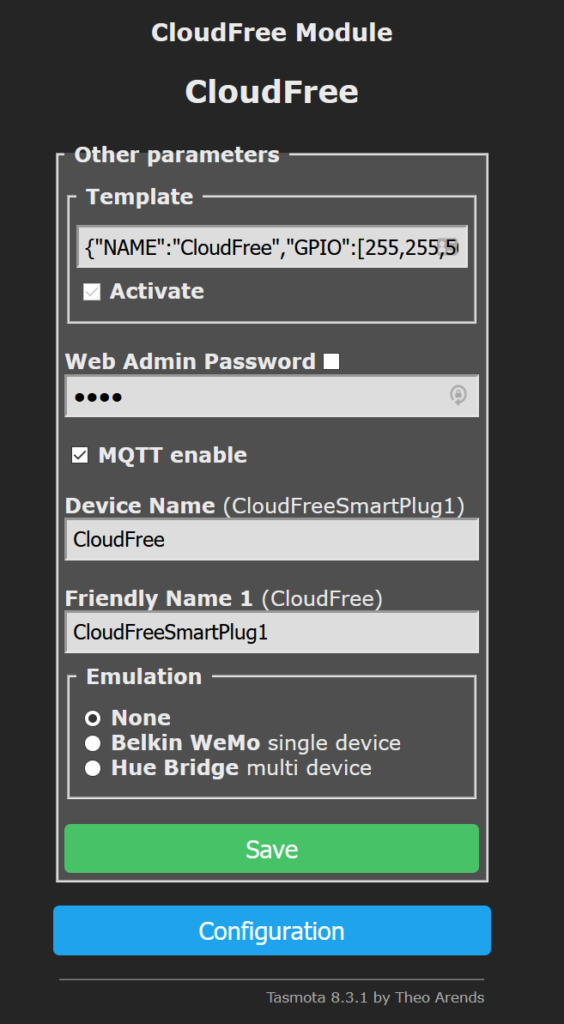
We will now give the smart plug a friendly name for home assistant to use with it. That can be done through the “Configure Other” option on the Configuration page. The Friendly Name can be any string. Click Save and allow Tasmota to reboot. Below shows a friendly name of “CloudFreeSmartPlug1” since I tend to use camelcase for my naming.
Once you are back to the main menu, we need to go to the Tasmota console, so go ahead and click console. In order to turn on discovery mode so that Home Assistant can auto discover our device, we must run one command. Simply enter the following command in the Tasmota console.
SetOption19 on
After this is turned on, you should see a large amount of output in the console window in the browser as the plug auto-negotiates with home assistant.
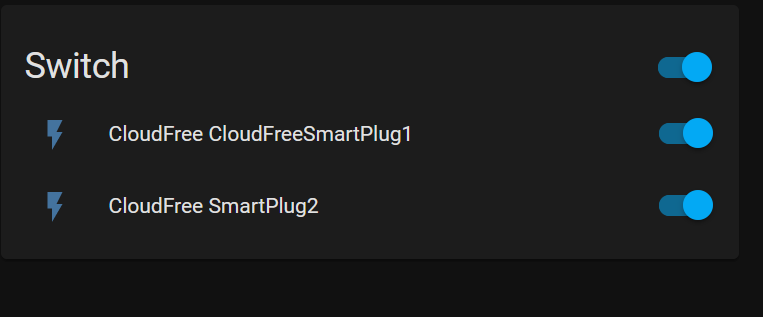
We now have a functioning Tasmota smart plug in home assistant. Plug in a fan or some lights and try turning things on and off through the Home Assistant UI. We can also see the friendly names shown in home assistant. Since these were setup without any goal in mind, I don’t have very meaningful friendly names on the smart plugs, but this is easy enough to change.