
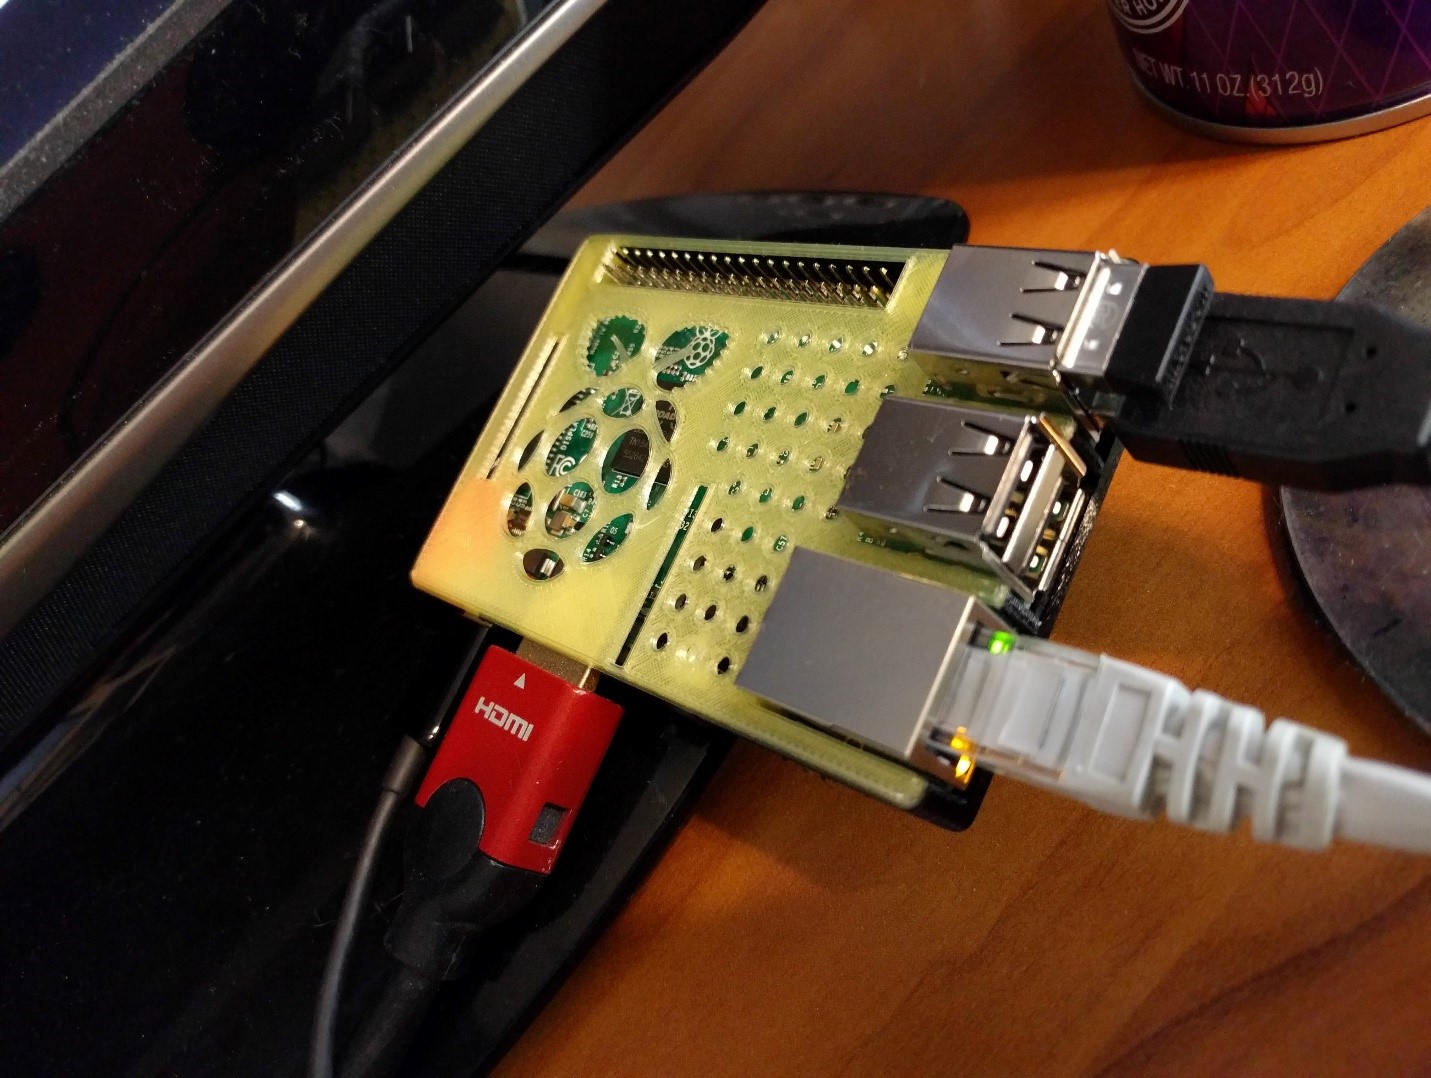
Raspberry Pis are neat little computers that can be placed just about anywhere assuming there is power and network connectivity nearby. These were made even more convenient with the addition of built in Wi-Fi on the Raspberry Pi 3. One application of these small devices is for home security, as a small motion sensing webcam that can record 24/7, or only when there is motion detected.
There are ways to build up your own system using the basic raspbian distribution and various software packages, or you can use a custom built operating system for this purpose, MotionEyeOS.
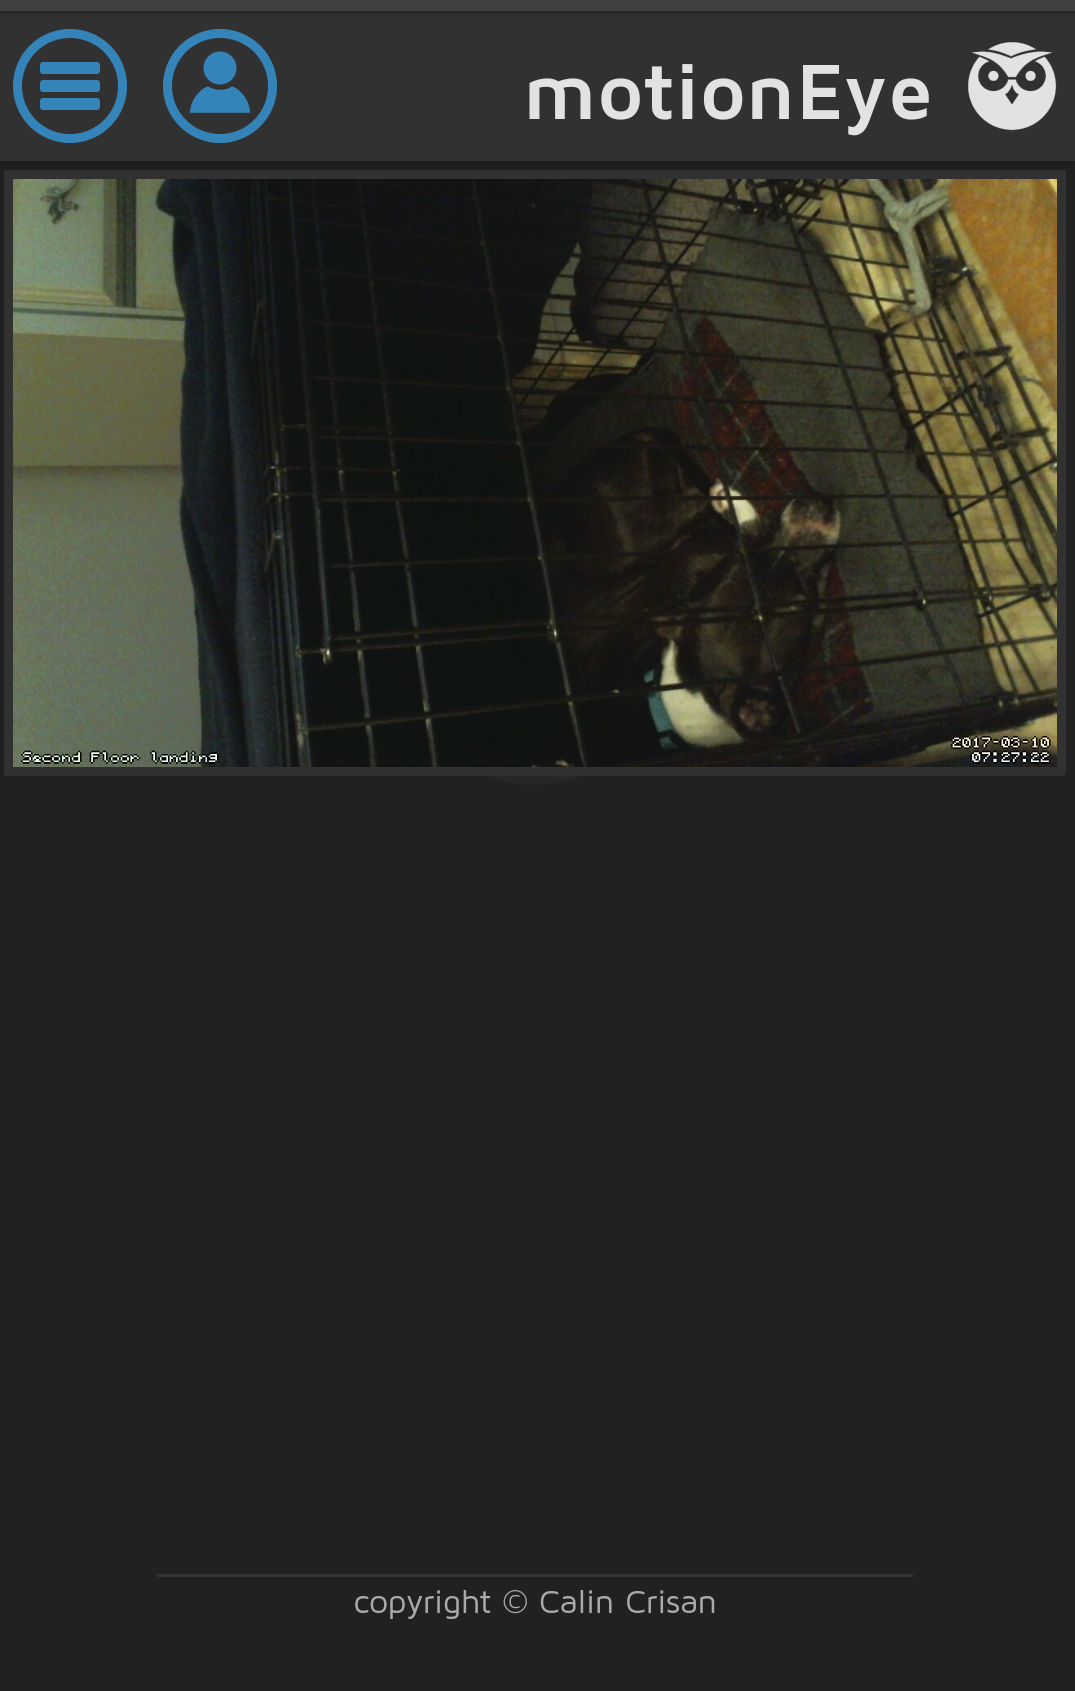
MotionEyeOS has everything needed to run a security camera system, or simply a remote webcam monitoring system. This will cover setting up a camera in this tutorial for basic recording and monitoring. This will let us spy on our dog while away at work.
Getting Started
- You will need a Raspberry Pi
- Compatible Webcam or Pi Cam
- SD or Micro SD card for the Pi (larger is better if you plan on storing the images/videos on it)
- MotionEyeOS Image for the Pi (https://github.com/ccrisan/motioneyeos/releases)
- Make sure to download the correct version for your Pi
Installation
This will cover the process for installing the image to the SD card for windows. There are also guides for Mac and Linux available from the Raspberry Pi foundation here. https://www.raspberrypi.org/documentation/installation/installing-images/README.md
- Install Win32 Disk Imager
- Start the application

- Click the folder icon and navigate to your disk MotionEyeOS disk image
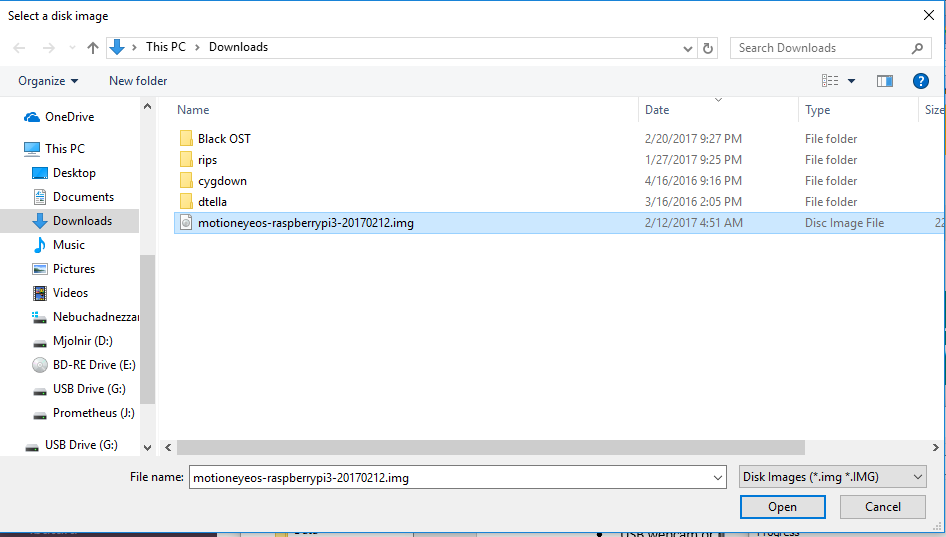
- Ensure the Device listed is the SD card you want to format with the image, in this case, it is the G:\ Drive
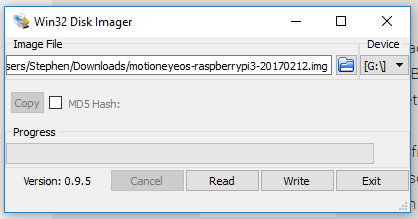
- Finally, hit the write button, and the image will be written to the SD card, which is all that’s needed to install MotionEyeOS.
Configuration
- Hook the Pi up to a monitor and a network connection and power it up.
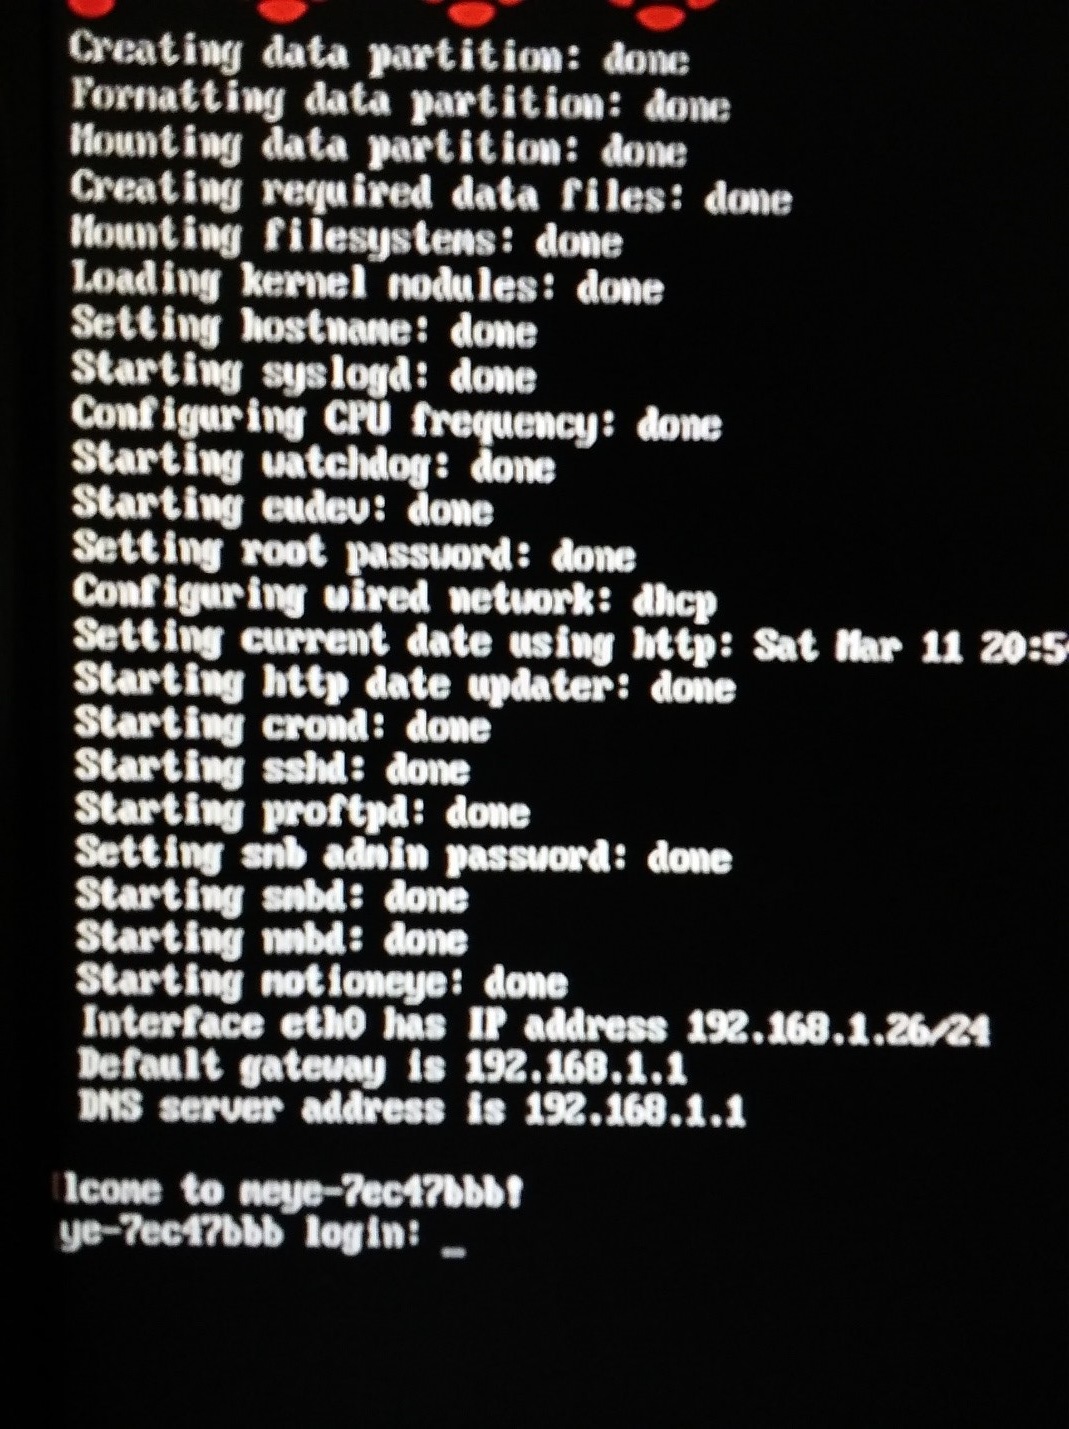
- Once the Pi is done booting, it will show a login prompt, above this prompt is network information about the pi, including the IP address, in this case it is 192.168.1.26. This will be needed to access the WebUI of MotionEyeOS.
- After finding the IP address, navigate to it in your web browser of choice.

- To login, enter the username, “admin” and hit Login. There is no password by default.
- Click on the menu button in the top left corner to pull up the options
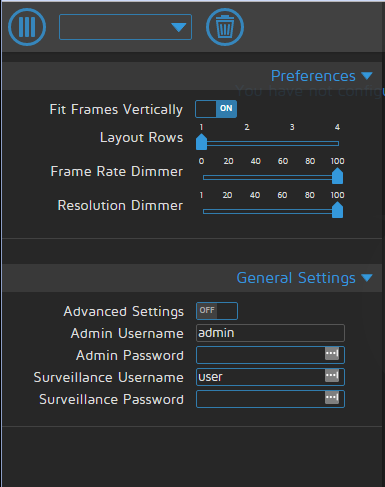
- Here you will be able to change the admin username and password, as well as the surveillance username and password. The surveillance user is a basic user who can view the webcams but not change settings.
- To add a camera, plug in a USB webcam or pi cam and hit the dropdown next to the menu button. From here you can select cameras that have been already setup, or you can add a camera.
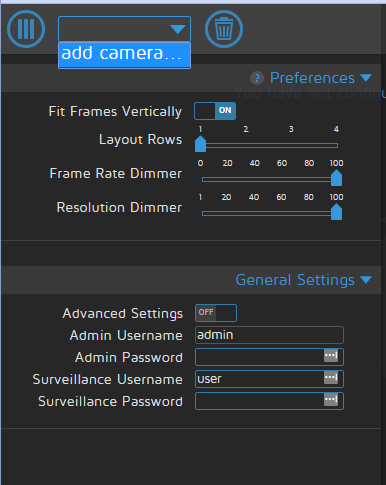
- The webcam should show up as a camera, if it does not, you may need to install drivers for it.

- After adding the webcam, you can navigate to it and its settings by going through the same dropdown
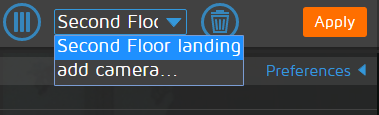
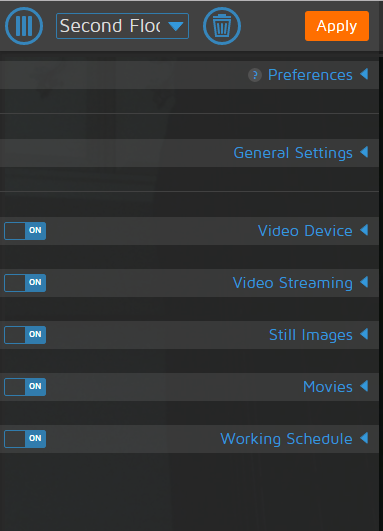
- Once on the camera page, you can access a vast amount of settings. These let you configure working hours, motion sensing, save data locations for any videos or images, and more. If more advanced settings are needed, there is an option under General Settings to enable the advanced settings. Once settings have been modified, click the apply button in the top right corner of the settings pane to enable them.
- Below are screenshots of the system in action
By default, SSH and FTP are enabled on MotionEyeOS, so if you want to add services or install drivers to it, you can do so remotely. This also allows you to move any security footage off the pi if it is being used to store the footage.