
Recently I have ended up with 2 Z-Wave devices in my home, and while the devices work just fine without it enabled, I wanted to mess around with them in home assistant. I’ve seen lots of information on Z-Wave and Zigbee devices and sensors and had been looking at getting some anyway, so I used this as a reason to jump in.
Since I run Home Assistant on a VM via Proxmox, my setup will end up being a bit different than the usual “just plug in the USB Z-Wave controller and go” for those running Home Assistant on a Raspberry Pi or NUC.
Hardware
I did since research on various zwave USB dongles and ended up in the home assistant documentation. From there, I decided on the Aeotec Zstick gen 5. This seemed to have the greatest compatibility with both devices and gone assistant itself. I also looked into alternative hubs that integrated zwave that I might be able to connect to HASS however these seemed to add more complexity than the USB stick even taking into account the virtual machine status of my home assistant box.
Proxmox Setup
Setting this up starts with getting the hardware into the VM. There are two ways to do this, passing a USB controller into the VM so all devices on it are available in the VM, or to pass in the USB device alone so only that device is available to the VM (Note: you can always add more USB devices later, it’s just a one by one process). I decided to just pass in this one device as it seemed to be the most straight forward and simple process to do.
To start out this process, we plug the USB device into any port on the Proxmox server. Once it’s plugged in, we find it in the operating system using lsusb.
root@pve:~# lsusb
Bus 003 Device 003: ID 051d:0002 American Power Conversion Uninterruptible Power Supply
Bus 003 Device 002: ID 8087:0024 Intel Corp. Integrated Rate Matching Hub
Bus 003 Device 001: ID 1d6b:0002 Linux Foundation 2.0 root hub
Bus 004 Device 001: ID 1d6b:0003 Linux Foundation 3.0 root hub
Bus 002 Device 002: ID 0658:0200 Sigma Designs, Inc. Aeotec Z-Stick Gen5 (ZW090) - UZB
Bus 002 Device 001: ID 1d6b:0002 Linux Foundation 2.0 root hub
Bus 001 Device 002: ID 8087:0024 Intel Corp. Integrated Rate Matching Hub
Bus 001 Device 001: ID 1d6b:0002 Linux Foundation 2.0 root hub
The device I’m using is the Aeotec Zstick, so I’m going to use device ID 0658:0200 for my commands.
The command is generically shown below.
qm set <VM ID Number> -usb0 host=<USB ID Value>
Which when adding my ID and VM number, it becomes:
qm set 115 -usb0 host=0658:0200
After running this command, shutdown the VM and then start it back up. A reboot from the VM terminal isn’t enough as Proxmox needs to add the new hardware, so this requires a full shutdown followed by a boot up.
Once the VM was back up with the USB passed through, I saw a notification for new devices discovered, clicking through I saw this:
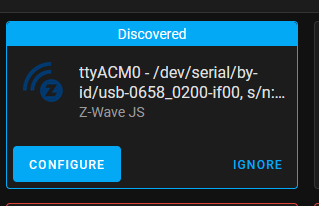
This proves that our USB pass-through worked as Home Assistant is seeing the new USB device. A second option would be to run ‘lsusb’ and see the new device from the terminal of the VM itself.
Home Assistant Setup
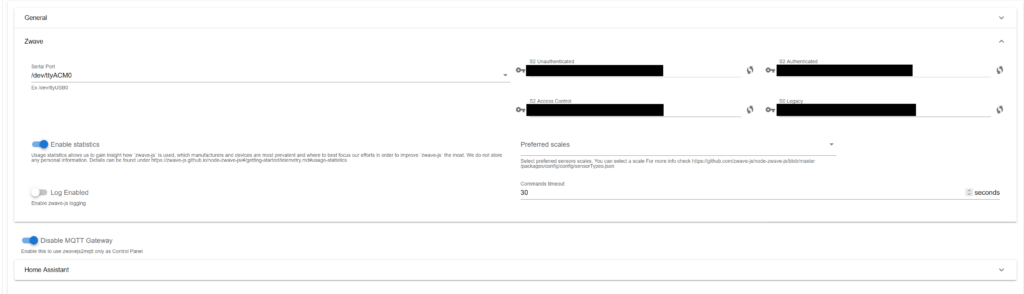
Next up we have the home assistant side of things to setup. I decided to use Z-Wave JS 2 MQTT for my zwave integration. This comes bundled with a webui to make it easy to manage the zwave network and a few other features (while being built on zwavejs, the default integration from HASS).
- Go to the add-on store and add the Z-Wave JS to MQTT addon
- Start the add-on
- Click the “Open Web UI” button.
- Click the gear icon
- Expand the zwave options
- In the serial port dropdown, select the port that was shown earlier in the discover box: in my case, ttyACM0
- I just used the generate buttons to generate all the various tokens on the page and hit save
Getting Data into Home Assistant
Now to get the integration up so we can see the devices in home assistant. Go to the add on for Z-Wave JS to MQTT, see the Documentation tab and follow the instructions there. Below are what was provided to me (cut down to the portion remaining):
- Go to the Configuration panel and click “Integrations”.
- In the bottom left, click “+ Add Integration”.
- Select the “Z-Wave JS” integration from the list.
- A dialog box will show, asking to use the add-on:
- UNCHECK that box, it will install the official add-on.
- Again, the official add-on is recommended, so…
- In the next dialog it will ask for the server. Enter:
ws://a0d7b954-zwavejs2mqtt:3000(this will be unique to your install) - Confirm and done!
Adding Devices
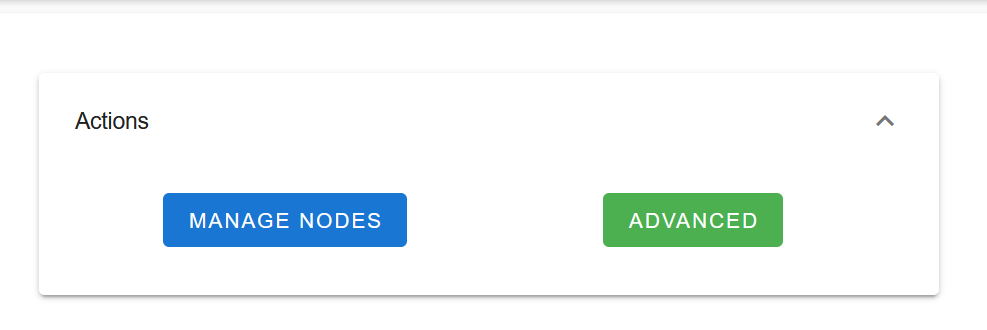
Adding devices to the zwave network is straight forward using the webui provided in the Z-Wave JS to MQTT package. From the main webui page we want to go to manage nodes.
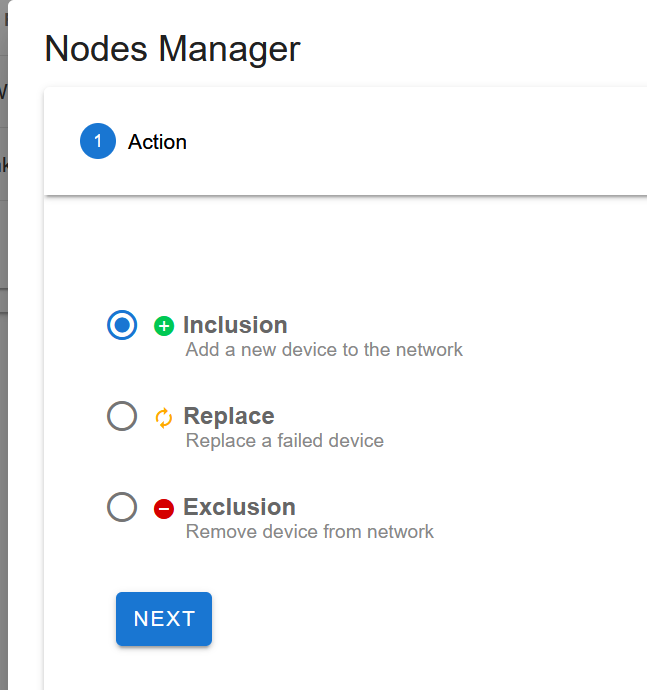
From the node Management main page, we want to run an inclusion to add our new node.
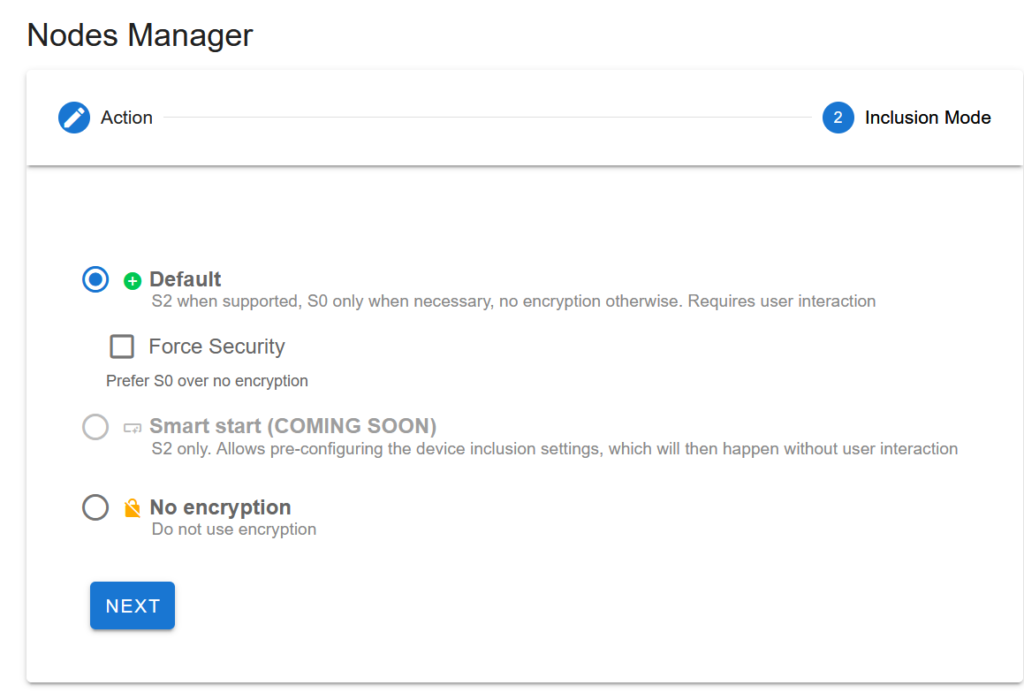
This gives us a few options on security for how the new node will communicate. The default option tries to use higher security, however will fall back on lower security if the end devices don’t support it. This is going to be what you probably want to use. I tried to force security with both of my devices, and neither worked with that option set.
Once we hit next here, the network will begin listening for new nodes. We just need to head on over to our zwave device and put it in inclusion mode for it to join up. The device manual will provide instructions for that side of things. Also make sure the devices are in range of your zwave USB dongle or other nodes on the network (sadly one device I have won’t be able to join without some additional nodes or range extenders).
Conclusion
The process was straight forward, though I did try to make it more complicated on myself by not reading the Z-Wave JS to MQTT documentation for getting things setup. Once I had it up and started adding devices, home assistant would detect them and start giving me controls. This was very cool to start adding these devices and start expanding home assistants capabilities. I plan on adding other sensors, so the network will grow far enough for that isolated node to eventually join the network, it just won’t be used on day 1.