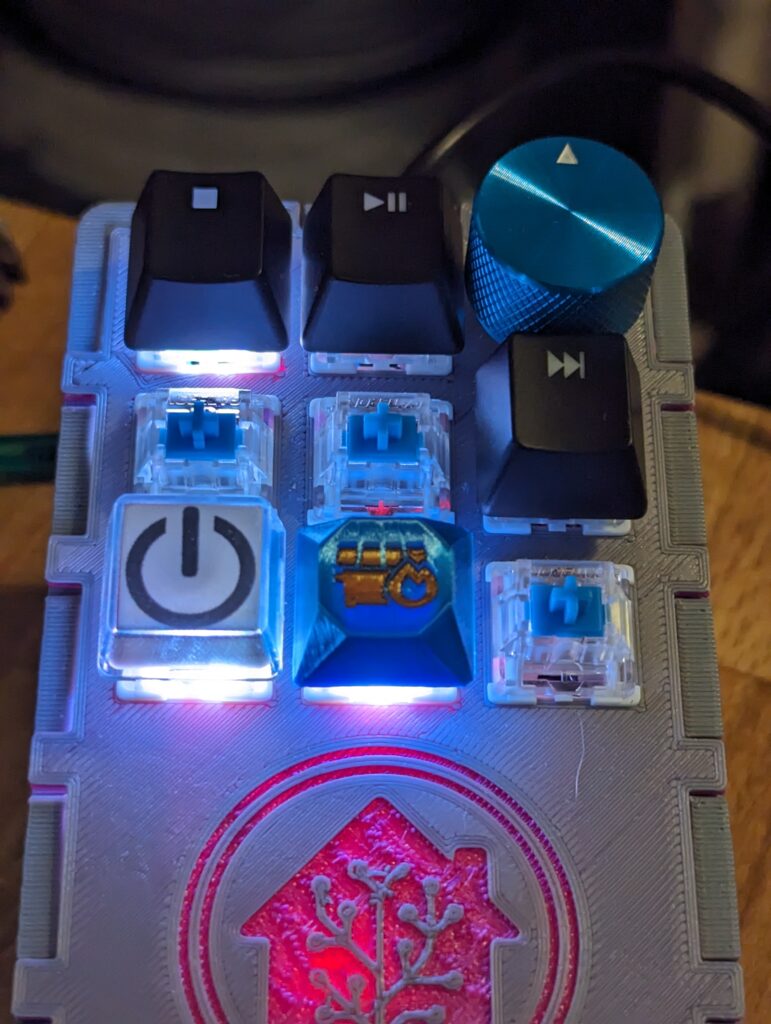
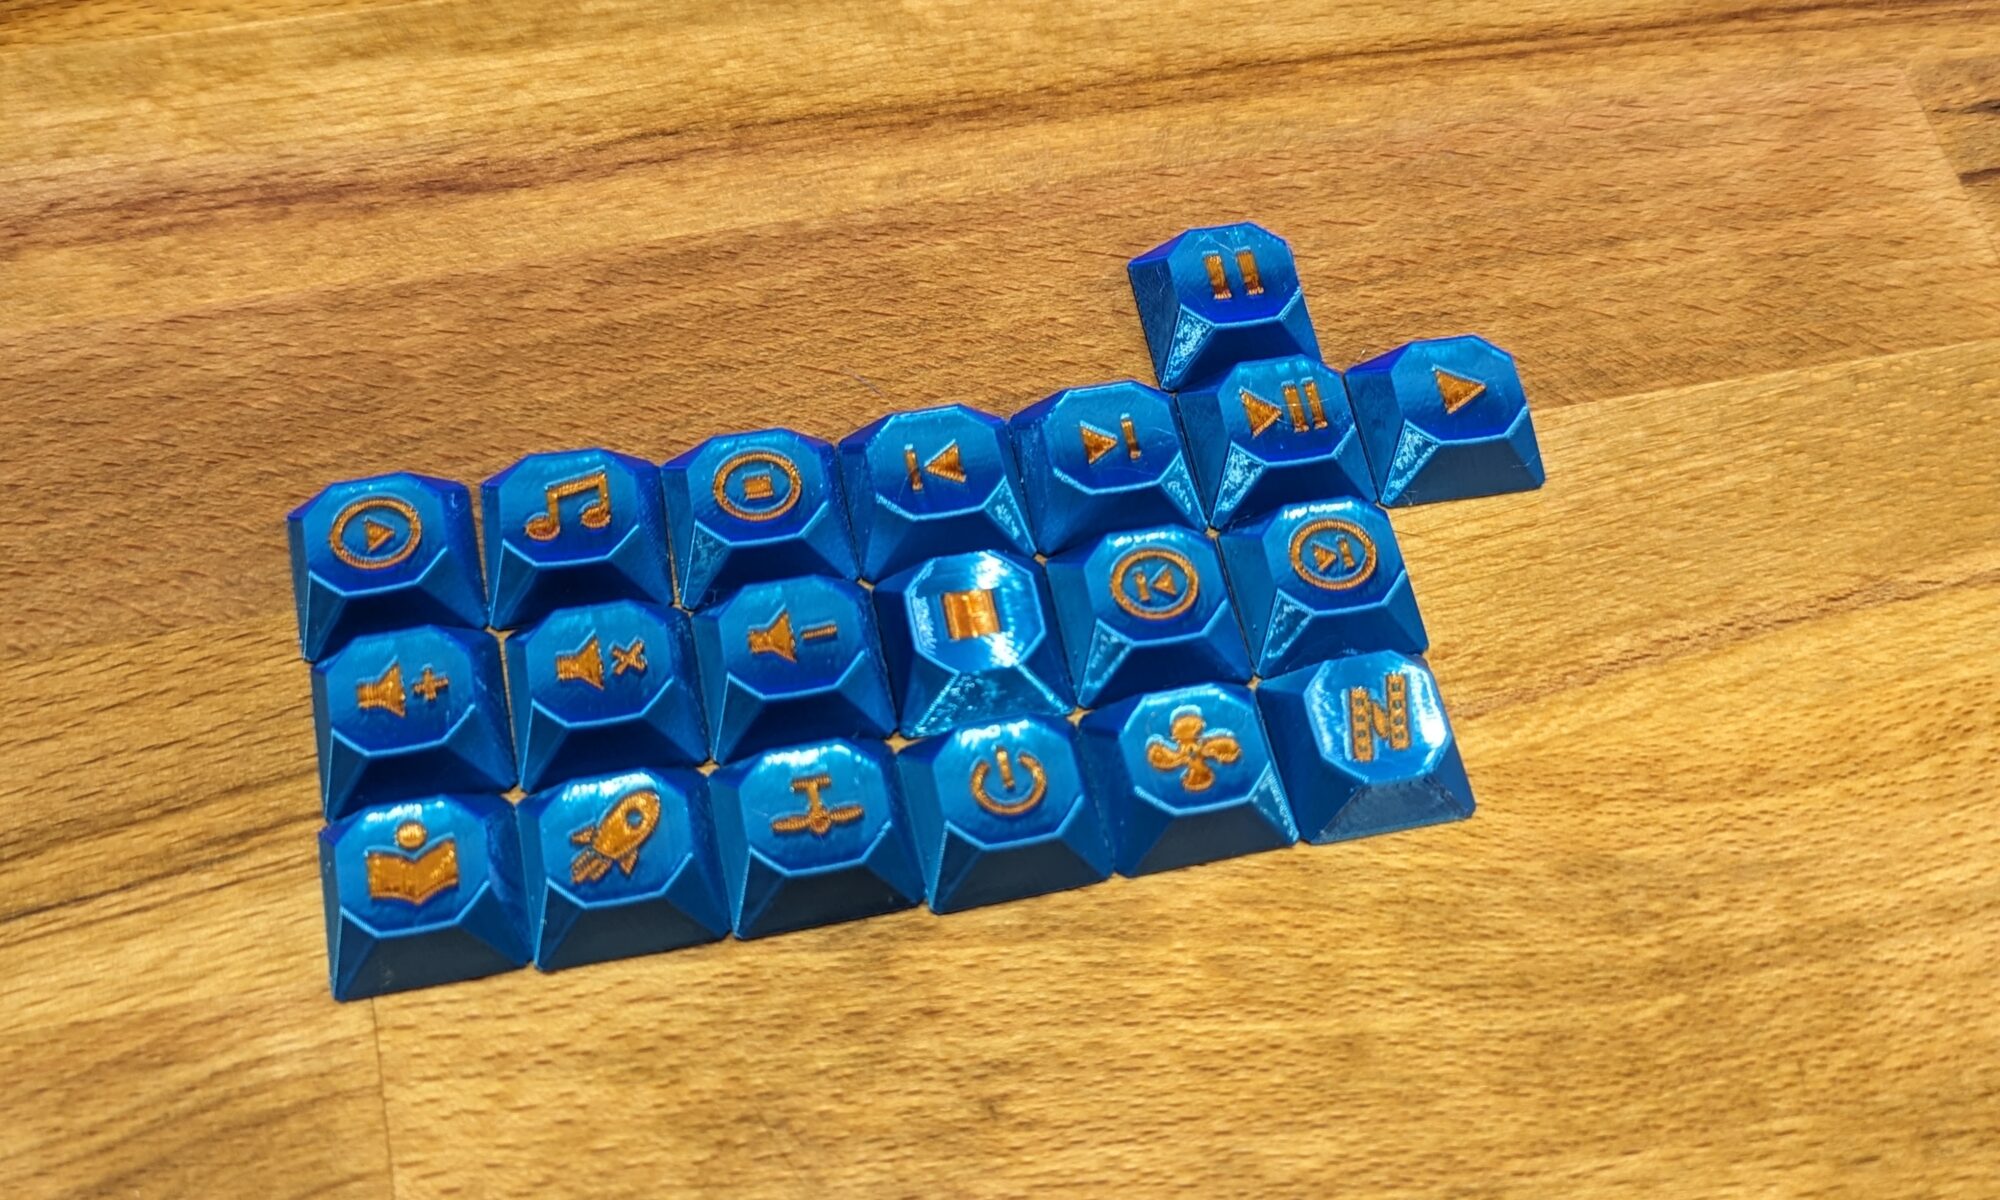
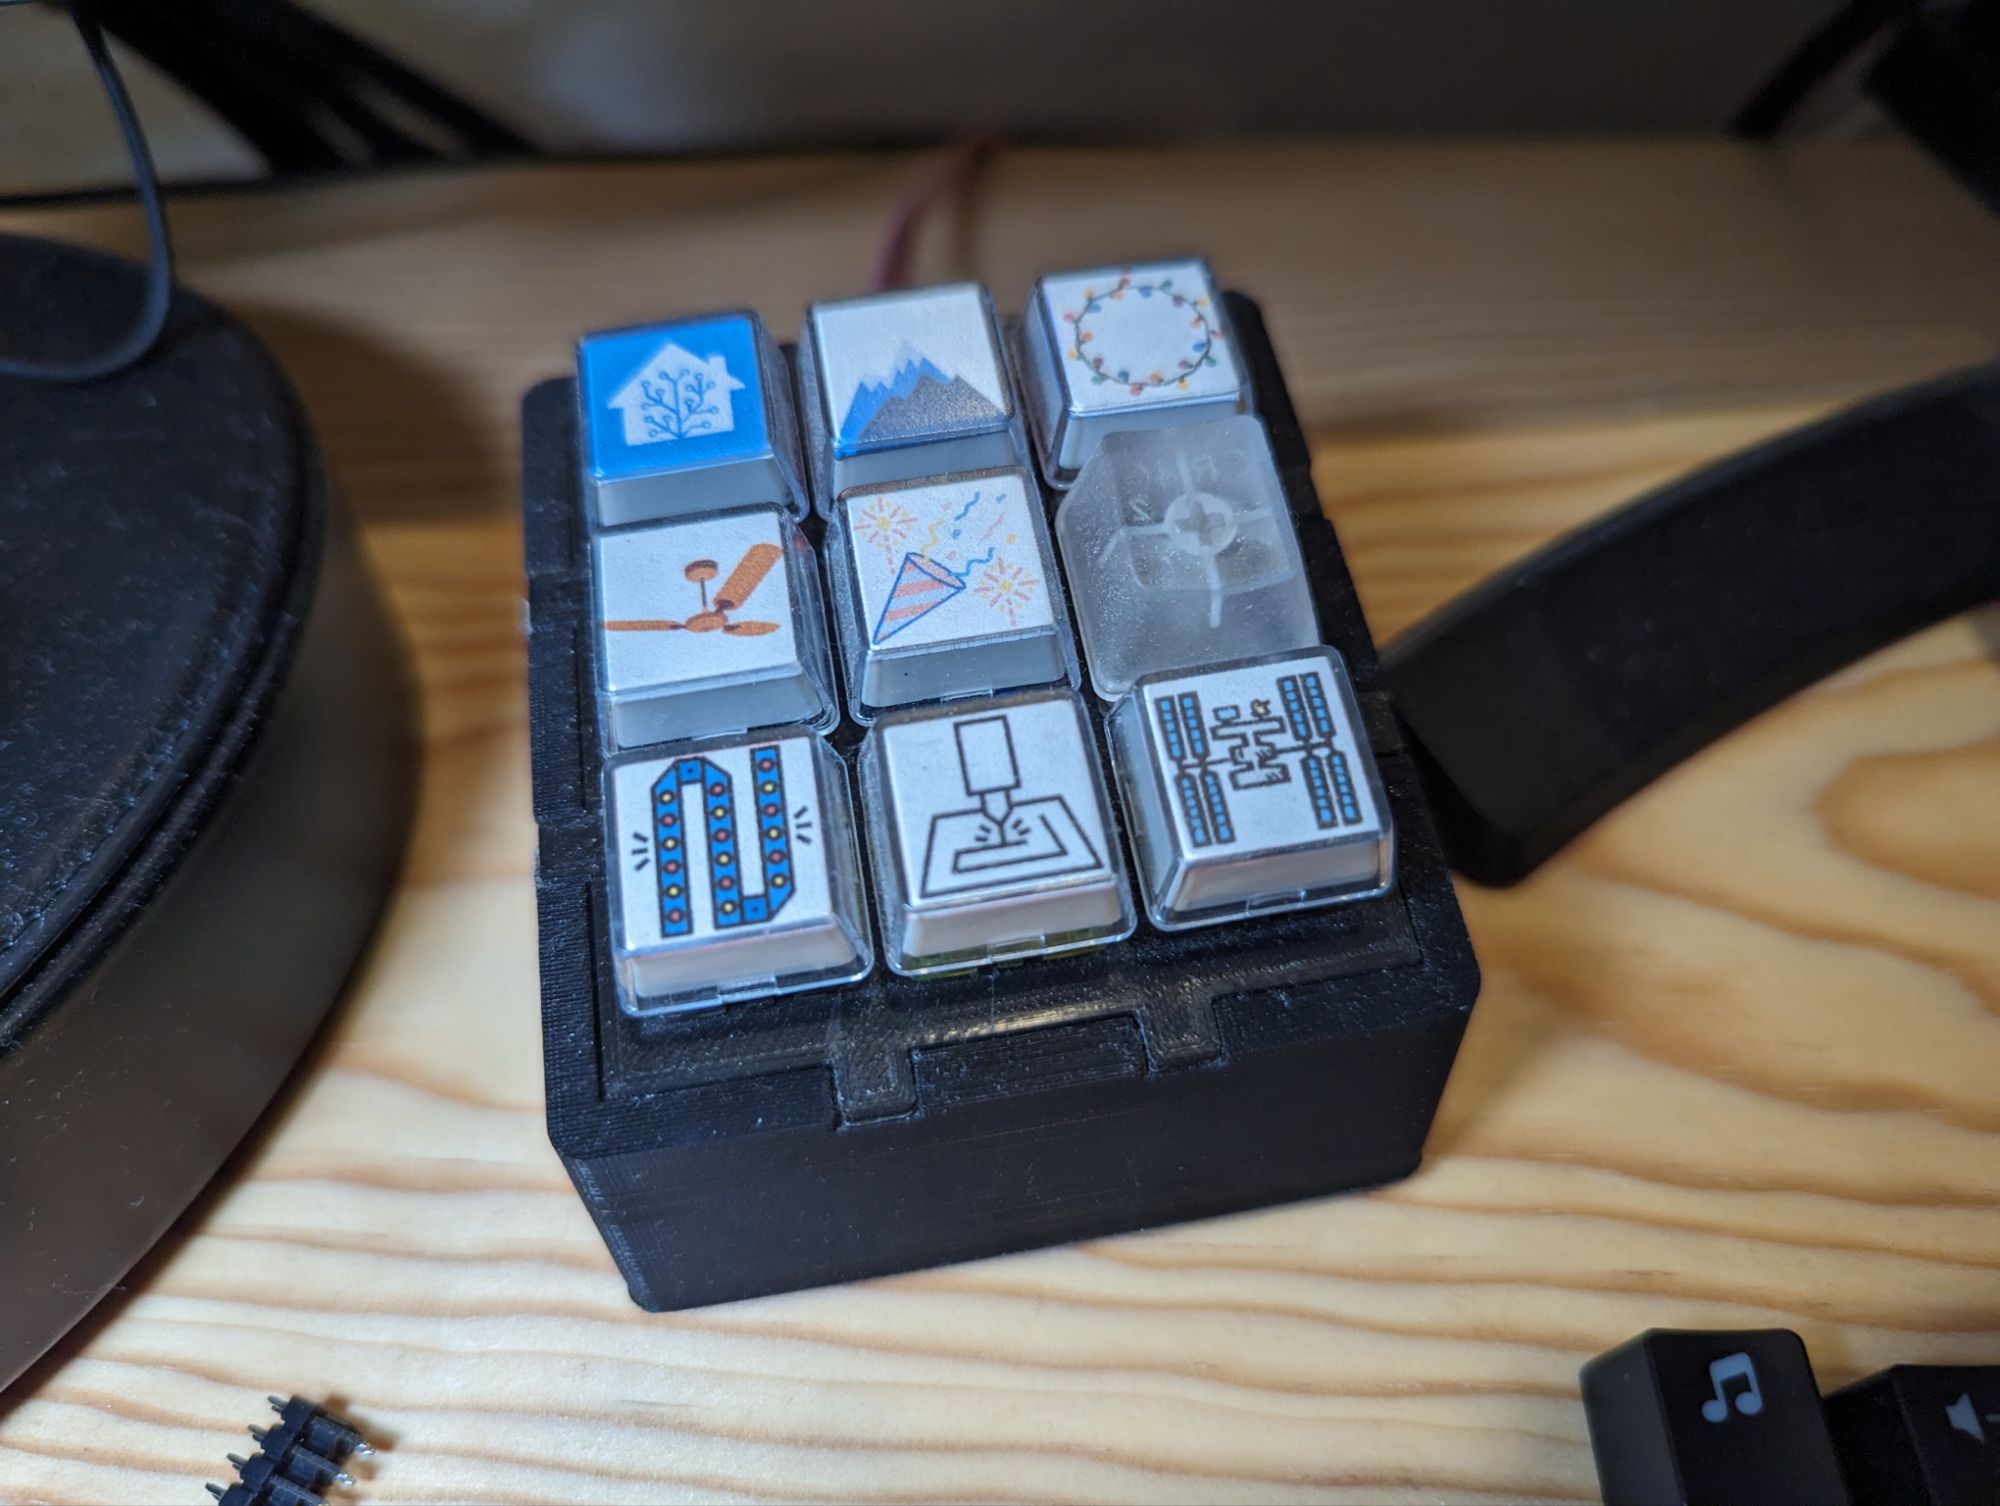
So far I’ve been using relegendable key caps for my macro pads and ESP Decks, but I’ve recently found another way. There is an open source keycap generator that can create multi color key caps that can be printed on my Bambu printers. There are a lot of pre-generated caps included with the repository, but I’d like to be able to generate my own custom ones too.
3d Printed Keycap Options
I found a number of 3d printable keycap sets.
- KLP Lame Keycaps
- Riskable Complete Cherry MX Stem Gem Profile Keycap Set
- Craig Andrews DES Profile MX Keycaps
- Key v2 OpenSCAD library
Craig Andrews’ keycap set has no legends, just the various row sizes and u sizes for keycaps. The KLP Lame keycaps don’t have cool characters or multi color options in general, so maybe not as cool but still pretty cool. I was intrigued by the keyv2 OpenSCAD software, but it didn’t seem quite as capable as the one I picked in the end (lack of multi color support was the big missing piece).
The one that caught my eye though was generated by an open source keycap generator. This intrigued me as I can use it to generate my own caps, with whatever text or icons I want to. This one ended up being it’s own adventure as I struggled to run the provided scripts successfully.
I decided to go with the keycap playground based keycaps as I could make use of the openscad based generator to customize my own keycaps.
Testing and the Included Caps
I first started out by printing out a number of the keycaps generated by the creator of the scripts. Since I planned on using these on my macropads, I picked a number of icon keycaps to print out instead of lettered keycaps.
We’ll start by pulling all the key caps into Bambu Studio and opening the objects menu. This is a part of the left hand side bar.

Once the objects listing is open, we’ll go to the assembly view. In this view we can select filament colors for each individual object being printed.

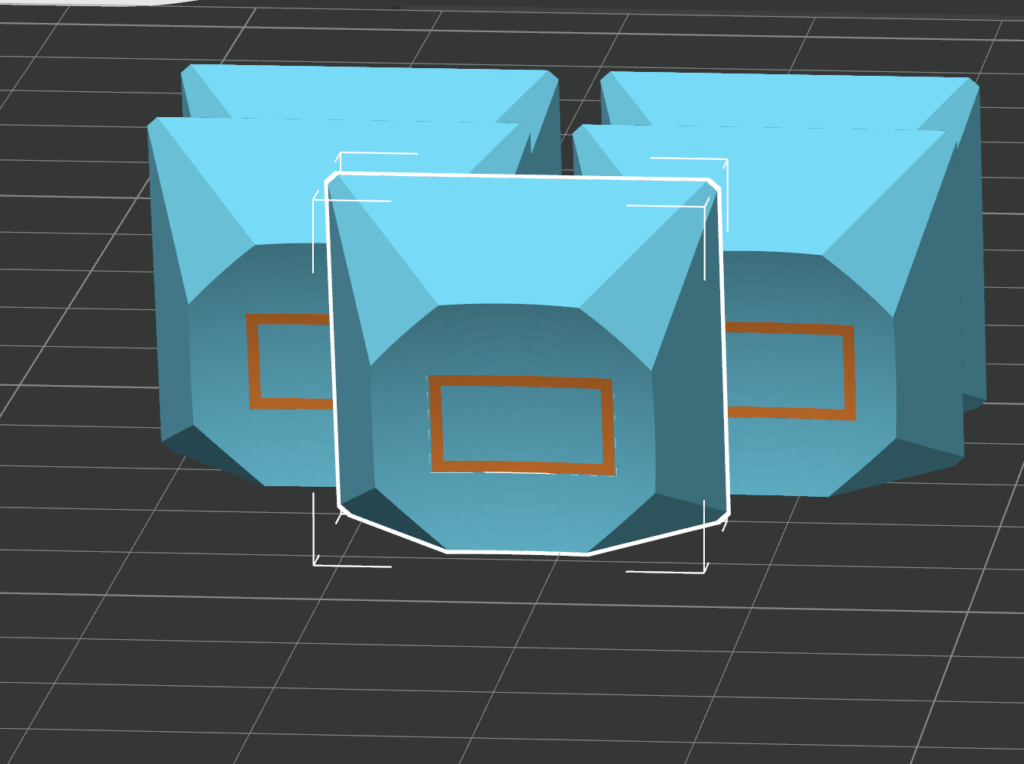
Once in the view, all the keycaps will be shown in a big blob (even if arranged nicely on the build plate). This is fine since we can use the object interface to select which parts of the caps we want which colors. In these keycaps, the [1,1,1,1] object is the outer shell and main body of the keycap. The other object in there is the legend of the keycap.
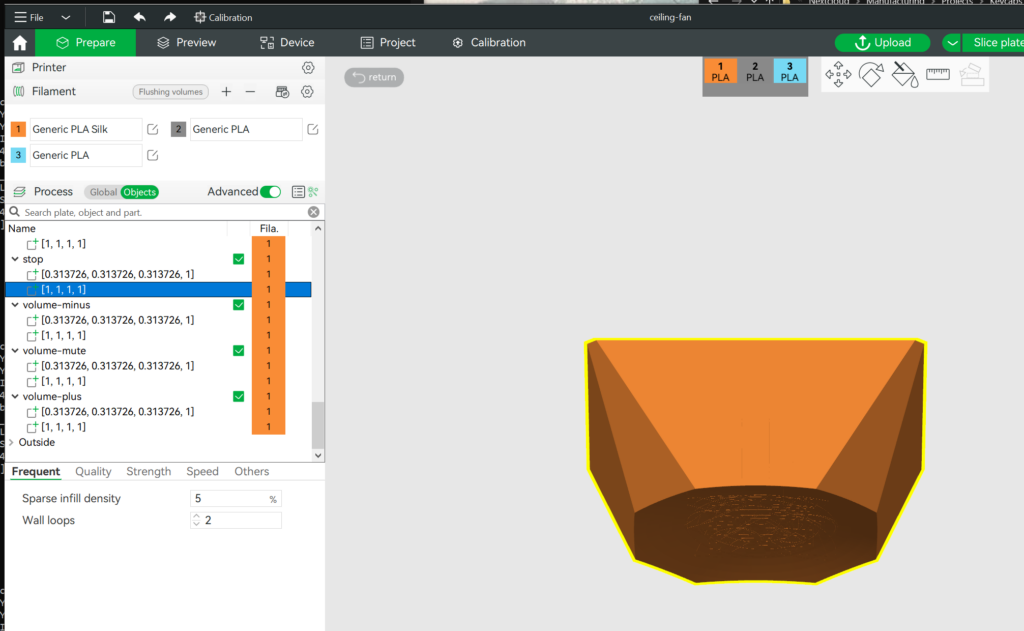
In my case, I changed all the shells to blue and left the legends orange. After this we can clock the return button in the upper left corner (just outside the side pane with the object list) to get back to our build plate where we’ll see the keycap colors in full now. Or we will once they’re arranged. Just right click on the build plate and hit arrange and let Bambu Studio do the work for you.

Now we can get an initial look at our legend and cap colors.
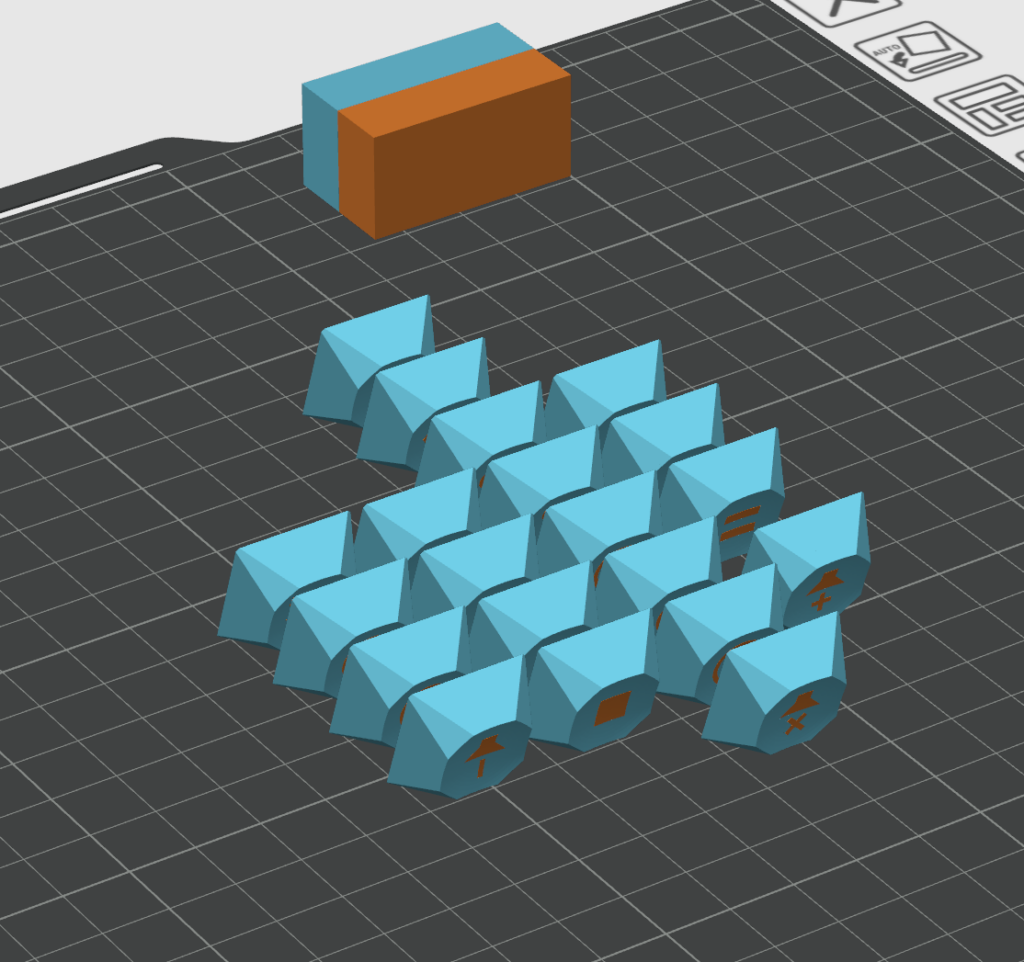
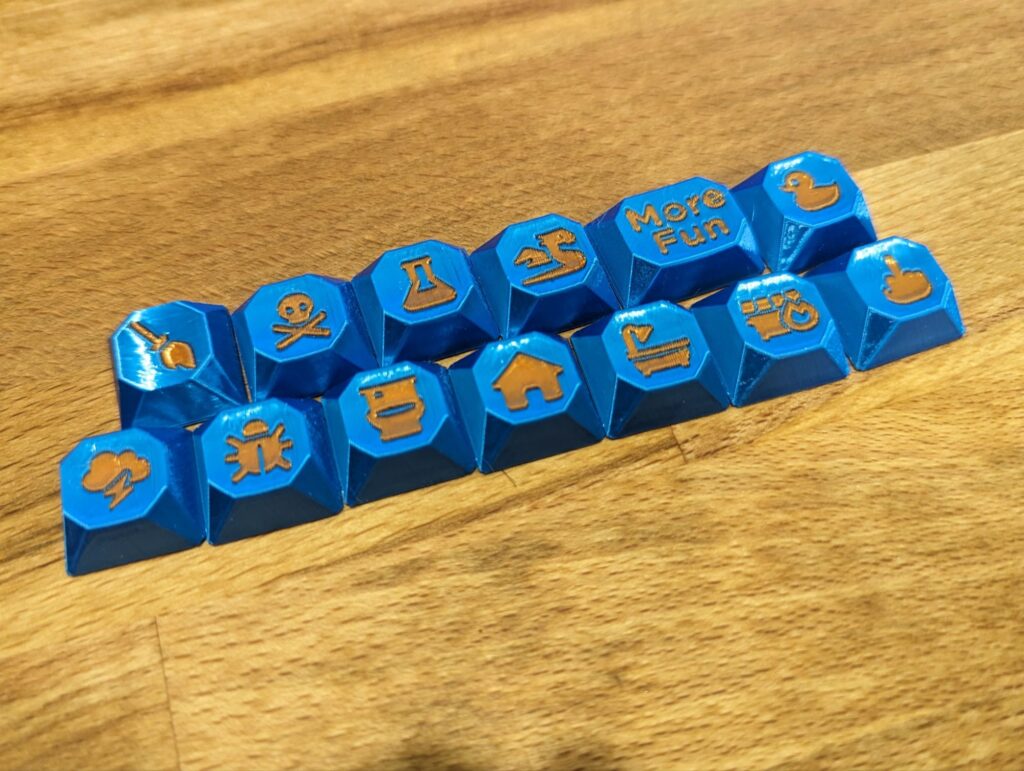
I used a silky blue and copper I had around from some previous work for my demo prints. I think the silky’s look great in some instances, but in this case, I think a matte filament would look better at least for the legend in the keycap, if not for the whole thing.
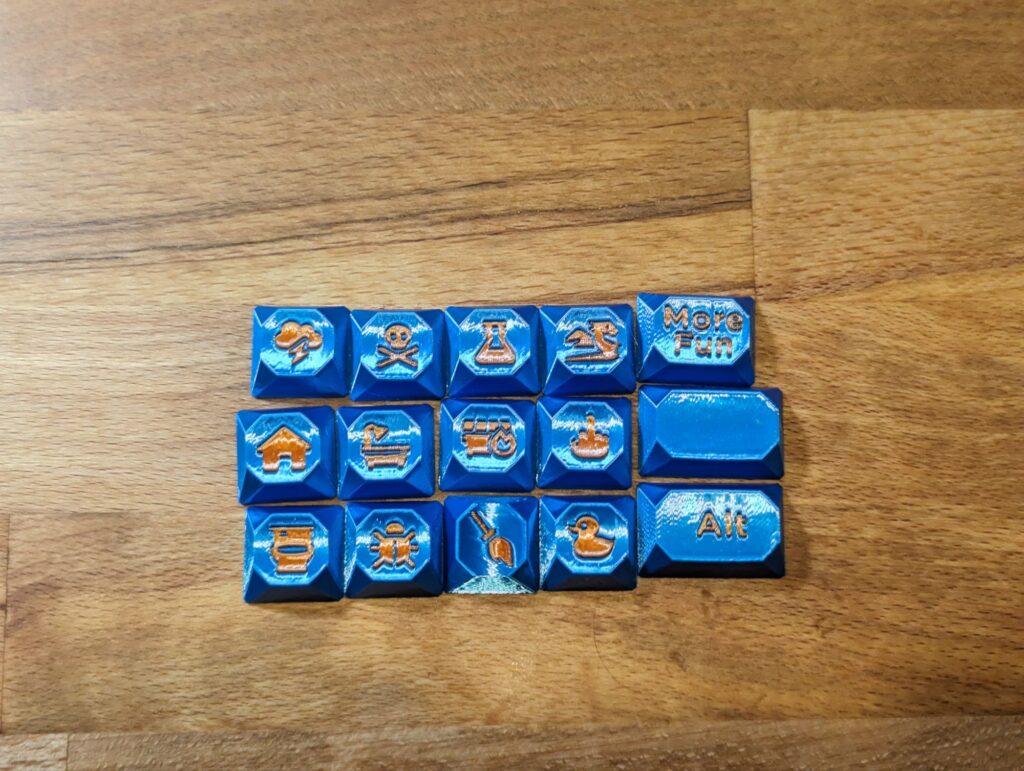
Even so, I’m happy with the results and will absolutely start using them for my ESP Deck and NFC Deck macro pads. They’ll give my builds a bit more personality.
Setting up Keycap Playground
There are a few dependencies needed to run the keycap playground software (and a few more to use the automated scripts with it).
Dependencies:
Install lib3mf-dev from the standard apt repos:
apt-get install lib3mf-dev
Colorscad can be retrieved from GitHub:
git clone https://github.com/jschobben/colorscad.git
Building 3mfmerge is done from the colorscad repository. Just start from the 3mfmerge folder in the repo and run the following commands:
mkdir build
cd build
cmake .. -DLIB3MF_TESTS=OFF
cmake --build .
Font Installation
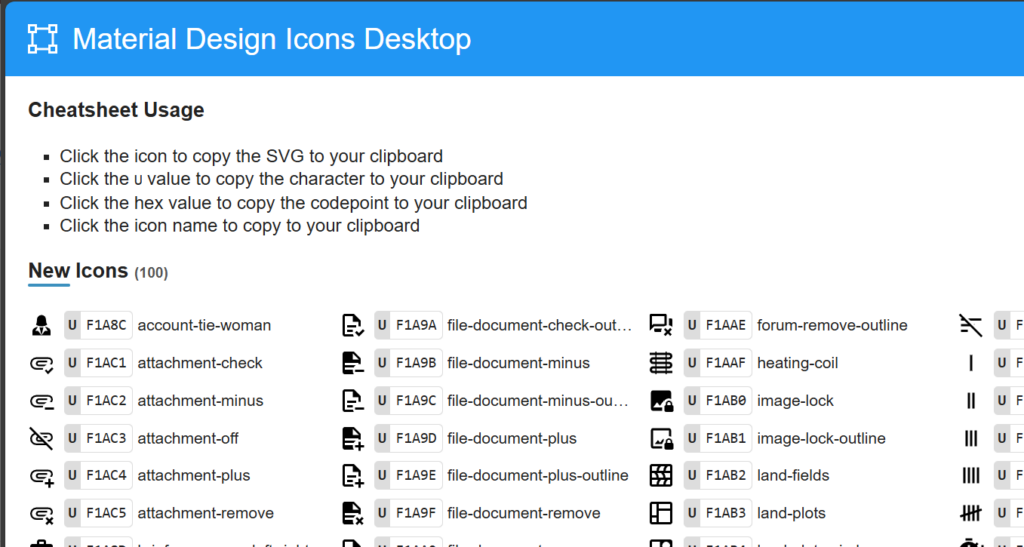
I’m running things on Ubuntu through WSL. For my ubuntu install, I downloaded the material design desktop ttf font from Templarian on GitHub.
Installing the font itself is pretty simple. Copy the font to /usr/local/share/fonts or a subfolder (such as /usr/local/share/fonts/TTF) and then run sudo fc-cache -fv. There are some graphical programs you can install to make this easier, but I didn’t need to use them. The Ubuntu wiki page on Fonts here may be of help too.
Now do note the font name is not exactly the same as in the gem_full.py script, so we’ll need to edit the script to use the desktop font’s name instead (from “Material Design Icons” to “Material Design Icons Desktop”).
Keycap Playground Tweaks
Let’s go over the entire set of file tweaks so far that we need to make
While the key cap generator does work well once you get it working, it does take a few modifications to run depending on your setup.
- The -P argument is no longer in colorscad, so remove it to from the keycap.py script.The –enable=fast-csg isn’t in stable openscad builds (2021 builds and earlier) yet, but it is in 2022 builds and later. If your OpenSCAD version is 2021 or older, remove the flag from keycap.py, otherwise leave it in.
- The –enable=fast-csg isn’t in stable openscad builds (2021 builds and earlier) yet, but it is in 2022 builds and later. If your OpenSCAD version is 2021 or older, remove the flag from keycap.py, otherwise leave it in.
- The stem type is defaulted to ‘alp’ which is not a stem type that I have key switches for. This can be replaced with ‘box_cherry’ to get the more common output.
- Change the font name in gem_full.py script to use the desktop font’s name instead (from “Material Design Icons” to “Material Design Icons Desktop”).
Running the Python Generation Script
Generates a whole keyboard’s worth of keycaps (and a few extras). Best way
to use this script is from within the keycap_playground directory.
$ ./scripts/gem_full.py --out /tmp/output_dir
I did notice that the .3mf files generated are a bit different from the ones generated by it from other people, mine aren’t able to be loaded in microsoft 3d builder. There are no problems though loading them into Bambu Studio.

The keycaps I generated also have different object names in bambu studio than the ones provided in the sample output.

Bambu studio at least seems to handle them for coloring the legends and slicing without any issues. Other than this looking a bit funny, it doesn’t affect the output.
Manipulating Unicode
I plan on making a number of custom icon keycaps different from the defaults provided in the script. I also haven’t used Unicode much in the past, so let’s cover using it in a few different places.
Libre Office Writer
I decided to create all the icons I wanted in libre office writer, then copy paste them out into my scripts in order to know my Unicode was correct. To insert a Unicode character into it is easy enough, type the character code in to the document and hit ALT-X afterwards. Libre office will then replace the code with the character.
F0460 Alt X
Sublime Text
Using Sublime text to insert Unicode into files is not much different than using libre office. Instead of typing the hex followed by a key combo in libre office, it’s a key combo followed by the hex and a space for sublime text.
Ctrl-Alt-Shift-U + hex + Space
With that you have the Unicode character inserted into your text document.
When I started out updating the script for some custom keycaps, I inserted the characters into libre office, then copied them into the script via notepad++, though I ended up installing sublime text and just inserted them directly using that text editor instead to be a bit more efficient. I could also copy them out of the font’s helper html and into the text document which helped too.
Debugging Stems
One of these things is not like the rest, if you generate some keycaps and notice the stems are wrong, it’s probably due to an odd default in the software to do “alp” stems. This can be rectified by just changing the stem type to “box_cherry”and regenerating the keycaps.


Debugging Fonts
When the script failed to generate valid legends on the keycaps, I decided to try out the web font instead of the desktop font. This however didn’t change the output. In this case, I didn’t even get the “invalid character” box as the legend on my keycap, so something else must be going on.
Figuring out what’s going wrong with the fonts can be a little more tedious. I ran into a few problems with my fonts that manifested in slightly different ways. Square boxes instead of characters like below meant the font was missing from my system entirely.
If nothing was generated in the legends, no box, character, etc. That meant the character was invalid in the font that was being used. In my case, there was quite the rabbit hole of figuring out why the characters I was giving it were invalid even after installing the right fonts.
Still Failing to Generate a Keycap with Icon
I ended up going down quite the rabbit hole with this one. I ran into issues with being able to generate an MDI keycap despite multiple attempts and modifications etc. After I installed my font, I didn’t even get the error box anymore. All I got was an empty keycap with no legend at all.
Create a separate .3mf file for each color
1/2 [1, 1, 1, 1] Starting
2/2 [0.313726, 0.313726, 0.313726, 1] Starting
2/2 [0.313726, 0.313726, 0.313726, 1] Geometries in cache: 211
2/2 [0.313726, 0.313726, 0.313726, 1] Geometry cache size in bytes: 37913760
2/2 [0.313726, 0.313726, 0.313726, 1] CGAL Polyhedrons in cache: 7
2/2 [0.313726, 0.313726, 0.313726, 1] CGAL cache size in bytes: 55510320
2/2 [0.313726, 0.313726, 0.313726, 1] Total rendering time: 0:00:31.248
2/2 [0.313726, 0.313726, 0.313726, 1] Current top level object is empty.
2/2 [0.313726, 0.313726, 0.313726, 1] Warning: output is empty, removing it!
2/2 [0.313726, 0.313726, 0.313726, 1] rm: cannot remove './tmp.AODdBP/[0.313726, 0.313726, 0.313726, 1].3mf': No such file or directory
However I could generate lettered keycaps without any issues. I was able to generate the entire alphabet of keys, legends intact, but no icons. Below is a log from when I generated the “A” keycap.
Create a separate .3mf file for each color
1/2 [1, 1, 1, 1] Starting
2/2 [0.313726, 0.313726, 0.313726, 1] Starting
2/2 [0.313726, 0.313726, 0.313726, 1] Geometries in cache: 219
2/2 [0.313726, 0.313726, 0.313726, 1] Geometry cache size in bytes: 37947200
2/2 [0.313726, 0.313726, 0.313726, 1] CGAL Polyhedrons in cache: 9
2/2 [0.313726, 0.313726, 0.313726, 1] CGAL cache size in bytes: 66755696
2/2 [0.313726, 0.313726, 0.313726, 1] Total rendering time: 0:00:32.873
2/2 [0.313726, 0.313726, 0.313726, 1]    Top level object is a 3D object:
2/2 [0.313726, 0.313726, 0.313726, 1]    Simple:        yes
2/2 [0.313726, 0.313726, 0.313726, 1]    Vertices:     3130
2/2 [0.313726, 0.313726, 0.313726, 1]    Halfedges:   12860
2/2 [0.313726, 0.313726, 0.313726, 1]    Edges:        6430
2/2 [0.313726, 0.313726, 0.313726, 1]    Halffacets:   6600
2/2 [0.313726, 0.313726, 0.313726, 1]    Facets:       3300
2/2 [0.313726, 0.313726, 0.313726, 1]    Volumes:         2
2/2 [0.313726, 0.313726, 0.313726, 1] Finished at ./tmp.P3hmeK/[0.313726, 0.313726, 0.313726, 1].3mf
Running OpenSCAD Nightly
I thought it might be the version of OpenSCAD that I’m using causing the issues that I was running into generating the icon legends. I decided to try running a dev build of it instead of the stable build (which is over 3 years old). I first started by trying to build it myself, but after a few days working on that without any successful builds, I decided to try another option.
Since the quest to compile OpenSCAD from source was going to be a bit longer of a detour than I expected and may not help me out anyway. I decided to try and find a Ubuntu PPA or some other source for a beta or nightly build of it.
OpenSCAD provides a snap package for the Dev builds as well that I could use, however snap didn’t want to run on my WSL instance, so I decided to try the app images instead.
I ended up finding the development built snapshots of OpenSCAD which were in an app image format, something I had never used before.
These ended up being easy enough, I downloaded the app image using wget, ensured it was executable (chmod +x on it), and then tried running it. It complained about fuse being missing from my machine, so I installed that and it was off to the races.
To simplify things for the script though, I also decided to symlink the app image to my user/bin folder as openscad.
sudo ln -s /path/to/appimage /usr/bin/openscad
Shell Environment
To validate the inputs that the script was generating, I tried putting all of the script’s inputs directly into the keycap_playground.osc through OpenSCAD and run the generation. When I did this, it all worked without any issues, generating my keycap with a good looking legend, no boxes.
Maybe it’s my shell environment instead, I could try using ZSH instead of bash, but I thought running things manually through the shell instead of the Python script would help me isolate the problem first. I finally got one keycap to generate using this method. I took the commands output by the script, copied them into my shell, and modified the legend character being passed into OpenSCAD. I also noticed a lack of “\ublah\ublah” on the console, so I’m thinking it’s related to how python is handling the Unicode character before passing it off to OpenSCAD.
Create a separate .3mf file for each color
1/2 [1, 1, 1, 1] Starting
2/2 [0.313726, 0.313726, 0.313726, 1] Starting
2/2 [0.313726, 0.313726, 0.313726, 1] Geometries in cache: 219
2/2 [0.313726, 0.313726, 0.313726, 1] Geometry cache size in bytes: 23419520
2/2 [0.313726, 0.313726, 0.313726, 1] CGAL Polyhedrons in cache: 9
2/2 [0.313726, 0.313726, 0.313726, 1] CGAL cache size in bytes: 74999520
2/2 [0.313726, 0.313726, 0.313726, 1] Total rendering time: 0:00:20.628
2/2 [0.313726, 0.313726, 0.313726, 1] Top level object is a 3D object (Nef polyhedron):
2/2 [0.313726, 0.313726, 0.313726, 1]    Simple:     yes
2/2 [0.313726, 0.313726, 0.313726, 1]    Vertices:     5813
2/2 [0.313726, 0.313726, 0.313726, 1]    Halfedges:   22126
2/2 [0.313726, 0.313726, 0.313726, 1]    Edges:       11063
2/2 [0.313726, 0.313726, 0.313726, 1]    Halffacets:  10480
2/2 [0.313726, 0.313726, 0.313726, 1]    Facets:       5240
2/2 [0.313726, 0.313726, 0.313726, 1]    Volumes:         4
2/2 [0.313726, 0.313726, 0.313726, 1] Finished at ./tmp.1PiS9z/[0.313726, 0.313726, 0.313726, 1].3mf
So something is wrong with my Unicode in the script, or in how the script is handling that before sending it to OpenSCAD.
Python Environment
Since the script is python, it’s time to investigate the Python environment I’m running to see if I can find a misconfiguration there before digging into the script itself. This ended up being a no-op though as Python3 supports Unicode natively without any configuration changes. In Python 3, UTF-8 is the default source encoding (see PEP 3120), so Unicode characters can be used anywhere.
If it were running Python 2, it would work after declaring in the source code header:
# -*- coding: utf-8 -*-
I wonder if Python is string-ify-ing things weirdly to Unicode instead of just outputting what I put in.
Unicode in a Shell Environment
In a shell environment (Bash and ZSH should support this out of the box), Unicode can be used in the following way using tools like echo.
% echo -e ‘\u2620’ # \u takes four hexadecimal digits
☠
% echo -e ‘\U0001f602’ # \U takes eight hexadecimal digits
😂
I was able to get the script to successfully generate keycaps when I modified the shell commands going into openscad rather than using the output from python directly. This lead me to believe something in python was messing with the output and preventing my keycaps from generating correctly.
The Real Fix

Adding some print statements in the right places and with the right arguments finally gave me the info I needed. I found that the json dump function was editing the string to UTF-8 and passing it in, which was causing issues as the icons were being modified by that. I needed to add one argument to the function call and everything started working.
The json.dumps call needed to be:
json.dumps(legend, ensure_ascii=False)
This one little argument was enough to convert the Unicode that could be used by openscad to a useless utf-8 character that couldn’t be deciphered (especially since it was converted from one Unicode character into two utf-8 characters). The final new quote function is below.
    def quote(self, legends):
        """
        Checks for the edge case of a single quote (') legend and converts it
        into `"'"'"'"` so that bash will pass it correclty to OpenSCAD via
        `getstatusoutput()`.  Also covers the slash (\\) legend for
        completeness.

        .. note::

            Example of what it should look like: `LEGENDS=["'"'"'", "", "\""];`
        """
        properly_escaped_quote = r'''"'"'"'"'''
        out = "["
        for i, legend in enumerate(legends):
            if legend == "'":
                out += properly_escaped_quote + ","
            elif legend == '"':
                out += r'"\""'
            else:
                out += json.dumps(legend, ensure_ascii=False) + ","
        out = out.rstrip(',') # Get rid of trailing comma
        return out + "]"
After finding the bug in the script, I documented it in an issue I had opened on the GitHub and submitted a PR to fix it. The maintainer may not have touched it in a while but hopefully anyone else who finds it will be able to make use of the findings.
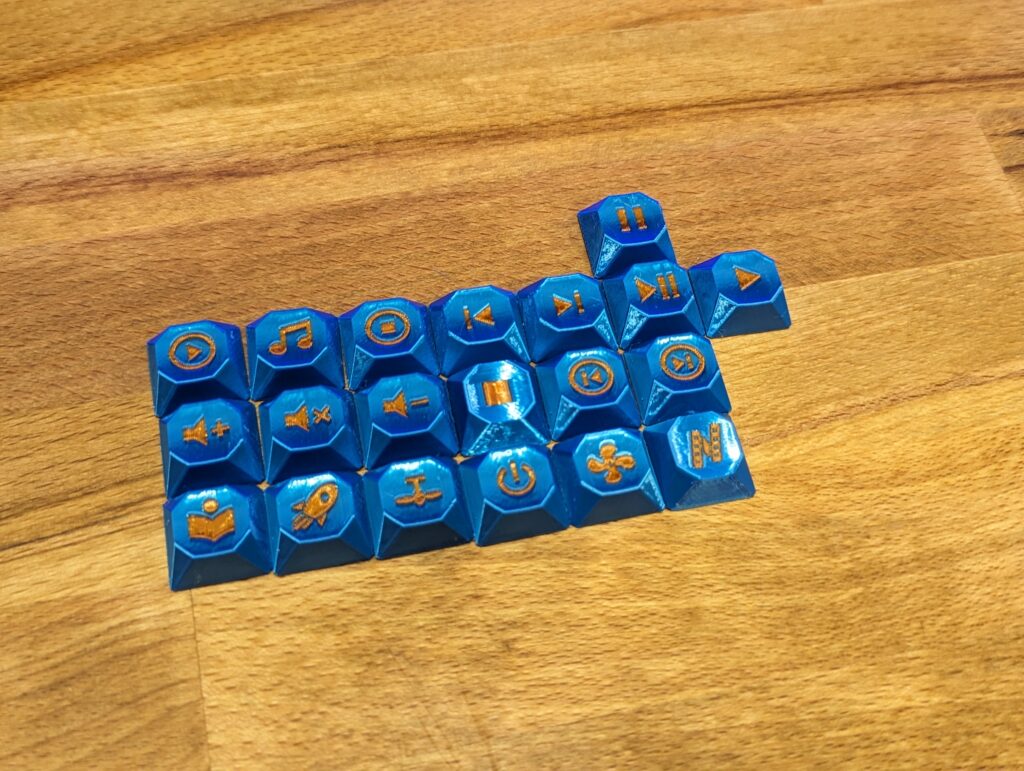
I may have considered editing it to create keycaps for EVERY icon in material design icons, but that’s nearly 7500 unique caps. How would someone even go about uploading something like that archive to a 3d printing website? Though it would be fun to try at some point. I’ve also only generated gem keycaps so far but the generator can create any form of keycap. They do turn out well when printed and I’m happy with the results even if the journey to get here was frustrating.
Drawbacks
I did install some of these on my keypads and noticed one drawback rather quickly. When using LED backlighting (for notifications and such), it’s much less noticeable using the printed key caps vs the relegendable ones. There is a PR on the main repo to allow keycap playground to provide glow through capabilities with the right materials. I may look into this and try generating some new keycaps that way (though I’ll also need some clear material to run on my printers as well for that).
